
Simple Marshmallow Spiderweb Brownies

Fudgy brownies topped with playful marshmallow spiderwebs and festive sprinkles—an easy, kid-friendly Halloween treat ready in under an hour.
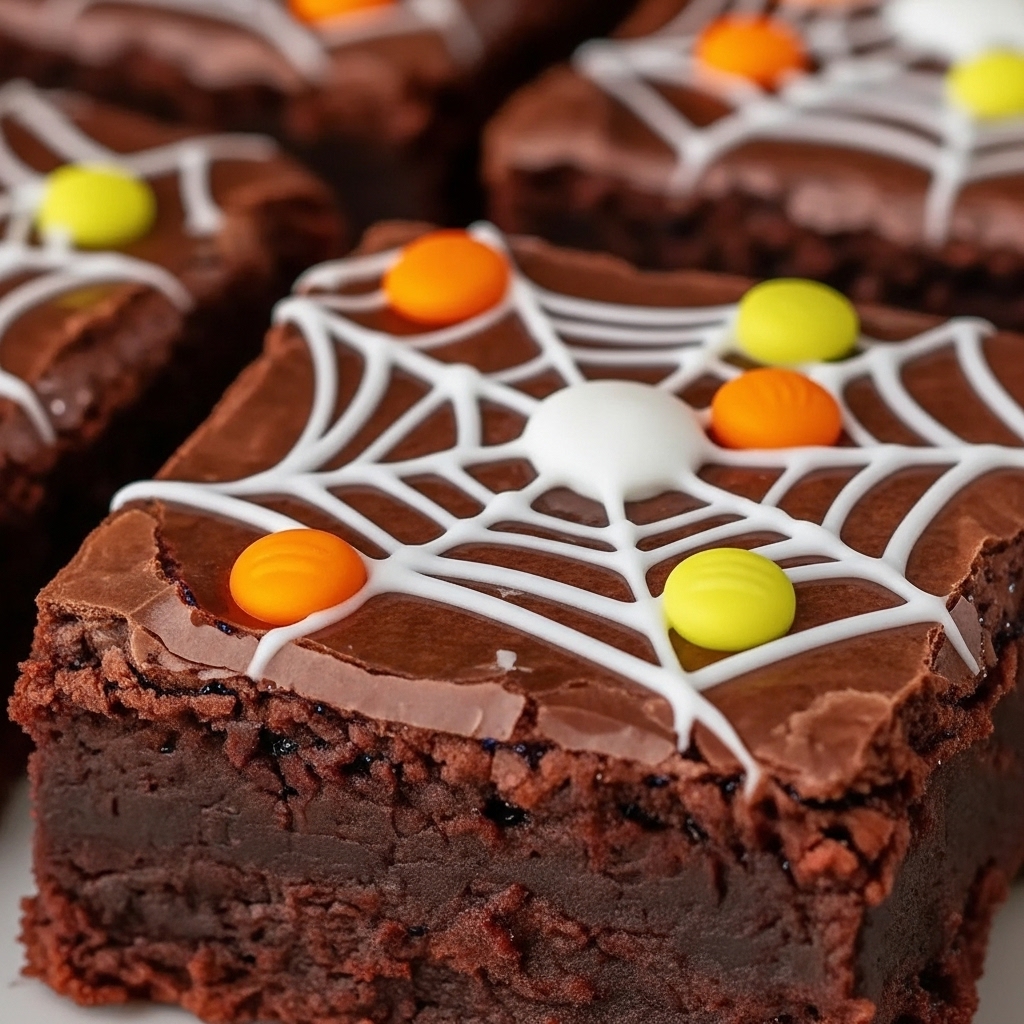
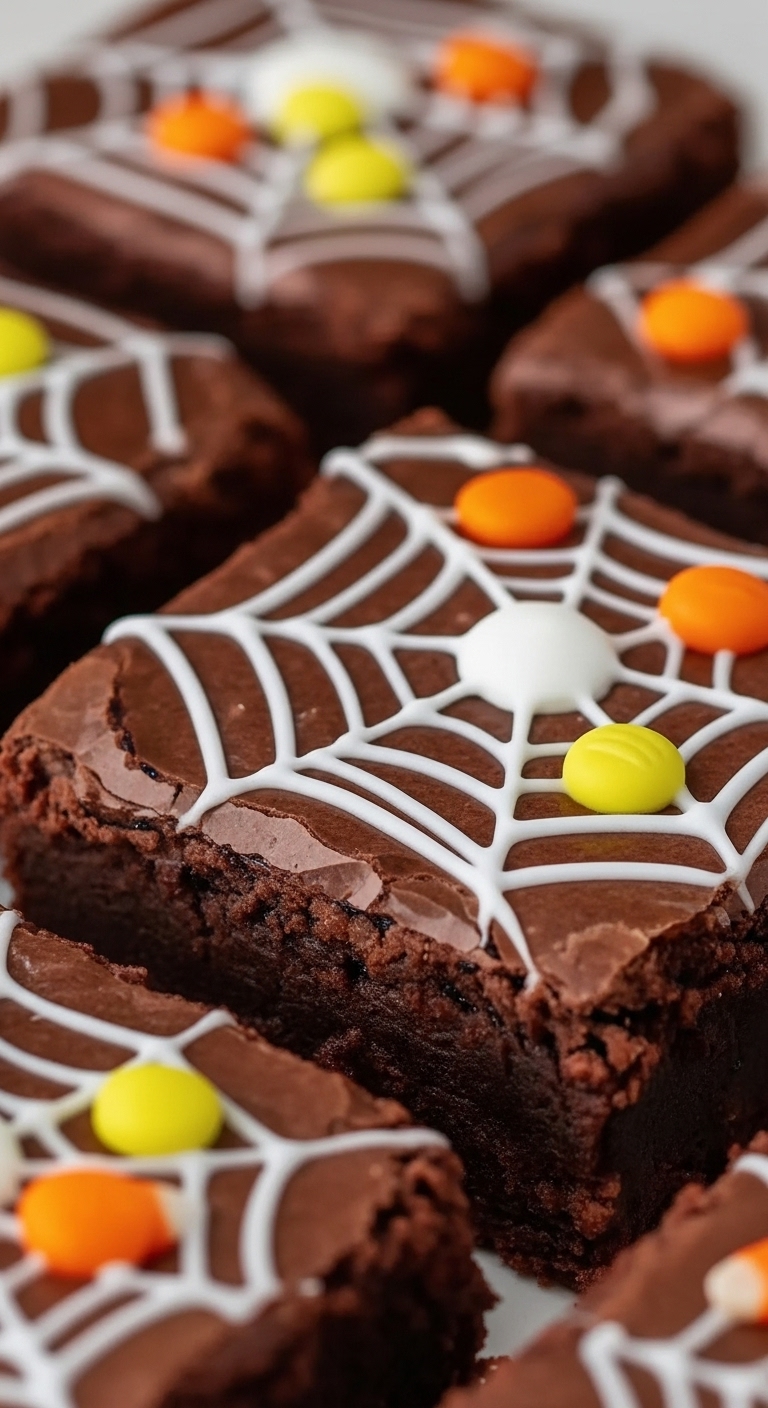
This marshmallow spiderweb brownie idea started as a last-minute Halloween project and quickly became one of my favorite easy-to-make party treats. I discovered it on an evening when the kids wanted to bake but I needed something fuss-free that still looked special. Using a store-bought brownie mix keeps the texture reliably fudgy, while the quick technique with melted mini marshmallows creates dramatic, whimsical spiderwebs that always draw gasps. The contrast of glossy black or orange sprinkles against the shiny marshmallow strands makes a bakery-style presentation without the bakery-time commitment.
What I love most about these brownies is how tactile and communal the decorating step becomes—kids and adults alike enjoy pulling the marshmallow into wispy threads and arranging them across the surface. Flavor-wise, you still get the deep, chocolate richness of a well-baked square with a pillowy, sweet marshmallow accent that softens slightly into chewy ribbons. I usually make these when we have a small gathering or a classroom party because they travel well and the dramatic look makes them feel celebratory, even though the hands-on time is minimal.
Why You'll Love This Recipe
- Fast: Ready from start to finish in about 42 minutes, perfect for last-minute celebrations.
- Accessible ingredients: Uses one standard box of brownie mix and simple decorations you can find year-round.
- Family-friendly: Decorating is a fun activity for kids—stretching marshmallow strands is delightfully messy and engaging.
- Make-ahead friendly: Base brownies can be baked in advance and decorated on the day you plan to serve.
- Impressive presentation: The spiderweb effect looks elaborate but requires only melted mini marshmallows and a little patience.
- Versatile: Swap sprinkles and colors to match any party theme or season.
Personally, I remember the first time I made these: my daughter’s classmates arrived expecting store-bought treats and instead found a pan that looked like it belonged in a bakery window. They asked for seconds and then begged to help the next time. It’s become our go-to treat when we need something both quick and show-stopping.
Ingredients
- Boxed brownie mix (1 box, about 18.3 oz): Choose a brand you trust—Ghirardelli or Betty Crocker yield reliably fudgy results. Look for one labeled "fudge" or "chewy" if you prefer that texture. Follow the package for eggs and oil measurements.
- Mini marshmallows (about 1/2 cup): Approximately 25 g converts to roughly 1/2 cup of mini marshmallows. Use regular mini marshmallows—not marshmallow creme—so they melt and can be stretched into threads.
- Halloween spider-shaped sprinkles (2 tablespoons): Any seasonal sprinkles work—black, orange, or multicolored spider sprinkles add contrast and a festive touch. Measure by tablespoon for consistent coverage.
- Pan and parchment: An 8 x 8-inch baking pan lined with parchment helps you lift the brownies out intact. Trim the parchment so it overhangs two sides for easy removal.
The boxed mix determines most of your chocolate and fat content, so choosing a higher-quality mix improves the base flavor. If you like extra fudginess, look for mixes that recommend adding an extra egg yolk or a tablespoon of oil—follow those tweaks to intensify chewiness. For marshmallows, avoid store-brand minis that are very stale; fresh marshmallows melt smoother and form longer, more elastic threads.
Instructions
Step 1 — Preheat and prepare your pan: Preheat the oven to 350°F (175°C). Line an 8 x 8-inch baking pan with parchment paper so it overhangs two sides; this creates a sling for easy removal. Lightly grease the parchment with a thin layer of oil or nonstick spray to ensure the brownie base releases cleanly. Step 2 — Mix and bake the base: Combine the brownie mix with the wet ingredients specified on the box (typically eggs, oil, and water). Stir until just combined—avoid overmixing to keep the final texture tender. Pour into the prepared pan and spread evenly with a rubber spatula. Bake for the time suggested on the box, usually 20–30 minutes; check doneness with a toothpick—remove when it comes out mostly clean with a few moist crumbs. Transfer to a cooling rack and allow to cool completely; warm brownies will cause the marshmallow to melt into a sticky mess rather than forming fine threads. Step 3 — Melt the marshmallows: Place about 1/2 cup of mini marshmallows into a microwave-safe bowl. Microwave in 10–15 second bursts, stirring between bursts, until fully melted and glossy. Let the melted marshmallow cool for about 30–60 seconds until it becomes tacky rather than piping-hot—this helps you stretch it without burning your fingers. Step 4 — Pull the marshmallow threads: Use lightly oiled fingers to stretch small portions of the cooled melted marshmallow into thin strands. Pull gently and repeatedly to create long, spiderweb-like threads. If the marshmallow becomes too sticky, lightly oil your fingers again or let it cool a touch more. Work quickly once the marshmallow reaches tacky stage—if it cools too much it will firm up and stop stretching. Step 5 — Arrange and decorate: Gently drape the marshmallow threads across the surface of the cooled brownies in a radial web pattern—start with several long strands crossing the pan, then add concentric loops and fill in with shorter threads. Press them down very lightly so they adhere. Finish by sprinkling 2 tablespoons of Halloween spider-shaped sprinkles evenly over the top for a fun, spooky effect. Let the decorations set for 5–10 minutes before slicing. Step 6 — Slice and serve: Use a sharp knife warmed under hot water and dried between cuts to create smooth edges. Slice into 9 or 12 squares depending on desired serving size. Serve at room temperature—these keep their marshmallow web appearance best within a few hours of decorating.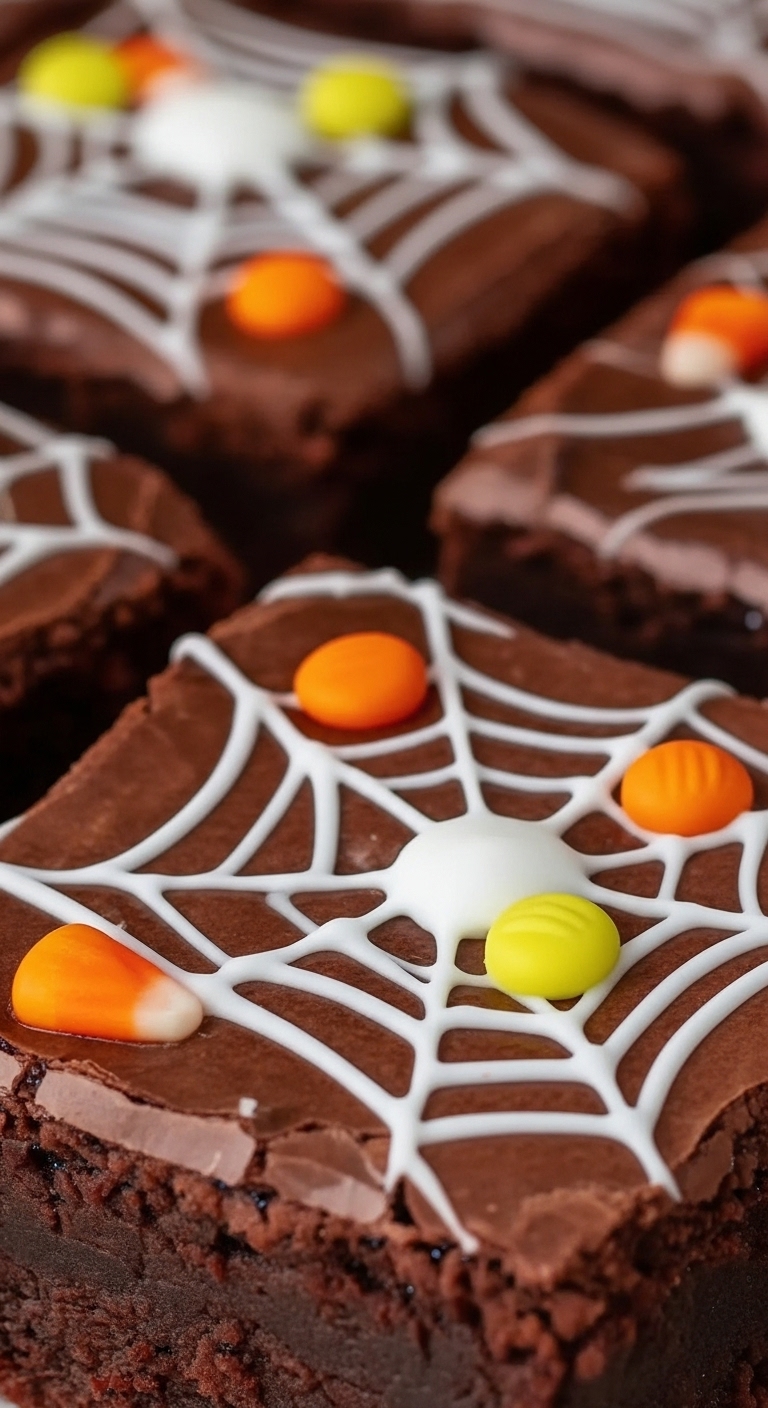
You Must Know
- These bars are best decorated just before serving; marshmallow threads soften over time if stored under humidity.
- Store baked, undecorated brownies in an airtight container for up to 3 days at room temperature or freeze up to 3 months.
- High in calories for a small pan: the entire 8 x 8-inch pan contains approximately 1500 kcal as prepared with a boxed mix and decorations.
- Allergies: contains gluten, likely dairy and eggs depending on the mix—see package labeling for specifics.
My favorite aspect is how these make simple store-bought components feel handmade and theatrical. Family and friends always comment on the spiderwebs—once a neighbor saw them and asked if I’d bought them from a bakery. I also enjoy how adaptable the look is: swap colors for birthdays or seasonal themes and you instantly have a new dessert for the occasion.
Storage Tips
Store undecorated brownies at room temperature in an airtight container for up to 3 days; place a sheet of parchment between layers to prevent sticking. If you plan to decorate later, keep the base chilled and add marshmallow webs no more than a few hours before serving. For longer storage, freeze the cooled, uncut brownies wrapped tightly in plastic wrap and then foil for up to 3 months—thaw at room temperature before decorating. Once decorated, store at cool room temperature for up to 24 hours; refrigeration can make the marshmallow threads stiff or weep in humid conditions.
Ingredient Substitutions
If you prefer from-scratch, use a classic 1:1 boxed-mix substitute with 1/2 cup melted butter, 2 large eggs, and 2 tablespoons water or espresso for depth. For a gluten-free option, select a certified gluten-free boxed mix and ensure sprinkles and marshmallows are GF. Vegan marshmallows exist but don’t always stretch the same way—expect shorter, less elastic threads. If you want a less sweet finish, use bittersweet chocolate chips folded into the batter or sprinkle a pinch of flaky sea salt over the top before decorating.
Serving Suggestions
Serve squares with a dollop of lightly sweetened whipped cream or a scoop of vanilla ice cream for contrast. For a party display, place brownies on a cake stand with small tongs and a label describing flavors—kids love choosing their favorite spider decorations. Pair with warm drinks like spiced cider or milky hot chocolate for a seasonal treat. Garnish with edible glitter or cacao dust around the edges for an elevated look at grown-up gatherings.
Cultural Background
Brownies are an American classic dating back to the early 20th century; they’re beloved for their dense, fudge-forward crumb. The idea of decorating with marshmallow threads taps into playful, theatrical holiday baking traditions—much like spun sugar and cotton candy, pulled marshmallow can become an ornamental element. This mash-up of convenience (box mix) and decorative technique reflects modern home baking’s emphasis on creativity with minimal barrier to entry.
Seasonal Adaptations
For Halloween, choose black and orange sprinkles or edible candy spiders. For winter holidays, use red and green nonpareils and shape marshmallow threads into snowflake patterns. For spring, pastel sprinkles and jewel-toned marshmallows create a festive look. Swap the boxed mix for a peppermint or pumpkin-spice mix during their respective seasons to reinforce holiday flavors.
Meal Prep Tips
Bake a double batch and freeze one pan uncut for later; thaw and decorate the second day for a quick party-ready dessert. Portion individual servings in small containers for school parties—place marshmallow webs on top just before handing out. Keep decorating supplies (marshmallows, oil for fingers, sprinkles) stored together so an impromptu decorating session only takes minutes.
These brownies are a reminder that decorative baking can be simple, interactive, and delightfully theatrical. Try them for your next celebration and adapt the decorations to match the mood—you’ll be surprised how a little melted marshmallow elevates a humble pan of brownies into a showpiece.
Pro Tips
Use a metal spatula or a warmed, dry knife to slice for clean edges—run under hot water, dry, and cut between each slice.
If melted marshmallow is too sticky, lightly oil your fingertips with a neutral oil before stretching threads.
Work in small batches when pulling marshmallow threads—melt more marshmallows as needed to maintain elasticity.
This nourishing simple marshmallow spiderweb brownies recipe is sure to be a staple in your kitchen. Enjoy every moist, high protein slice — it is perfect for breakfast or as a wholesome snack any time.
FAQs about Recipes
Why must brownies be cool before adding marshmallow threads?
Let the brownies cool completely before decorating; warm brownies will cause the marshmallow to melt and not form threads.
How long do these brownies keep?
Store undecorated brownies in an airtight container at room temperature for up to 3 days or freeze up to 3 months.
Tags
Simple Marshmallow Spiderweb Brownies
This Simple Marshmallow Spiderweb Brownies recipe makes perfectly juicy, tender, and flavorful steak every time! Serve with potatoes and a side salad for an unforgettable dinner in under 30 minutes.
Ingredients
Base
Decoration
Instructions
Preheat and prepare pan
Preheat the oven to 350°F (175°C). Line an 8 x 8-inch pan with parchment paper so it overhangs two sides. Lightly grease the parchment.
Mix and bake brownie base
Mix the boxed brownie mix with required wet ingredients per package directions. Pour into the pan, spread evenly, and bake until a toothpick comes out mostly clean—typically 20–30 minutes. Cool completely on a rack.
Melt marshmallows
Place 1/2 cup mini marshmallows in a microwave-safe bowl and heat in 10–15 second bursts, stirring between, until melted and glossy. Let cool 30–60 seconds until tacky.
Pull marshmallow threads and decorate
Using lightly oiled fingers, stretch cooled melted marshmallow into thin strands and drape them over the cooled brownies in a web pattern. Sprinkle 2 tablespoons Halloween spider-shaped sprinkles over the top and let set for 5–10 minutes.
Slice and serve
Use a warmed, dry knife to slice into squares. Serve at room temperature within a few hours for best appearance of the marshmallow webs.
Last Step: Please leave a rating and comment letting us know how you liked this recipe! This helps our business to thrive and continue providing free, high-quality recipes for you.
Nutrition
Did You Make This?
Leave a comment & rating below or tag
@feastinarecipe on social media!
Categories:
You might also like...

Lemon Chicken Orzo Soup
Cozy, bright, and ready fast, this Instant Pot lemon chicken orzo soup brings tender chicken, fresh veggies, and a sunny citrus finish.

50 Calorie Strawberry Cheesecakes
Feather-light mini cheesecakes with bright strawberry sauce, a tender biscuit-style base, and creamy filling. Just 47 calories each and irresistibly fresh.

Kahlua Chocolate Cheesecake Bites
Silky mini cheesecakes swirled with melted chocolate and a splash of Kahlua, nestled on Oreo crusts and crowned with fresh whipped cream.
Did You Make This?
Leave a comment & rating below or tag @feastinarecipe on social media!
Rate This Recipe
Share This Recipe
Enjoyed this recipe? Share it with friends and family, and don't forget to leave a review!
Comments (1)
This recipe looks amazing! Can't wait to try it.
Comments are stored locally in your browser. Server comments are displayed alongside your local comments.

Hi, I'm Sarah!
What's Popular

30-Minute Meals!
Join to receive our email series which contains a round-up of some of our quick and easy family favorite recipes.