
>>

These Pizza Pinwheels are a winning dish — buttery crescent dough rolled with mozzarella and pepperoni for a quick, crowd-pleasing appetizer.
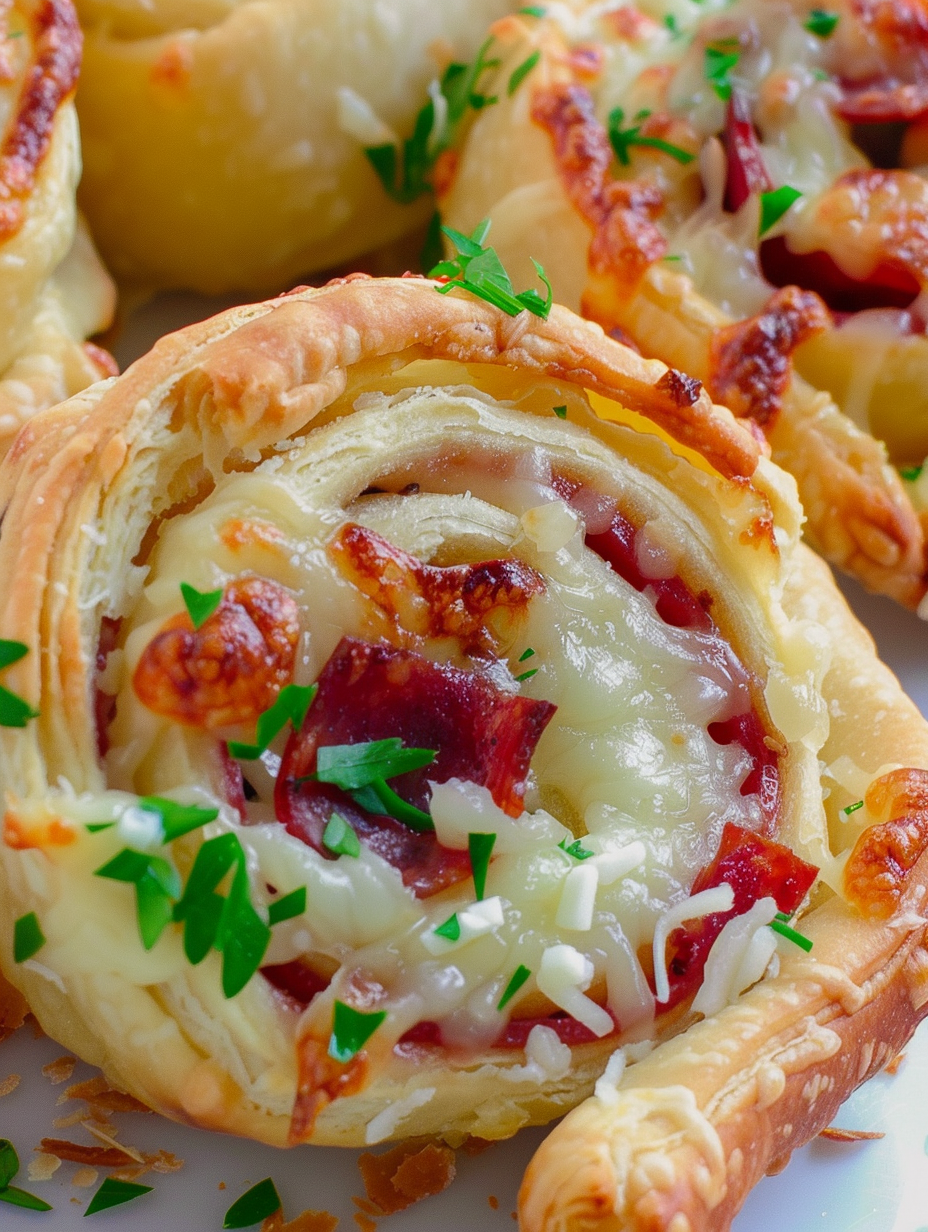
This recipe is all about easy, nostalgic flavor and the joy of sharing bite-sized comfort with friends and family. I first made these Pizza Pinwheels on a rainy afternoon when I needed something fast to bring to a potluck; the crescent dough, piled with gooey mozzarella and pepperoni, turned out to be an instant hit. The buttery, flaky exterior contrasts perfectly with the savory, slightly spicy pepperoni and the creamy, melty cheese inside. They disappear as soon as they hit the table, and people always ask for the simple secret: use good cheese and don't skimp on the pepperoni.
They matter because they're fast, transport well, and capture everything you love about pizza in a tidy, handheld bite. I discovered how forgiving the technique is — even if your roll isn't perfect, you can pinch seams, press gently, and still end up with evenly sized pinwheels. The combination of crisp edges and a soft, cheesy center, with a little pop of pepperoni flavor in every bite, makes these perfect for game day, kid-friendly lunches, or last-minute guests. Every baker in my family has tweaked the filling ratio and claimed theirs the best, but we all agree the method stays the same: roll tight, slice clean, and bake until golden.
My first batch got rave reviews at a neighborhood potluck; neighbors who’d never met ended up swapping serving tips. Now I keep the dough and a bag of shredded mozzarella on hand so these can be whipped up whenever someone drops by. The best tip I learned: chill the rolled log briefly before slicing for cleaner rounds and less spilling of cheese.
What I love most about these is how reliably they bring people together — whether it’s a quick after-school snack for kids or a platter for a casual gathering, the reaction is always the same: delighted surprise at how familiar pizza flavors translate into this elegant spiral. It’s a simple technique with big payoff.
Cool baked pinwheels completely before storing to avoid sogginess. For short-term storage, place in an airtight container lined with paper towel in the refrigerator for up to 4 days. For longer storage, flash-freeze sliced pinwheels on a baking sheet for 1 hour, then transfer to a freezer-safe bag for up to 3 months. To reheat, thaw overnight in the refrigerator or bake from frozen at 375°F for 10–12 minutes. Avoid microwaving if you want to preserve a crisp edge; the oven gives best texture restoration.
Swap pepperoni for thinly sliced salami, cooked crumbled sausage, or roasted vegetables for a vegetarian option. Replace whole-milk mozzarella with part-skim or plant-based shreds; note that melting quality will vary and plant-based cheeses may need extra time to soften. Use store-bought pizza sauce sparingly inside the log if you like saucy pinwheels, or brush a light layer on top before baking to introduce another layer of flavor. Ratio tip: keep cheese to about 4 cups per two cans of dough to avoid overflow when baking.
Serve warm with a side of marinara or garlic butter for dipping and a crisp green salad to balance richness. For party platters, alternate pinwheels with sliced veggies and olives for color contrast. Garnish finished pinwheels with a sprinkle of chopped fresh basil or parsley and a pinch of red pepper flakes for heat. They pair well with sparkling water, beer, or a simple iced tea for casual entertaining.
The spiral technique echoes rolled filled breads found across many cuisines, but these pinwheels are a distinctly American party food adaptation, combining familiar pizza flavors in a portable form. They share ancestry with stromboli and pizza rolls, born from the desire to make pizza both hand-held and shareable. This format grew popular as refrigerated dough options made it easy for home cooks to create restaurant-inspired fare quickly.
Spring and summer versions work beautifully with fresh basil, thinly sliced summer tomatoes, and a light mozzarella. In fall and winter, swap pepperoni for spicy sausage and add a bit of caramelized onion for depth. Holiday parties call for a more decadent approach: use fontina or provolone with prosciutto and a smear of fig jam for sophisticated finger food.
Assemble logs a day ahead and refrigerate tightly wrapped to save time. For bulk prep, slice and freeze uncooked pinwheels on a tray, then bag and label for easy baking later. When packing for lunches or picnics, include a small container of marinara to keep pinwheels crisp until eaten. Use parchment on your baking sheet to minimize cleanup and prevent sticking.
I brought these to a neighborhood block party once and returned home with several requests for the recipe — even our most skeptical neighbor admitted they were better than takeout. For a birthday party, I made mini pinwheels with smaller slices and they were gone in ten minutes. Readers have told me they love freezing the logs and baking them fresh on game day, and several families have adopted them as a quick after-school snack staple.
These pinwheels are comfort food with a clever twist: fast, flexible, and unfailingly crowd-pleasing. Give them a try and make them your own — switch up fillings, experiment with cheeses, and enjoy the way a simple roll becomes something worth sharing.
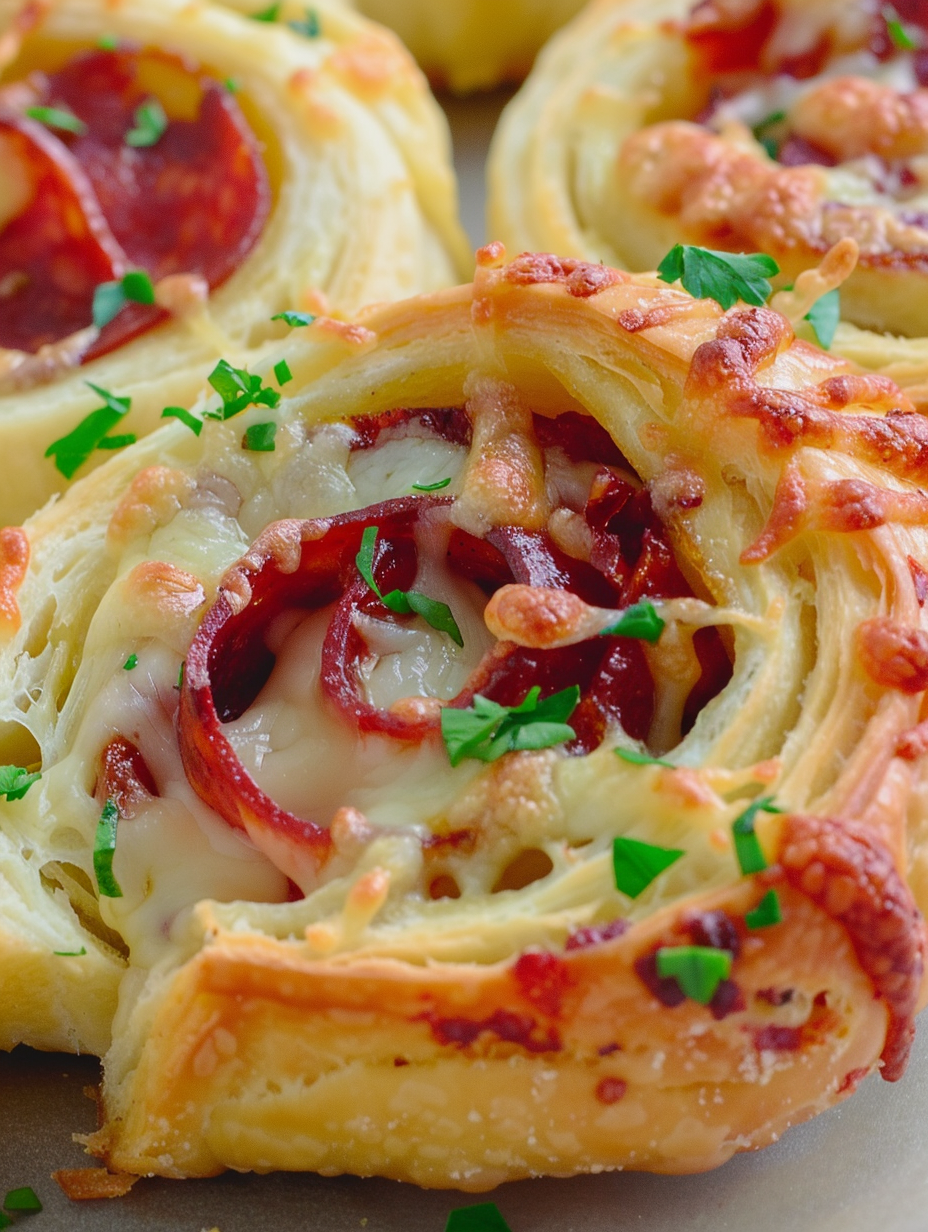
Chill the rolled logs for 10–15 minutes before slicing to get neater pinwheel rounds and less filling leakage.
Flash-freeze sliced pinwheels on a tray before bagging to prevent them from sticking together in the freezer.
Use a serrated knife for clean cuts; a gentle sawing motion reduces squashing the roll.
Line the baking sheet with parchment to avoid sticking and make cleanup faster.
This nourishing pizza pinwheels recipe is sure to be a staple in your kitchen. Enjoy every moist, high protein slice — it is perfect for breakfast or as a wholesome snack any time.
This Pizza Pinwheels recipe makes perfectly juicy, tender, and flavorful steak every time! Serve with potatoes and a side salad for an unforgettable dinner in under 30 minutes.
Preheat the oven to 375°F and position a rack in the center for even browning.
Unroll both cans of crescent dough and press the perforations together to form rectangles; use a rolling pin to even out thickness if needed.
Combine 4 cups shredded mozzarella and 2 egg yolks in a large bowl; add a pinch of salt and optional Parmesan for flavor.
Spread the cheese mixture evenly over the dough leaving a 1/2-inch border. Layer pepperoni slices over the cheese in a single layer.
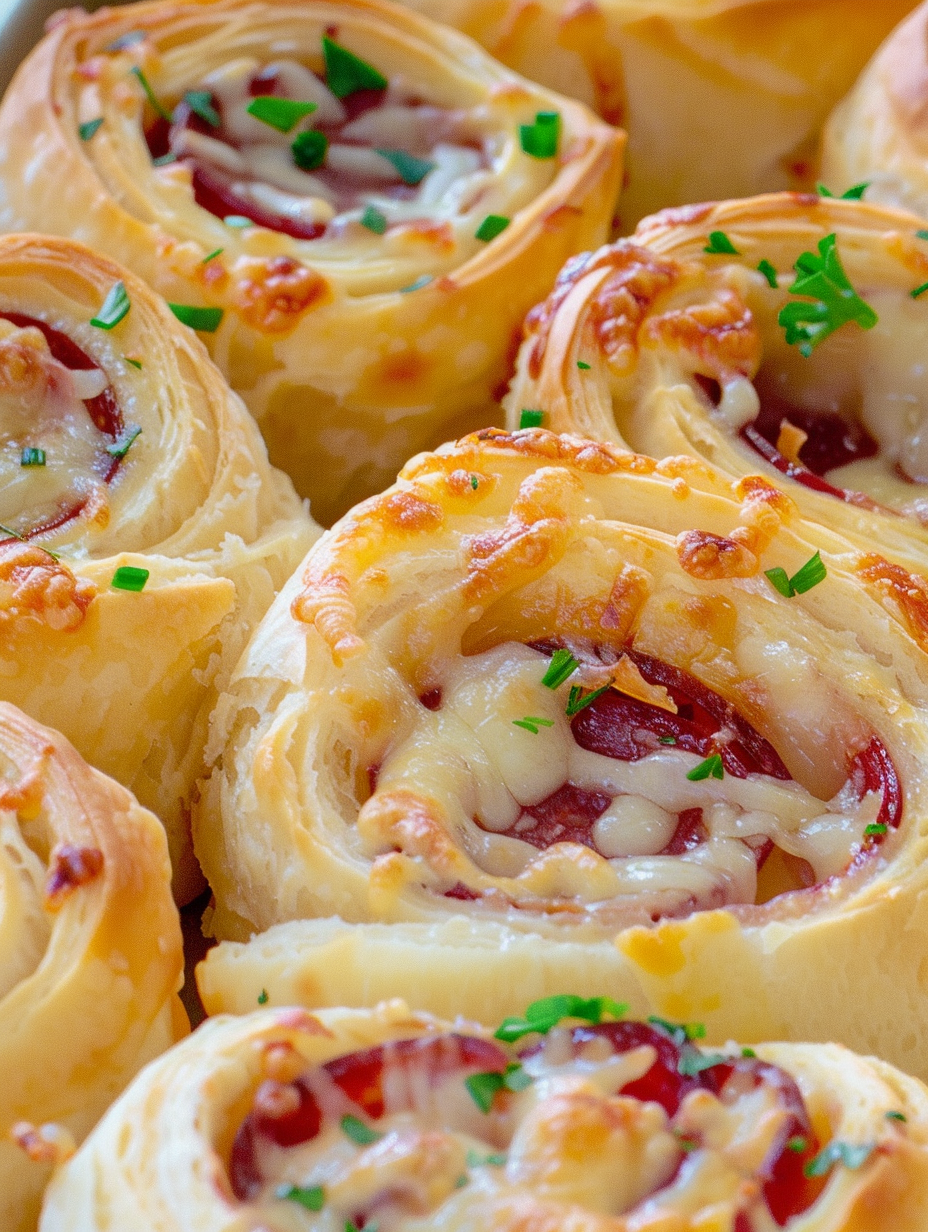
Roll each rectangle starting from the short end into a tight log, seal the seam underneath, and chill for 10–15 minutes for cleaner slices.
Using a serrated knife, cut the logs into 1-inch rounds and arrange them on a parchment-lined baking sheet about 1/2 inch apart.
Bake at 375°F for about 8 minutes until golden and cheese is melted. Let cool slightly before serving.
Last Step: Please leave a rating and comment letting us know how you liked this recipe! This helps our business to thrive and continue providing free, high-quality recipes for you.
Leave a comment & rating below or tag
@feastinarecipe on social media!

Cozy, bright, and ready fast, this Instant Pot lemon chicken orzo soup brings tender chicken, fresh veggies, and a sunny citrus finish.

Feather-light mini cheesecakes with bright strawberry sauce, a tender biscuit-style base, and creamy filling. Just 47 calories each and irresistibly fresh.

Silky mini cheesecakes swirled with melted chocolate and a splash of Kahlua, nestled on Oreo crusts and crowned with fresh whipped cream.
Leave a comment & rating below or tag @feastinarecipe on social media!
Enjoyed this recipe? Share it with friends and family, and don't forget to leave a review!
This recipe looks amazing! Can't wait to try it.
Comments are stored locally in your browser. Server comments are displayed alongside your local comments.

Join to receive our email series which contains a round-up of some of our quick and easy family favorite recipes.
