
>>

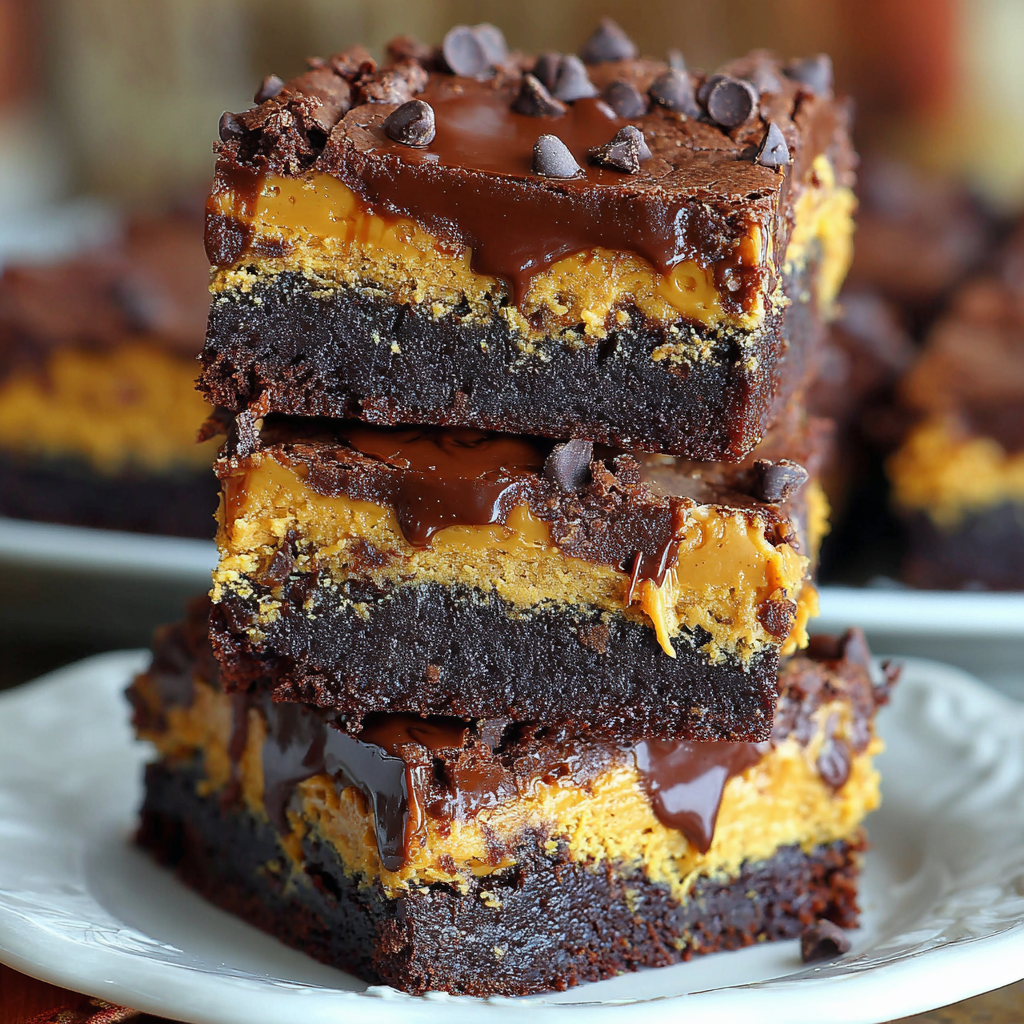
Decadent, fudgy flourless brownies with a peanut butter layer and bittersweet ganache—naturally gluten-free and irresistibly rich.
This recipe is my go-to for celebrations, potlucks, and any day that demands chocolate therapy. I first discovered this layered treat on a sleepy weekend when I wanted something that felt indulgent but was simple enough to make without a stand mixer. The result was a thick, almost brownie-cake hybrid that stayed gooey in the center and offered a salty-sweet peanut butter surprise in every bite. It quickly became the dessert everyone requested at family gatherings and helped me win over even the most staunch chocolate purists.
The texture is the star: dense, fudgy brownie with chewy edges and a ribbon of creamy peanut butter that cuts through the chocolate richness. A silky bittersweet ganache on top seals the experience, adding shine and a concentrate of chocolate flavor. These bars are flourless by design, naturally gluten-free, and they hold their shape beautifully thanks to cornstarch—no special equipment required beyond basics you already own.
I remember pulling a tray from the oven for a neighborhood potluck and watching a hush fall as people took their first bites. My neighbor, a self-declared snack skeptic, went back for thirds and asked for the recipe. That moment convinced me these are worth keeping in permanent rotation.
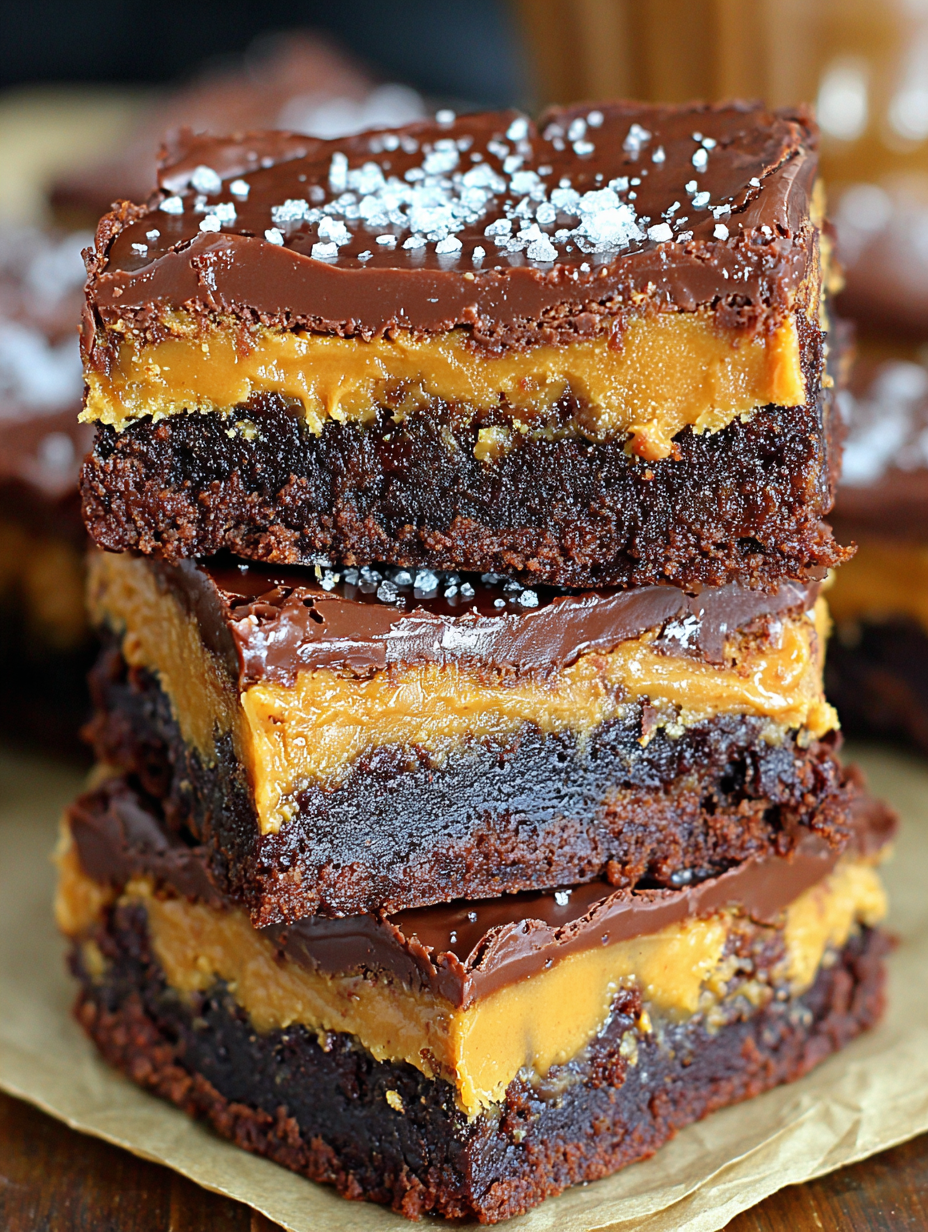
My favorite part is pulling a chilled pan from the fridge and hearing the clean snap of the ganache as I cut the bars. Family members often say these are “the best” because of the contrast between the dense chocolate and the salty peanut butter. I’ve learned that patience—letting the slab chill fully—makes the difference between a messy cut and picture-perfect squares.
Store the bars in an airtight container in the refrigerator for up to 3 days for the best texture and sheen on the ganache. For longer storage, individually wrap cooled squares in plastic wrap and place in a freezer-safe container or bag for up to 3 months. Thaw overnight in the refrigerator and bring to room temperature briefly before serving to allow the chocolate to soften. Avoid storing at room temperature for extended periods, as the ganache can become too soft and the peanut butter layer may lose its neat ribbon texture.
If you prefer a nuttier profile, use crunchy peanut butter in the filling for texture—expect slightly more spread. Swap peanut butter for almond butter for a different flavor; reduce the added sugar by 1 tablespoon if the nut butter is sweetened. For a dairy-free version, substitute dairy-free chocolate and use a coconut cream ganache made from full-fat canned coconut milk—note the flavor shifts toward coconut and the ganache may be slightly less glossy.
Serve warm with a small scoop of vanilla ice cream or chilled with a dollop of whipped cream to balance the richness. Garnish with a light sprinkle of flaky sea salt or crushed toasted peanuts for crunch and contrast. These bars are perfect for dessert platters, holiday trays, or boxed gifts; cut small and arrange on parchment-lined trays with a decorative ribbon for a polished presentation.
While brownies are an American classic, the peanut butter pairing taps into a long tradition of combining chocolate with roasted nuts and nut butters in U.S. baking. Layered bars like these echo the retro appeal of multi-component desserts—think peanut butter cups or layered candy bars—updated with a modern, flourless base. Regional variations can include swapping peanut butter for local nut pastes or adding coffee to the chocolate for deeper, mocha notes.
In cooler months, amplify warmth by stirring 1/2 teaspoon instant espresso granules into the melted chocolate for a cozy deep flavor. For summer gatherings, cut bars smaller and serve chilled with a bright berry compote to cut the richness. Around the holidays, fold 1/4 teaspoon cinnamon into the batter or top the ganache with crushed peppermint for a festive twist.
These bars are ideal for batch prep: bake a pan, chill, and portion into single-serve containers for office lunches or dessert grab-and-go. Refrigerated bars keep well for several days; freeze extras to maintain freshness. Label containers with the date and rotate older batches to the front of the fridge or freezer to ensure nothing goes to waste. Bring frozen bars to the fridge the night before to thaw gently.
These brownies have become my signature potluck contribution because they travel well and impress a crowd. Try them once and you’ll see why family and friends keep asking for the recipe—then make an extra batch to stash away for emergencies.
Use room temperature eggs for smoother incorporation and a more even baked texture.
Let the ganache cool slightly before pouring to avoid melting into the brownie layers.
Chill the slab fully before slicing for cleaner edges and fewer crumbs.
This nourishing peanut butter brownies recipe is sure to be a staple in your kitchen. Enjoy every moist, high protein slice — it is perfect for breakfast or as a wholesome snack any time.
Yes. Freeze individual bars wrapped in plastic wrap for up to 3 months. Thaw in the refrigerator overnight before serving.
Watch for a few moist crumbs on the toothpick. Overbaking will dry them out; underbaking will leave them too gooey to slice cleanly.
This Peanut Butter Brownies recipe makes perfectly juicy, tender, and flavorful steak every time! Serve with potatoes and a side salad for an unforgettable dinner in under 30 minutes.
Preheat oven to 350F. Lightly spray a 9-inch square baking pan and line with parchment paper leaving an overhang for easy removal.
In a medium bowl, combine 3/4 cup peanut butter, 1/2 cup granulated sugar, and 1 room temperature egg. Mix until completely combined and smooth.
Place 12 ounces chocolate chips and 6 tablespoons butter in a large microwave-safe bowl. Melt in 30-second intervals on high, stirring between each until glossy and smooth.
Stir in 3/4 cup sugar and 1 teaspoon vanilla. Add eggs one at a time, stirring after each. Whisk together 1/4 cup cocoa powder, 1/3 cup cornstarch, and 1/2 teaspoon salt then add to the wet mixture and stir until smooth.
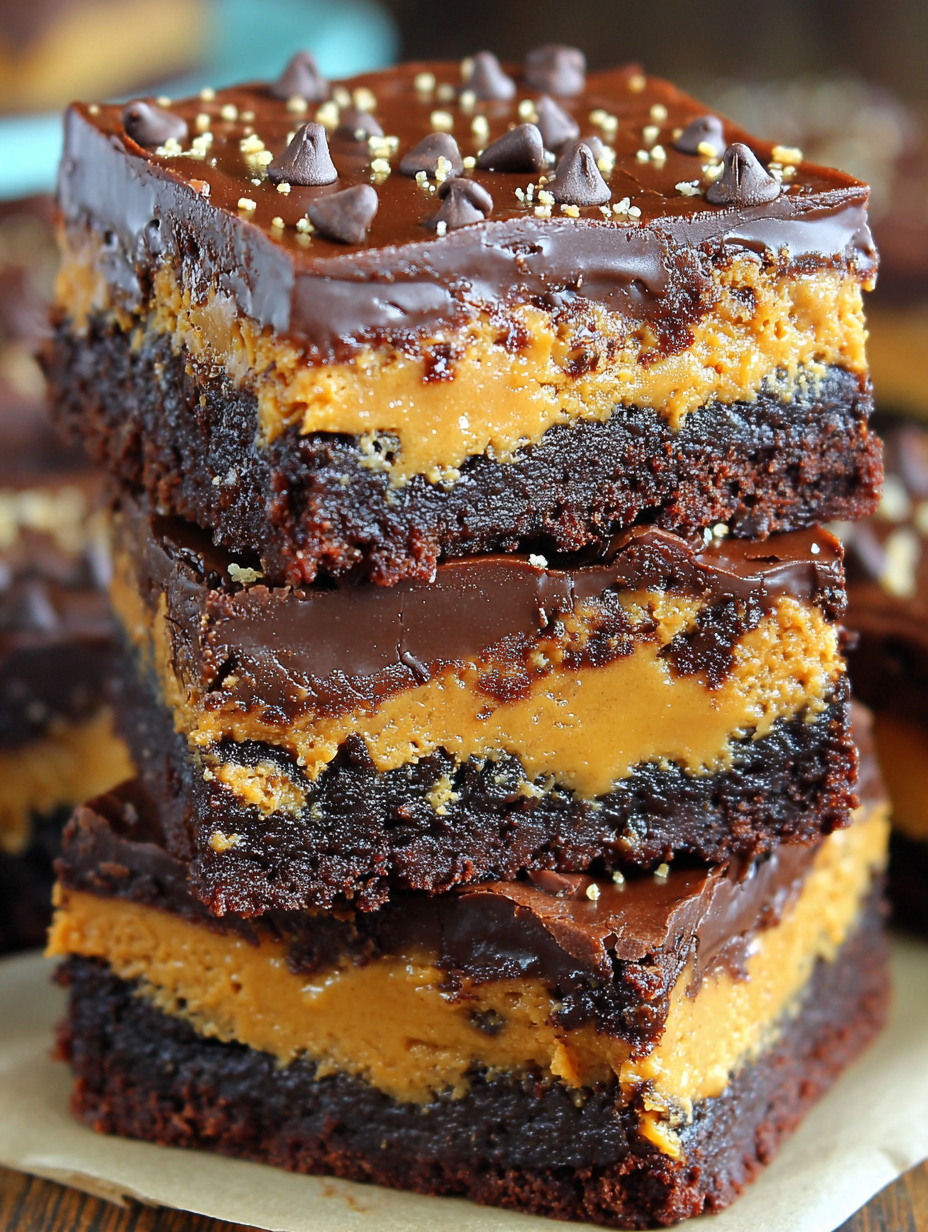
Stir in 1 cup mini chocolate chips. Pour two-thirds of batter into pan, drop spoonfuls of peanut butter filling over top, then spoon remaining batter and smooth lightly.
Bake 33–37 minutes until a toothpick comes out with a few moist crumbs. Cool completely on a rack or in the fridge before topping with ganache.
Heat 1/2 cup cream until scalding and pour over 10 ounces chopped bittersweet chocolate. Let sit 5 minutes, stir until smooth, pour over chilled brownies, and refrigerate until set.
Use parchment overhang to lift slab, cut into 36 bars, and store in an airtight container in the refrigerator for up to 3 days.
Last Step: Please leave a rating and comment letting us know how you liked this recipe! This helps our business to thrive and continue providing free, high-quality recipes for you.
Leave a comment & rating below or tag
@feastinarecipe on social media!

Cozy, bright, and ready fast, this Instant Pot lemon chicken orzo soup brings tender chicken, fresh veggies, and a sunny citrus finish.

Feather-light mini cheesecakes with bright strawberry sauce, a tender biscuit-style base, and creamy filling. Just 47 calories each and irresistibly fresh.

Silky mini cheesecakes swirled with melted chocolate and a splash of Kahlua, nestled on Oreo crusts and crowned with fresh whipped cream.
Leave a comment & rating below or tag @feastinarecipe on social media!
Enjoyed this recipe? Share it with friends and family, and don't forget to leave a review!
This recipe looks amazing! Can't wait to try it.
Comments are stored locally in your browser. Server comments are displayed alongside your local comments.

Join to receive our email series which contains a round-up of some of our quick and easy family favorite recipes.
