
No-Bake Cherry Cheesecake

A silky, refrigerator-style cheesecake with a buttery graham cracker base and bright cherry topping — no oven required and perfect for warm nights.
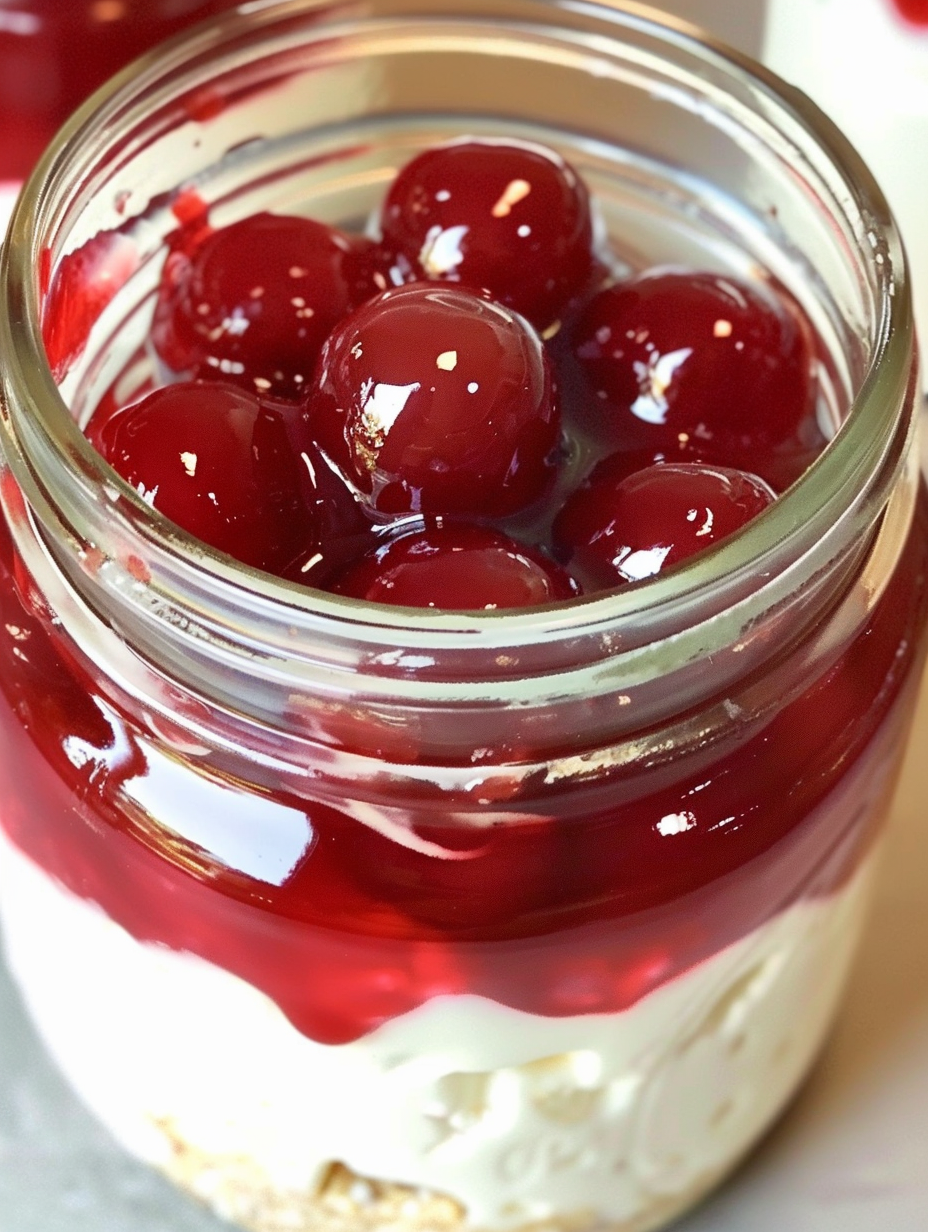
This no-bake cherry cheesecake has been one of my easiest crowd-pleasers for years. I first pulled this together for a summer potluck when the oven mysteriously stopped working, and what began as a workaround became our family favorite. The filling is luxuriously smooth from cream cheese and sweetened condensed milk, brightened with fresh lemon juice and vanilla, while the graham cracker base offers just the right buttery crunch. Every bite balances sweet and tangy, with glossy cherry topping adding cheerful color and familiar pie-shop flavor.
I discovered this combination in a late-June kitchen full of ripe strawberries and an anxious host trying to feed twelve without turning on an oven. Because it’s assembled in jars or a single springform, it’s incredibly flexible — great for potlucks, date nights, or a make-ahead dessert for weeknight dinners. The textures are what keep people coming back: a press-in crumb base that holds firm, a creamy, slightly aerated filling that sets in the refrigerator, and the juicy pop of cherry topping to finish. It’s reliable, fast, and delicious — and I’ll share every tip I’ve learned so your pantries and patience get the best result.
Why You'll Love This Recipe
- Ready with minimal hands-on time: about 20 minutes of active work and 2–3 hours of chill time; perfect for busy hosts.
- Uses pantry staples like graham crackers and sweetened condensed milk — no specialty ingredients required.
- Make-ahead friendly: assemble the night before and the flavors deepen while it chills.
- Customizable portions: assemble in jars for individual servings or a single pan to slice for a crowd.
- Kid-friendly and visually appealing: glossy cherry topping makes it party-ready with little effort.
- Low equipment footprint: mixing bowl, spatula, and measuring cups are all you need — no oven or springform necessary.
When I first served these in jars at that potluck, guests loved the presentation and asked for the recipe on the spot. My nephews especially liked pushing aside the cherry topping to get more filling — a sure sign something is going right. Over time I experimented with crust thickness and found 2–3 heaping tablespoons per jar gives the best crust-to-filling ratio for 4–6 ounce jars.
Ingredients
- Graham cracker crumbs: 1 to 1 1/2 cups finely ground graham cracker crumbs (store-bought or pulse one stack of full-sheet crackers); provides a slightly sweet, aromatic base — I like the classic Nabisco-style whole graham sheets for consistency.
- White sugar: 1/3 cup regular granulated sugar to sweeten and help the crust bind; superfine works equally well if you prefer a finer texture.
- Melted butter: 6 tablespoons unsalted butter, melted and cooled slightly to bind crumbs without sogginess; use real butter for the best flavor.
- Cream cheese: 1 package (8 oz) Philadelphia cream cheese, softened to room temperature for smooth whipping and peak formation.
- Sweetened condensed milk: 1 (14 oz) can sweetened condensed milk to add sweetness and silky body — not evaporated milk.
- Lemon juice: 1/3 cup fresh lemon juice (about 2 lemons) for bright acidity that helps the filling set and balances the sweetness.
- Vanilla extract: 1 teaspoon pure vanilla extract to round and deepen the flavor profile.
- Cherry pie filling: 1 (21 oz) can cherry pie filling for a glossy, jammy topping — or use fresh cherries macerated with sugar and a splash of lemon for a fresher alternative.
Instructions
Prepare the crust:In a medium bowl (or the bowl of a stand mixer) combine 1 to 1 1/2 cups finely ground graham cracker crumbs with 1/3 cup granulated sugar. Pour in 6 tablespoons melted unsalted butter and toss or beat on low until the mixture resembles wet sand and holds together when pinched — about 30 seconds. Taste and adjust if crumbs are dry; add a teaspoon more butter if needed.Press into jars or pan:Measure roughly 2–3 heaping tablespoons of the crumb mixture per 4–6 ounce jar (or press evenly into the bottom of a 9" springform — see notes) and press firmly with the back of a spoon or a small measuring cup to form a compact base. Refrigerate while you make the filling so the crust firms and resists sogginess; chill about 1 hour or while you continue assembly.Whip the cream cheese:Beat 8 oz softened cream cheese in a clean bowl with an electric mixer on medium-high until fluffy and light, about 2–3 minutes. Scrape down the bowl to avoid lumps — fully softened cream cheese is essential for a silky texture.Incorporate condensed milk:With the mixer on low, gradually pour in the entire 14 oz can of sweetened condensed milk. Mix until fully combined and smooth, scraping the sides once. The mixture will be loose at first but will set in the refrigerator due to the acid content and cold.Add lemon and vanilla:Stir in 1/3 cup fresh lemon juice and 1 teaspoon vanilla extract. Beat briefly until the filling is homogeneous and slightly aerated — aim for a glossy, pourable texture that will thicken as it chills.Assemble and chill:Spoon or pipe the filling over the prepared crusts in jars or spread into your pan. Smooth the tops with a small offset spatula. Refrigerate uncovered for 2–3 hours to set; for best texture chill overnight. If covering, wait until the surface is cool to avoid condensation.Top and serve:Before serving, spoon cherry pie filling over each jar or spread over the whole cake. If using jars for transport, you can add the pie filling and seal with lids; keep chilled until serving. Enjoy chilled.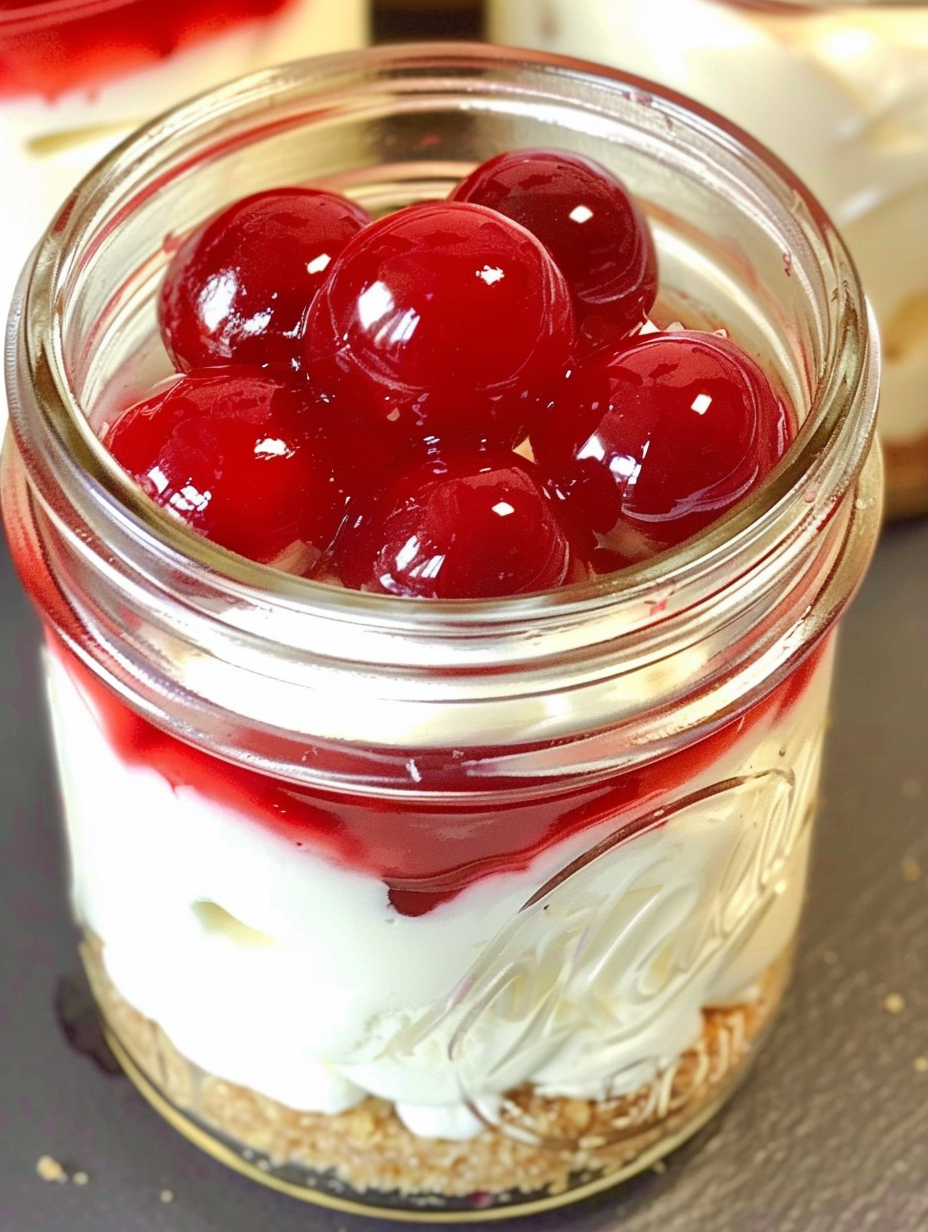
You Must Know
- This dessert is high in calcium and energy due to dairy; store jars tightly in the refrigerator and consume within 3–4 days for best texture.
- Freezing is possible for up to 1 month but the filling may become slightly grainy after thawing; thaw in the refrigerator overnight.
- Chill time is crucial — at least 2 hours, ideally overnight, for the filling to firm and develop flavor.
- Swapping the graham crust for gluten-free cookies makes it friendly for gluten-sensitive guests.
- Using fresh lemon juice helps the filling set and brighten flavors more than bottled juice.
My favorite aspect of this dessert is how approachable it is: in a single afternoon I’ve made three jars for dessert, one in a springform for company, and still had energy left to enjoy the evening. Family members have commented that the filling has the feel of a light mousse but the richness of a traditional cheesecake. On holiday weekends I’ll double the recipe because it travels well and disappears fast — a true compliment when every plate returns empty.
Storage Tips
Store finished jars or a whole pan covered in the refrigerator for 3–4 days. Use airtight containers or seal jars with tight lids to prevent the crust from softening too much. If you must freeze, wrap the pan tightly in plastic wrap and foil, or freeze jars without the cherry topping for up to one month; thaw in the fridge overnight and add topping just before serving. Reheat is not recommended — serve chilled. Look for slight separation between filling and crust as a sign the dessert has softened too long at room temperature.
Ingredient Substitutions
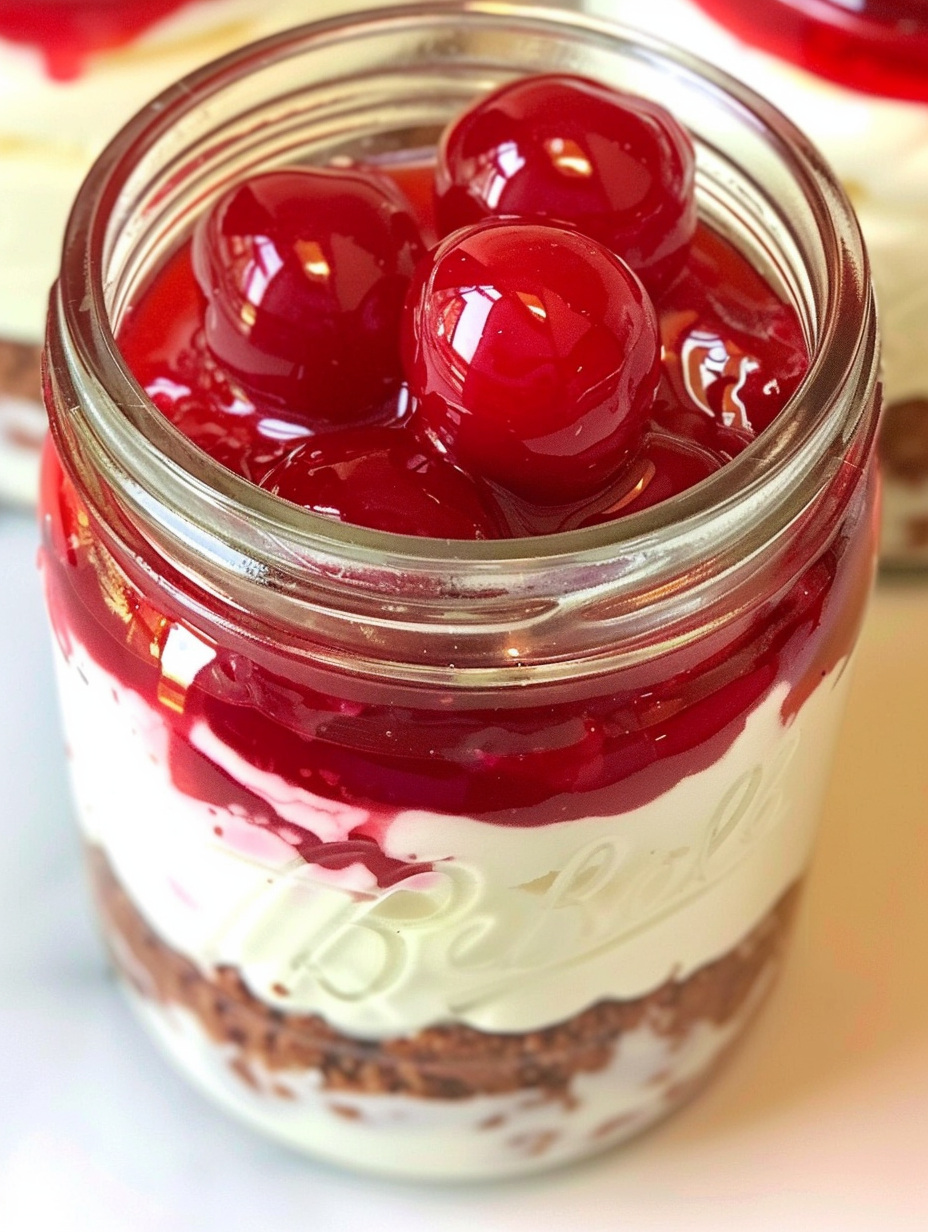
You can swap the graham crumbs for digestive biscuits or chocolate cookie crumbs — reduce sugar slightly if using sweet cookies. For a dairy-free option, use a stabilized vegan cream cheese and sweetened condensed coconut milk; note the texture and setting may be slightly softer. To make it gluten-free, use certified gluten-free graham crumbs or crushed gluten-free shortbread. If you prefer less sweetness, reduce the cherry pie filling amount or use fresh fruit macerated with a tablespoon or two of sugar instead of canned topping.
Serving Suggestions
Serve jars on a small dessert plate with a mint sprig and a microplane of lemon zest to emphasize freshness. For a dinner party, unmold a full-size pan onto a platter and pipe a ring of whipped cream around the edge before adding cherries. Pair with a bright dessert wine like Moscato d'Asti or a simple black coffee to cut through the richness. Seasonal berries or a drizzle of dark chocolate are lovely alternatives to cherry topping.
Cultural Background
Refrigerator-style cheesecakes became popular in mid-20th century America when condensed milk and convenient packaging made no-bake desserts accessible to home cooks. This version borrows classic American elements — graham cracker crust and canned pie filling — blending nostalgia with modern convenience. The cherry topping echoes traditional pie flavors, while the no-bake method nods to regional climates or situations where ovens were impractical or unavailable.
Seasonal Adaptations
In summer swap cherry topping for macerated fresh berries with a touch of lemon and cornstarch-thickened glaze for a lighter, fresher finish. For fall, try spiced pear compote with a cinnamon graham crust. At holiday time, mix a tablespoon of orange zest and a pinch of ground cloves into the filling and top with fruited compote for a festive twist. Temperature affects setting — colder kitchens help the filling firm faster.
Meal Prep Tips
Make the crust and filling up to 24 hours ahead, storing each covered in the refrigerator, then assemble and add topping the day of serving. Use uniform jars and fill with a small cookie scoop for consistent portions. Label containers with date and contents if you’re prepping multiple desserts. For transportation, keep jars upright in a cooler with ice packs to preserve texture and appearance.
There is a simple joy in this recipe: it rescues busy days and brings people together without complicated technique. Make it yours, experiment with toppings, and enjoy how easily it becomes a requested staple at your table.
Pro Tips
Soften cream cheese to room temperature for at least 30 minutes to avoid lumps; beat until light and airy for the best texture.
Press crust firmly with the bottom of a measuring cup to compact crumbs and prevent a sandy mouthfeel.
Use fresh lemon juice rather than bottled for brighter flavor and better setting.
Chill uncovered initially so condensation doesn’t form when covering; cover after the surface is cool to the touch.
If filling seems too loose, refrigerate longer — the acid in the lemon helps the structure set over time.
This nourishing no-bake cherry cheesecake recipe is sure to be a staple in your kitchen. Enjoy every moist, high protein slice — it is perfect for breakfast or as a wholesome snack any time.
FAQs about Recipes
Can I make this gluten-free?
Yes — you can use gluten-free graham-style crumbs or crushed gluten-free cookies for a gluten-free version; the texture will be similar though flavors vary slightly.
How long does it take to set?
Chill at least 2 hours, ideally overnight. If you’re short on time, place jars in the coldest part of the fridge; they will firm somewhat in 90–120 minutes but are best after longer chilling.
Can I transport these in jars?
Yes, you can assemble in jars, top with filling, then screw on lids for transport. Keep chilled until serving and add cherry topping only when ready to display.
Tags
No-Bake Cherry Cheesecake
This No-Bake Cherry Cheesecake recipe makes perfectly juicy, tender, and flavorful steak every time! Serve with potatoes and a side salad for an unforgettable dinner in under 30 minutes.
Ingredients
Crust
Filling
Topping
Instructions
Make the crust
Combine graham cracker crumbs and sugar in a bowl, stir in melted butter until the mixture holds together when pinched. Press 2–3 heaping tablespoons per 4–6 oz jar or an even layer into a 9" pan. Refrigerate for 1 hour to firm.
Whip the cream cheese
Beat softened cream cheese on medium-high until fluffy and smooth, about 2–3 minutes, scraping down the bowl to prevent lumps.
Add condensed milk
With mixer on low, gradually add the can of sweetened condensed milk until combined and glossy, scraping sides of bowl once.
Flavor and aerate
Stir in fresh lemon juice and vanilla extract and beat briefly until slightly aerated and homogeneous; this mixture will thicken as it chills.
Assemble and chill
Spoon or pipe filling over chilled crusts or into the prepared pan. Smooth tops and refrigerate uncovered for 2–3 hours or overnight for best set.
Top and serve
Spoon cherry pie filling over each portion just before serving. If transporting in jars, you may add filling and seal with lids; keep chilled until serving.
Last Step: Please leave a rating and comment letting us know how you liked this recipe! This helps our business to thrive and continue providing free, high-quality recipes for you.
Nutrition
Did You Make This?
Leave a comment & rating below or tag
@feastinarecipe on social media!
Categories:
You might also like...

Lemon Chicken Orzo Soup
Cozy, bright, and ready fast, this Instant Pot lemon chicken orzo soup brings tender chicken, fresh veggies, and a sunny citrus finish.

50 Calorie Strawberry Cheesecakes
Feather-light mini cheesecakes with bright strawberry sauce, a tender biscuit-style base, and creamy filling. Just 47 calories each and irresistibly fresh.

Kahlua Chocolate Cheesecake Bites
Silky mini cheesecakes swirled with melted chocolate and a splash of Kahlua, nestled on Oreo crusts and crowned with fresh whipped cream.
Did You Make This?
Leave a comment & rating below or tag @feastinarecipe on social media!
Rate This Recipe
Share This Recipe
Enjoyed this recipe? Share it with friends and family, and don't forget to leave a review!
Comments (1)
This recipe looks amazing! Can't wait to try it.
Comments are stored locally in your browser. Server comments are displayed alongside your local comments.

Hi, I'm Sarah!
What's Popular

30-Minute Meals!
Join to receive our email series which contains a round-up of some of our quick and easy family favorite recipes.