
>>

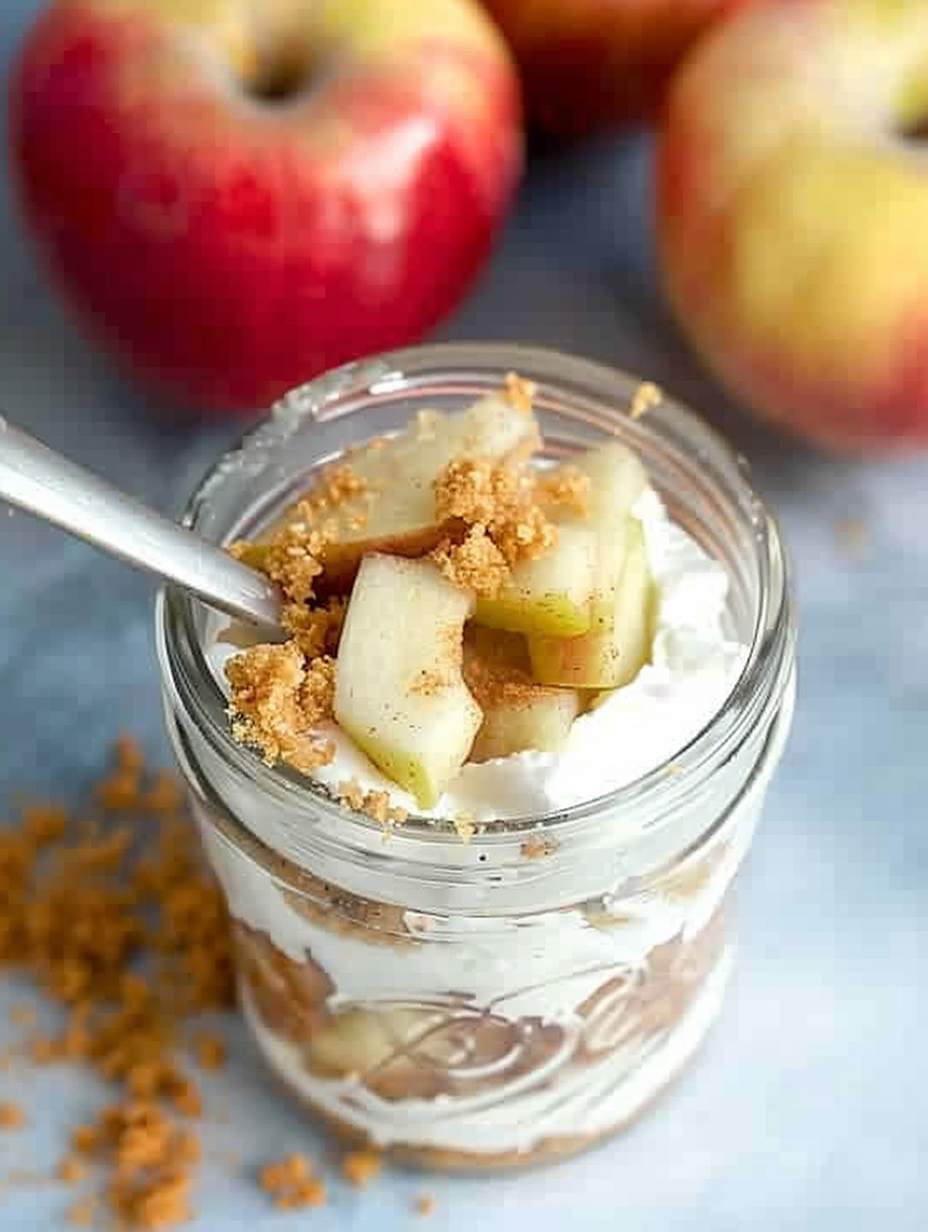
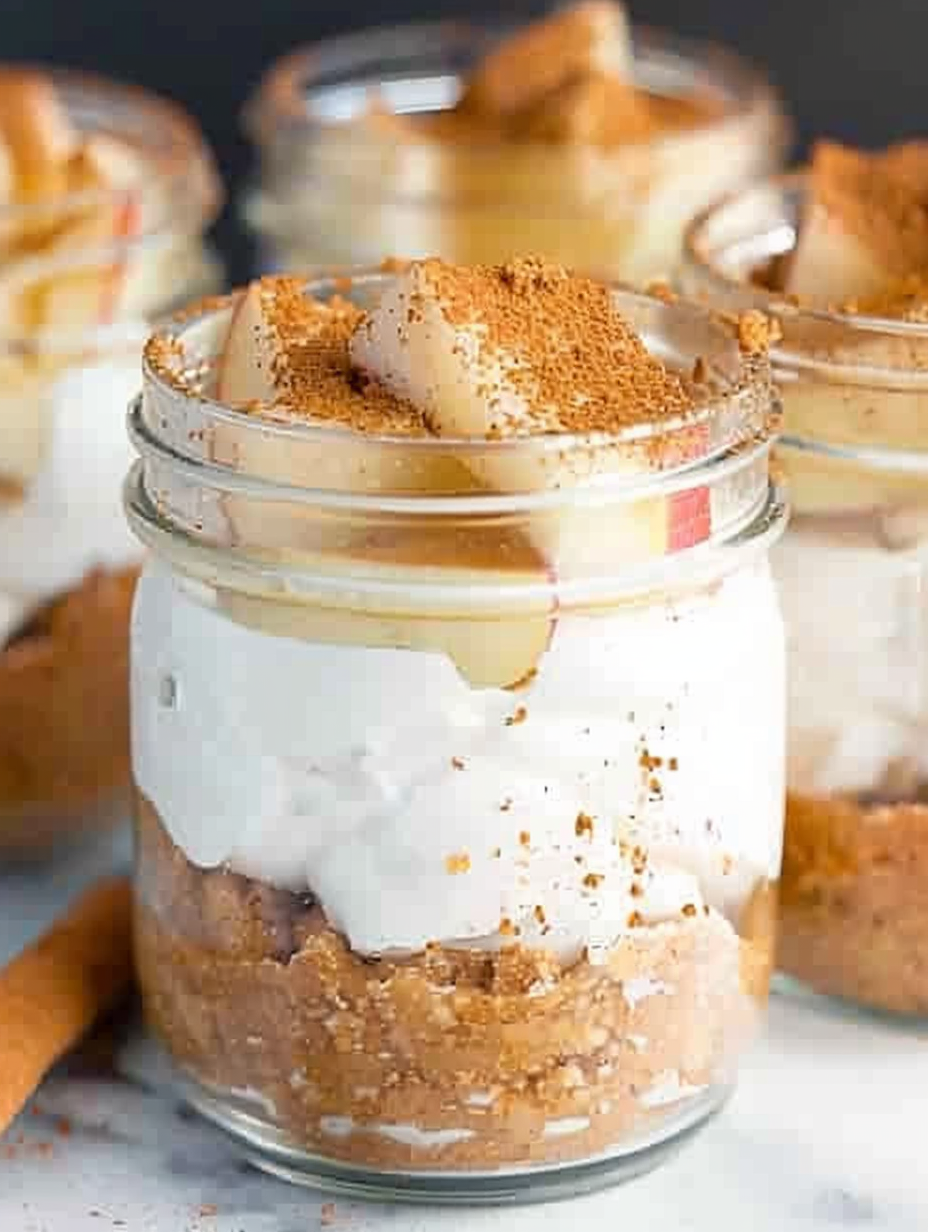
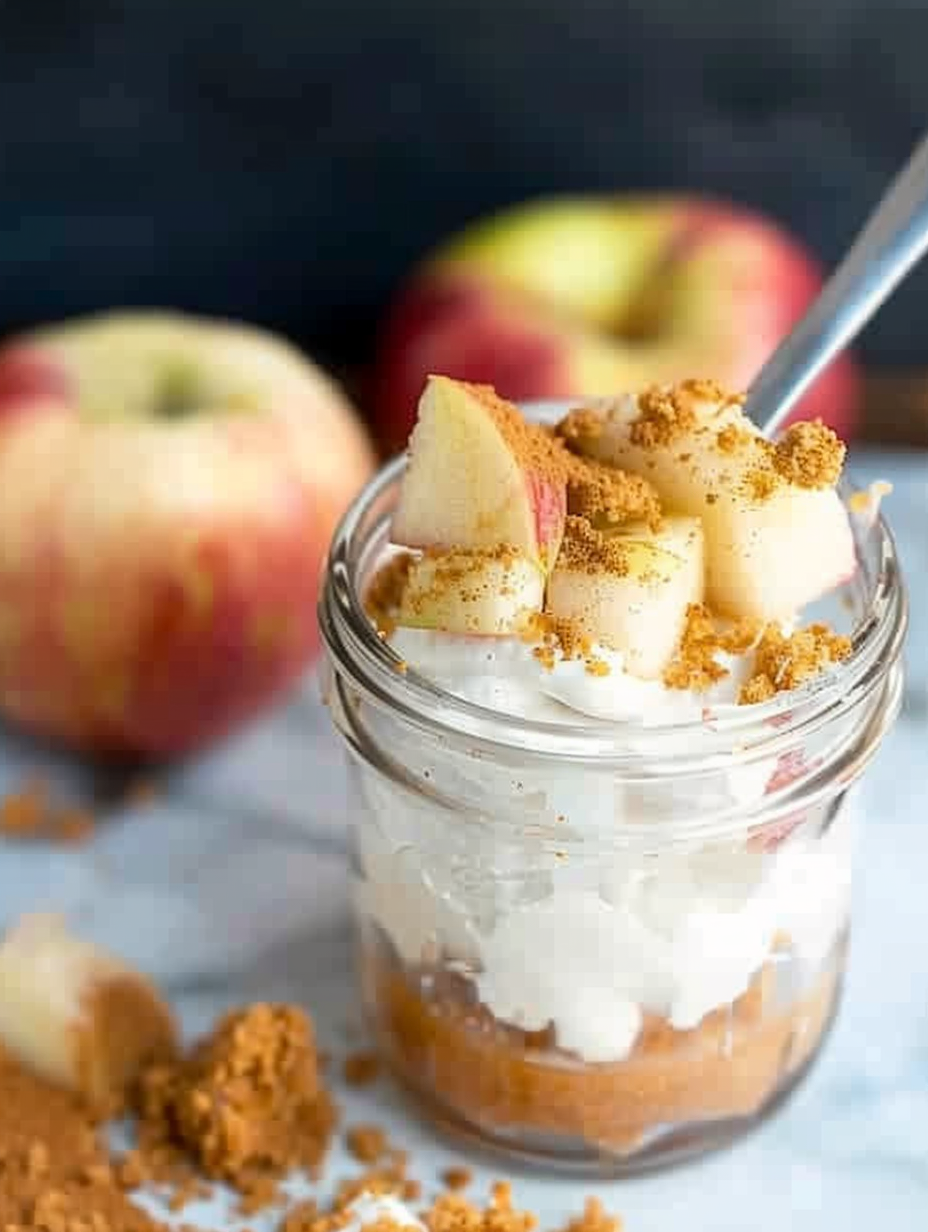
A quick, portable dessert: layers of cinnamon-spiced apples, creamy no-bake cheesecake, and graham cracker crumbs served in mason jars for perfect portion control.
This No Bake Apple Pie Cheesecake in a Jar is my go-to solution when I want something comforting and nostalgic without turning on the oven. I first developed this layered treat on a busy autumn weekend when I had unexpected guests and only 15 minutes to pull something sweet together. The combination of warm, spiced apples and a tangy, velvety filling tucked between crunchy graham crumbs immediately hit the right notes — like apple pie and cheesecake had a very agreeable conversation in a jar. It’s the sort of thing that sparks smiles and invites seconds without any fuss.
What makes this dessert stand out is the way familiar flavors are reimagined for convenience: each jar is a single-serve dessert that looks charming on the table and stores beautifully in the fridge for several days. I love that you can make the apple topping ahead, and the filling whips up in a blender or with a hand mixer in minutes. These jars have become my party-friendly secret and a reliable item to bring to potlucks or weekday treats for the family.
Personally, my family’s reaction the first time I made these was priceless — my teenager declared them “fancy” and requested them for a birthday dessert. Over the years I learned a few small tricks, like letting the apples cool slightly before layering so they don’t thin the filling, and using a piping bag for a neater assembly. These small touches make the jars feel indulgent without extra work.
I love that guests think these took much longer to prepare than they actually did — the stacked presentation reads celebratory, and leftovers are a treat for busy mornings. Over time I’ve perfected the balance of sweet apples and tangy filling so neither overpowers the other; the graham crumbs provide the crunch that makes every spoonful satisfying.
Store the jars in the refrigerator with tight-fitting lids for up to 7 days. For best texture, place a piece of parchment or plastic directly on the surface of the filling before sealing to avoid condensation. If you want to freeze, assemble jars without the fresh apple topping and freeze for up to 2 months; thaw in the refrigerator overnight and add warmed apples just before serving. Reheat refrigerated apples gently in a microwave for 10–20 seconds if you prefer them warm, but avoid overheating the cream cheese layer.
If you need to swap ingredients, try these tested adjustments: substitute honey or maple syrup for agave at a 1:1 ratio, though maple will lend a stronger flavor. Use low-fat cream cheese and nonfat Greek yogurt for a lighter version but expect a thinner texture. For a gluten-free option, replace graham crumbs with gluten-free cookie crumbs or crushed almond flour — note almond flour will change texture and slightly reduce carbs. For dairy-free, use vegan cream cheese and coconut yogurt, and brown the apples in coconut oil; texture will be slightly softer.
Serve each jar with a small spoon and a sprinkling of extra graham crumbs or chopped toasted pecans for crunch. A tiny dollop of whipped cream or a drizzle of salted caramel elevates this into an elegant dessert for special occasions. These jars pair beautifully with a cup of black coffee or a spiced tea and make a charming picnic dessert when chilled in a cooler.
This dessert blends two classic American treats — apple pie and cheesecake — into a single, portable form. The idea of single-serve desserts in jars has roots in modern home entertaining and picnic culture, where portability and presentation matter as much as flavor. Layered desserts served in vessels were popularized as a practical, rustic aesthetic in mid-2000s food trends and have since become a staple for casual parties and grab-and-go dessert options.
In cooler months, boost the spice with extra nutmeg and a splash of bourbon in the apples. For summer, swap apples for macerated peaches or berries and reduce the spice to let fruit shine. Holiday versions can add ground cloves and orange zest to the apples, and top with candied pecans for a festive crunch.
Make the apple topping up to 3 days ahead and store in an airtight container. The filling can be made the day before and kept chilled; assemble jars the night before for a quick grab-and-go dessert. Use uniform jars (4 × 8-ounce mason jars) for consistent portions and stacking in the fridge. Label jars with the prep date to track freshness.
These little jars offer the joy of classic flavors with minimal fuss — they’re dependable, crowd-pleasing, and flexible enough to adapt to seasons and dietary needs. Try them once and you’ll find multiple reasons to keep the components on hand.
Soften the cream cheese to room temperature to avoid lumps in the filling and ensure a silky texture.
Let the cooked apples cool slightly before layering so they don’t thin the filling; warm apples are fine but not piping hot.
Use a piping bag or zip-top bag with the corner snipped to layer the filling neatly in jars.
For crispier graham layers, mix 1 tablespoon melted unsalted butter into the crumbs before layering.
This nourishing no bake apple pie cheesecake in a jar recipe is sure to be a staple in your kitchen. Enjoy every moist, high protein slice — it is perfect for breakfast or as a wholesome snack any time.
This No Bake Apple Pie Cheesecake In A Jar recipe makes perfectly juicy, tender, and flavorful steak every time! Serve with potatoes and a side salad for an unforgettable dinner in under 30 minutes.
Combine chopped apples, brown sugar, coconut oil and apple pie spice in a small saucepan. Cook over medium heat for 4–6 minutes until softened and lightly browned, stirring occasionally. Remove from heat and cool slightly before layering.
Beat cream cheese, agave nectar, Greek yogurt, apple pie spice and vanilla extract until smooth and lump-free. Use a hand mixer or stand mixer and scrape the bowl to ensure an even texture.
Place 2 tablespoons graham crumbs in each jar, add 2–3 tablespoons filling, 2 tablespoons apples, repeat layers as directed and finish with apples on top. Press gently to compact but keep layers distinct.
Cover jars and refrigerate at least 30 minutes or up to 7 days. Serve chilled or bring to room temperature for 10–15 minutes before eating. Reheat apple topping separately if you prefer warm apples.
Last Step: Please leave a rating and comment letting us know how you liked this recipe! This helps our business to thrive and continue providing free, high-quality recipes for you.
Leave a comment & rating below or tag
@feastinarecipe on social media!

Cozy, bright, and ready fast, this Instant Pot lemon chicken orzo soup brings tender chicken, fresh veggies, and a sunny citrus finish.

Feather-light mini cheesecakes with bright strawberry sauce, a tender biscuit-style base, and creamy filling. Just 47 calories each and irresistibly fresh.

Silky mini cheesecakes swirled with melted chocolate and a splash of Kahlua, nestled on Oreo crusts and crowned with fresh whipped cream.
Leave a comment & rating below or tag @feastinarecipe on social media!
Enjoyed this recipe? Share it with friends and family, and don't forget to leave a review!
This recipe looks amazing! Can't wait to try it.
Comments are stored locally in your browser. Server comments are displayed alongside your local comments.

Join to receive our email series which contains a round-up of some of our quick and easy family favorite recipes.
