
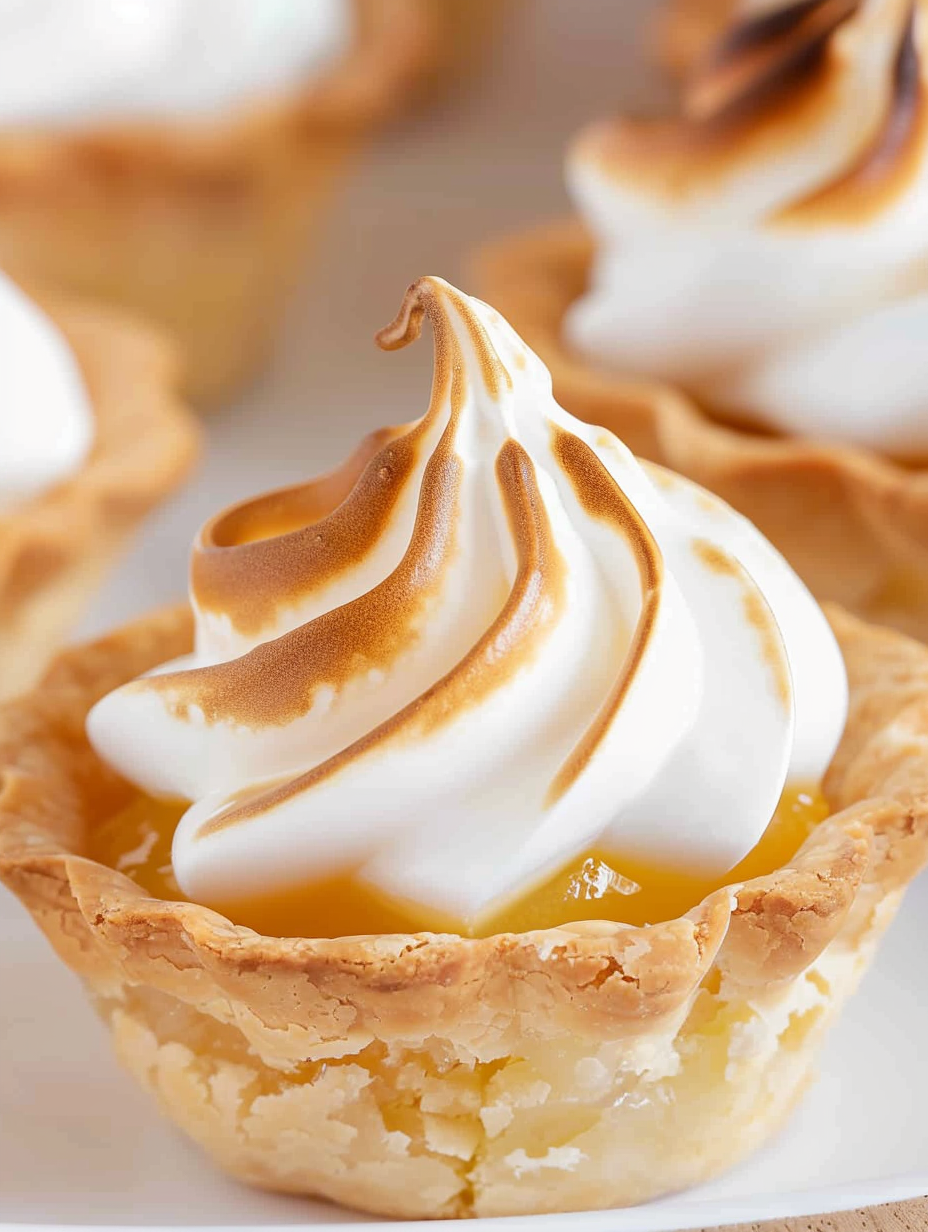
Mini Lemon Meringue Pies

Tiny tartlets with a buttery crust, bright lemon curd, and cloud-like toasted meringue. Perfect for parties, make-ahead desserts, or a sunny weeknight treat.

This recipe for mini lemon meringue pies has been my go-to for any celebration where I want something elegant but not fussy. I first made these on a warm spring afternoon when I needed a portable dessert for a neighbor’s garden party. The combination of a flaky crust, vibrant lemon curd, and a billowy, toasted meringue topping won everyone over. I remember my niece insisting on helping pipe the meringue, and her careful swirls made the pies look like tiny works of art. These small bites deliver the exact same contrast of textures and flavors as a classic pie but in an easy-to-serve format.
What makes these especially useful is how they bridge convenience and homemade flavor. Using pre-made crusts and store-bought lemon curd keeps the active time short, but the finishing steps — whipping glossy meringue and toasting it — provide that wow factor. The tartness of the lemon curd brightens each bite, and the toasted peaks add a caramelized sweetness and a soft, billowy mouthfeel. Over the years I have adapted the temperatures and watch points so the crust remains crisp while the meringue browns beautifully. These make an excellent choice for holiday trays, potlucks, or simply as a weekend baking project with friends.
Why You'll Love This Recipe
- Ready in under an hour from start to finish, ideal for last-minute entertaining or a special weeknight dessert.
- Uses pantry-friendly ingredients and two simple shortcuts: pre-made pie crusts and store-bought lemon curd for reliable flavor and speed.
- Mini format makes portion control easy and allows for elegant presentation on a platter, perfect for parties or afternoon tea.
- Meringue tops can be toasted under the broiler or with a kitchen torch, giving you flexible finishing options depending on your equipment.
- Make-ahead friendly: shells can be baked and stored, curd can be piped in, and meringue can be whipped just before serving to keep it glossy and voluminous.
- Family-friendly sweet-tart balance that appeals to both kids and adults, while still feeling refined for guests.
I often double the batch for larger gatherings. My family always remembers the first time I served these at a summer reunion; the plate was emptied so fast I had to hide a few for photos. The little rituals of piping the meringue and evenly browning the tops have become a favorite part of my baking routine.
Ingredients
- Pie crust: Two pre-made pie crusts. I use refrigerated rolled dough from the grocery store because it consistently yields a flaky, buttery shell. If you prefer homemade, a classic butter crust rolled to 1/8 inch works well. Let the dough warm slightly so it is pliable and not prone to cracking.
- Lemon curd: 20 ounces lemon curd, typically two 10-ounce jars. Brands such as Bonne Maman or store-brand curds are great for bright, balanced flavor. Look for curd that reads real lemon and cane sugar on the label for the cleanest taste.
- Meringue: Four egg whites at room temperature, one half teaspoon cream of tartar, and one cup granulated sugar. Room-temperature whites whip faster and to a larger volume. If you have medium or large eggs, four whites is standard; weigh about 120 grams total if you prefer precision.
- Optional garnish: Finely grated lemon zest or thin edible flowers to add color and an aromatic lift when serving. Zest no more than 1 teaspoon per tray to avoid overpowering the curd.
Instructions
Prepare the dough: Remove the pie crusts from the refrigerator and let them sit at room temperature for about 15 minutes so they become pliable. Preheat your oven according to the package directions, usually 375 degrees Fahrenheit. Lightly flour your work surface and roll out one crust to even out seams. Use a round cookie cutter slightly larger than the mini muffin cups, cut as many circles as possible, and gently press each circle into the well. Ease the dough down and use your fingertips to shape the edges for a uniform rim. Blind bake the shells: Fit the cutouts into a mini muffin tin and press the centers down with your fingers so the crust conforms to each cup. Prick the bottoms lightly with a fork if the crust seems prone to puffing. Bake according to package directions or until the edges are light golden brown. Typically this takes 12 to 15 minutes at 375 degrees Fahrenheit. Transfer the tin to a cooling rack and let the shells cool completely before removing to maintain crispness. Fill with lemon curd: Once cooled, spoon or pipe lemon curd into each shell to the top. For neat filling, transfer curd to a disposable piping bag or a zip-top bag with a corner snipped off. Fill each shell almost to the rim, leaving enough room to pipe meringue on top. Set the filled shells aside at room temperature while you prepare the meringue. Whip the meringue: In a clean, grease-free bowl, add four room-temperature egg whites. Fit a stand mixer with the whisk attachment and whisk on medium-high until foamy and soft peaks form, about one minute. Add one half teaspoon cream of tartar and continue whisking. With the mixer running on high, add one cup granulated sugar one tablespoon at a time. This gradual addition ensures a stable, glossy meringue. Continue beating until stiff, glossy peaks form and the sugar is dissolved, about 5 to 10 minutes. Avoid over-mixing which can cause separation. Pipe the topping: Transfer meringue to a piping bag fitted with your favorite tip and pipe swirls onto each filled shell, leaving a small base at the edge so the meringue anchors. If you do not have a piping bag, use two spoons to dollop and shape the meringue. The visual appeal comes from tall peaks and swirls that will brown beautifully under heat. Toast the meringue: Preheat your oven broiler to high. Place the mini muffin tin under the broiler on the middle rack and watch carefully, about 1 to 3 minutes. Rotate the pan if needed to achieve even color. Alternatively, use a kitchen torch to brown the peaks for precise control. Remove when the meringue has an even golden caramel color. Allow to cool briefly before serving so the meringue sets.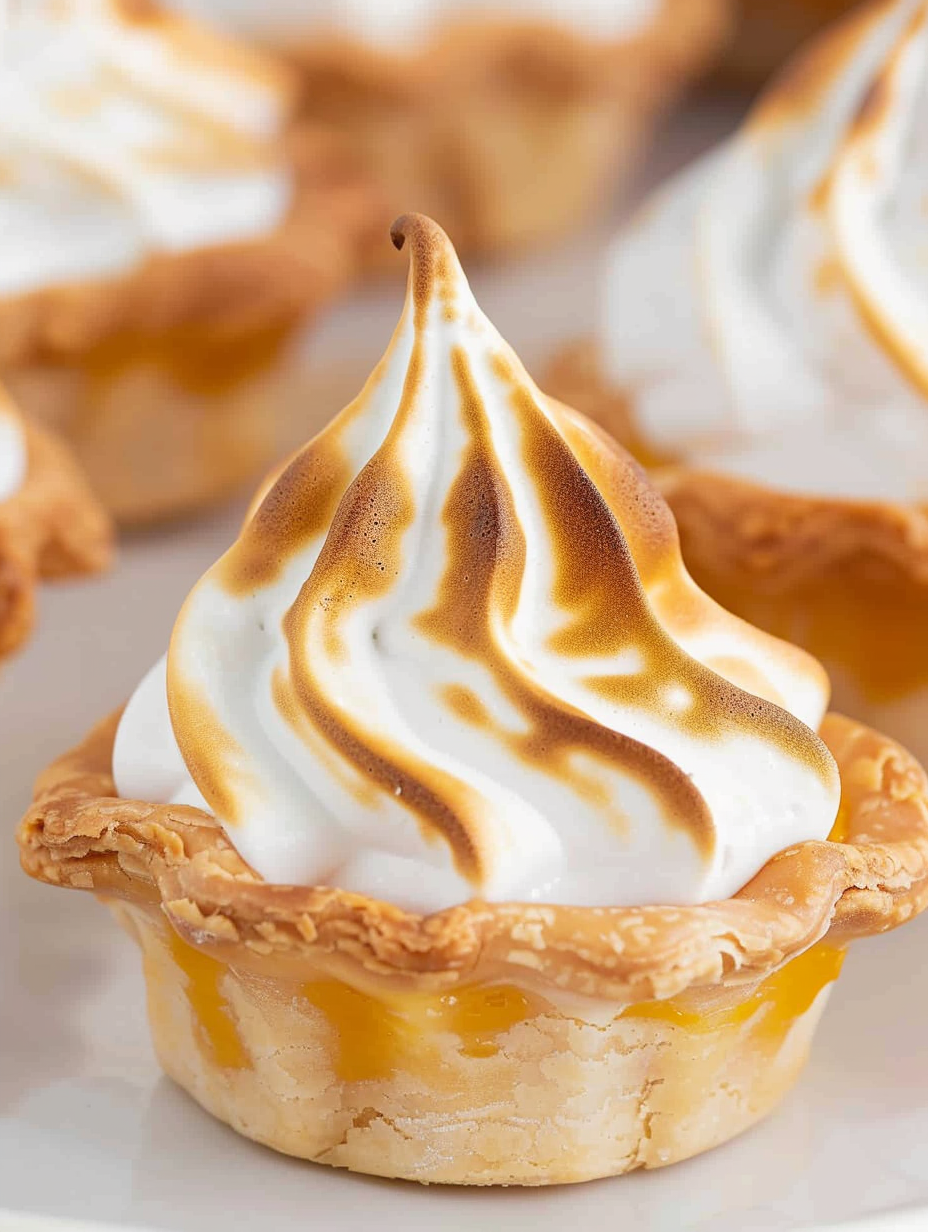
You Must Know
- These mini tarts provide about 214 calories per piece, with 35 grams of carbohydrates and 7 grams of fat, a light treat for a dessert portion.
- The shells and curd can be prepared a day ahead; keep shells in an airtight container and fill with curd shortly before serving to avoid sogginess.
- Meringue is best made and browned just before serving for maximum volume and glossy texture; whipped meringue loses volume if left too long.
- Freezing is not recommended once meringue has been browned, but baked shells and unopened lemon curd jars freeze well for up to three months.
- Always use a clean, dry bowl and utensils for whipping egg whites to ensure the best rise and stability.
My favorite part of this dessert is how the toasting stage transforms the meringue from glossy peaks into caramelized swirls that perfume the kitchen. Guests often comment on how each mini bite balances tart and sweet perfectly. These have been the highlight at summer pick-ups and holiday cookie exchanges because they feel special yet are surprisingly straightforward to execute.
Storage Tips
Store unfilled baked shells in an airtight container at room temperature for up to two days to maintain crispness. Once filled with lemon curd, keep the tartlets refrigerated and consume within 2 to 3 days. If you need to prepare parts ahead, freeze baked shells on a sheet tray until firm, then transfer to a freezer-safe bag for up to three months. Thaw shells at room temperature before filling. After browning the meringue, serve within a few hours because condensation can soften the topping in the refrigerator.
Ingredient Substitutions
If you prefer to make your own curd, a standard lemon curd made from egg yolks, sugar, lemon juice, and butter can be used; prepare and chill it fully before filling. For a dairy-free option, use a plant-based pie crust and a vegan lemon curd made with cornstarch and plant milk, though texture will be slightly different. Egg-free meringue alternatives such as aquafaba can be used; whip chickpea brine with sugar and a stabilizer like cream of tartar, but plan for longer whipping times. Whole wheat or gluten-free crusts work but may change the texture and toasting time.
Serving Suggestions
Serve these mini tartlets on a pretty platter with small forks or cocktail napkins. Garnish each with a tiny twist of lemon zest, a dusting of powdered sugar, or a small edible flower. Pair with light beverages like iced tea, sparkling wine, or coffee. For parties, arrange them with other bite-sized sweets so guests can sample a variety. They are also lovely plated alongside fresh berries and a dollop of lightly whipped cream for a summer dessert course.
Cultural Background
Lemon meringue as a combination comes from European influences where custard tarts and whipped egg-topped desserts were popular. The classic lemon meringue pie evolved in the United States during the early twentieth century when improved sugar refining and citrus availability made lemon curds and meringues more accessible. Miniaturizing this classic into individual tartlets follows a broader trend in modern pastry toward single-portion desserts that retain traditional flavors while improving portability and presentation.
Seasonal Adaptations
In spring and summer, brighten the curd with extra lemon zest and top with fresh berries for contrast. For autumn, add a touch of warm spices to the crust or a drizzle of caramel under the meringue. Holiday versions can include a lime-orange curd blend for festive color. Adjust oven timing slightly if your kitchen is very humid because meringue performance is sensitive to moisture; on humid days work quickly and serve meringue-topped pies soon after finishing.
Meal Prep Tips
For efficient assembly, bake shells a day ahead and store at room temperature. Keep curd chilled and transfer to a piping bag shortly before filling. Whip meringue just before guests arrive and brown using a torch for speed and control. If transporting, place filled tarts on a flat tray and store in a shallow box; brown the meringue on-site with a torch if possible to preserve the fresh toasted flavor. Label containers with dates when storing multiple batches.
These mini lemon meringue pies bring citrus brightness and a festive finish to any table. They are approachable to make and endlessly adaptable to the season or occasion. Invite friends to help with piping and toasting for a memorable baking afternoon.
Pro Tips
Use room-temperature egg whites to achieve maximum volume when whipping.
Add sugar slowly while whipping to ensure the sugar dissolves and meringue becomes glossy.
If using a broiler to brown meringue, watch continuously and keep the pan on the middle rack to avoid burning.
Bake shells fully and cool completely before filling to prevent sogginess.
This nourishing mini lemon meringue pies recipe is sure to be a staple in your kitchen. Enjoy every moist, high protein slice — it is perfect for breakfast or as a wholesome snack any time.
Tags
Mini Lemon Meringue Pies
This Mini Lemon Meringue Pies recipe makes perfectly juicy, tender, and flavorful steak every time! Serve with potatoes and a side salad for an unforgettable dinner in under 30 minutes.
Ingredients
Pie Crust
Lemon Curd
Meringue
Optional Garnish
Instructions
Soften and roll crust
Remove refrigerated pie crusts and let them sit 15 minutes until pliable. Preheat oven per package directions, generally 375 degrees Fahrenheit. Roll out one crust to even seams, and cut circles slightly larger than the mini muffin wells.
Fit and shape shells
Press each dough circle gently into the mini muffin tin. Use your fingers to press the center down and shape the sides so the dough conforms to the cup without stretching thinly at the rim.
Bake shells
Bake the shells until the edges are light golden brown, about 12 to 15 minutes at 375 degrees Fahrenheit, or according to package directions. Cool on a wire rack to room temperature to keep shells crisp.
Fill with lemon curd
Spoon or pipe lemon curd into each cooled shell to the top. Using a zip-top bag with a corner snipped off makes filling neat and fast. Set filled shells aside while preparing meringue.
Whip meringue
In a clean bowl, whip four room-temperature egg whites until frothy. Add 1/2 teaspoon cream of tartar then add 1 cup sugar one tablespoon at a time while whisking on high until stiff glossy peaks form, about 5 to 10 minutes.
Pipe and brown
Pipe meringue onto each filled shell. Broil on high for 1 to 3 minutes on the middle rack, watching continuously, or use a kitchen torch to toast the peaks until evenly golden. Allow to cool briefly before serving.
Last Step: Please leave a rating and comment letting us know how you liked this recipe! This helps our business to thrive and continue providing free, high-quality recipes for you.
Nutrition
Did You Make This?
Leave a comment & rating below or tag
@feastinarecipe on social media!
Categories:
You might also like...

Lemon Chicken Orzo Soup
Cozy, bright, and ready fast, this Instant Pot lemon chicken orzo soup brings tender chicken, fresh veggies, and a sunny citrus finish.

50 Calorie Strawberry Cheesecakes
Feather-light mini cheesecakes with bright strawberry sauce, a tender biscuit-style base, and creamy filling. Just 47 calories each and irresistibly fresh.

Kahlua Chocolate Cheesecake Bites
Silky mini cheesecakes swirled with melted chocolate and a splash of Kahlua, nestled on Oreo crusts and crowned with fresh whipped cream.
Did You Make This?
Leave a comment & rating below or tag @feastinarecipe on social media!
Rate This Recipe
Share This Recipe
Enjoyed this recipe? Share it with friends and family, and don't forget to leave a review!
Comments (1)
This recipe looks amazing! Can't wait to try it.
Comments are stored locally in your browser. Server comments are displayed alongside your local comments.

Hi, I'm Sarah!
What's Popular

30-Minute Meals!
Join to receive our email series which contains a round-up of some of our quick and easy family favorite recipes.