
>>

Sweet sugar cookie cups filled with a homemade, Jello-free strawberry glaze and fresh berries—perfect bite-sized spring desserts that are easy to make and impossible not to love.
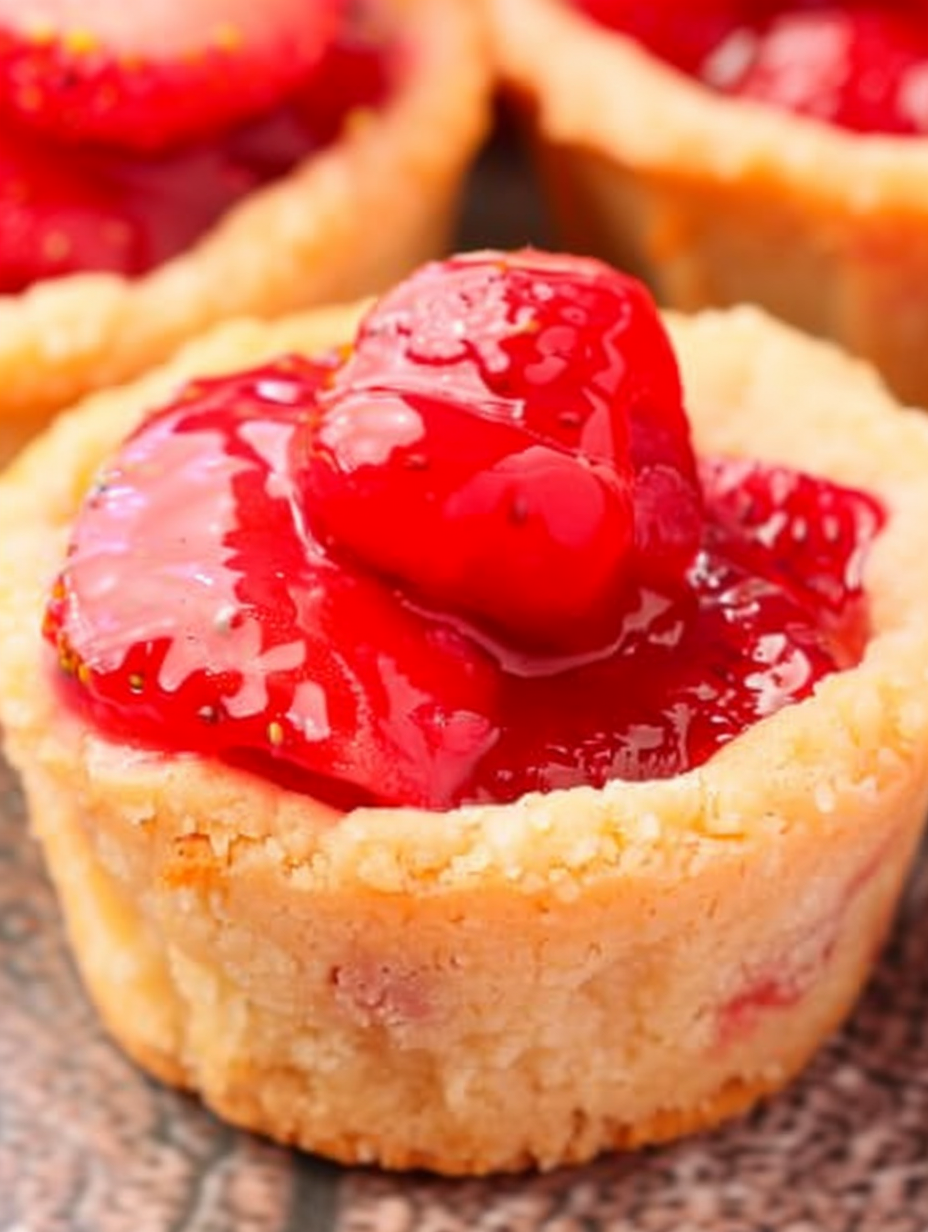
This recipe began as a way to capture the bright, fleeting sweetness of spring strawberries in a single bite. I first made these when I had a bowl of perfect, ripened berries and wanted something more delicate than a full pie but more celebratory than a simple shortcake. The result is a crisp, buttery sugar cookie formed into little cups and filled with a glossy, homemade strawberry glaze that uses no packaged gelatin. Each bite is a contrast of textures: a faintly crisp rim, tender cookie base, and a shiny, jam-like filling studded with fresh berry pieces.
These little cups quickly became my go-to for potlucks and family gatherings. Kids love them because they are the perfect size and brightly colored, while adults appreciate the scratch-made filling that tastes like strawberries at their peak. The technique is forgiving: the dough is simple and refrigerator-chill friendly, and the glaze comes together in one pan. I’ll walk you through precise visual cues and timing so you can make a tray of these with confidence, whether you’re bringing them to a picnic or making an afternoon treat.
I remember bringing a tray to a spring neighborhood gathering and watching adults argue over who could take the last two. My youngest declared it the best thing I ever baked, and my neighbor asked for the recipe—twice. It’s one of those treats that looks fancy but is truly simple to scale and adapt.
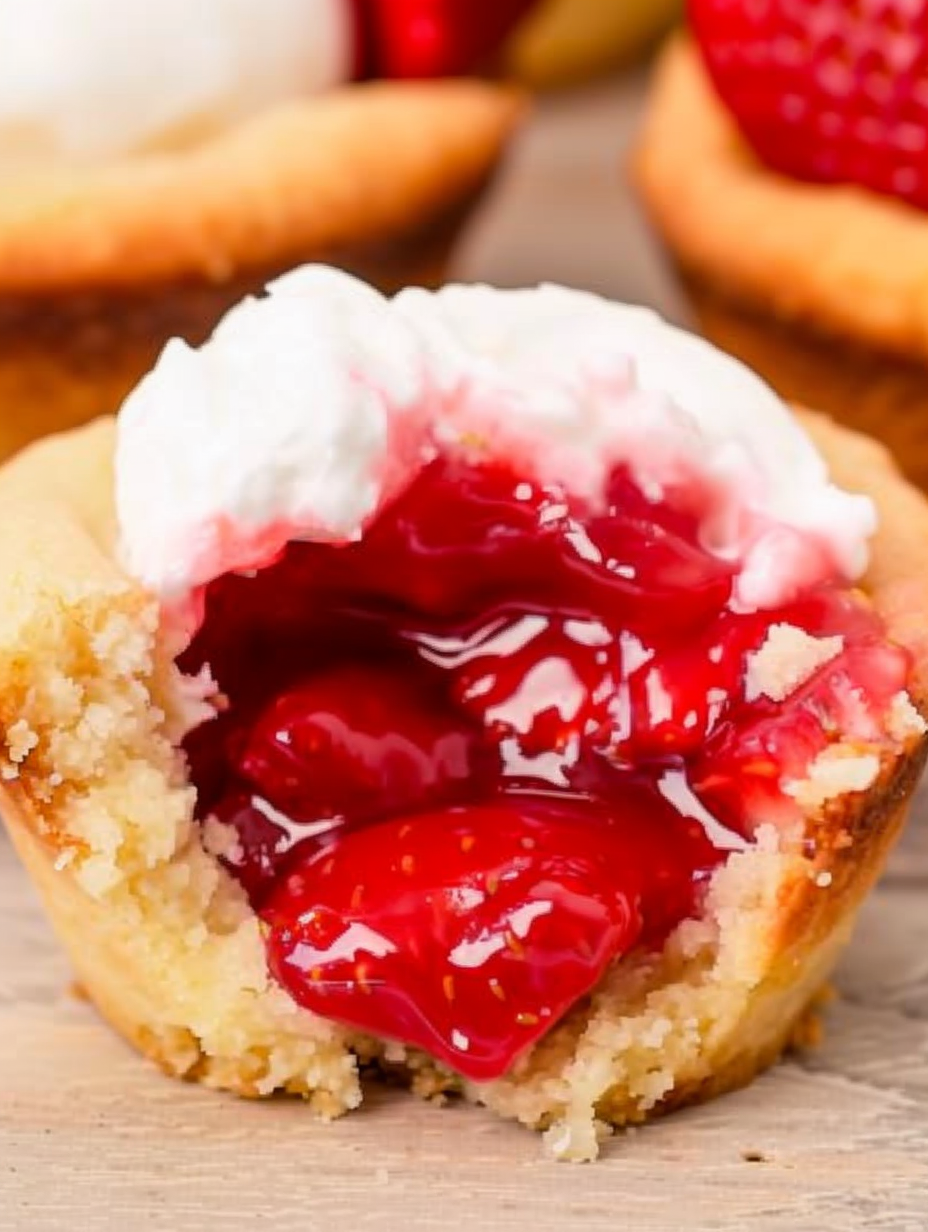
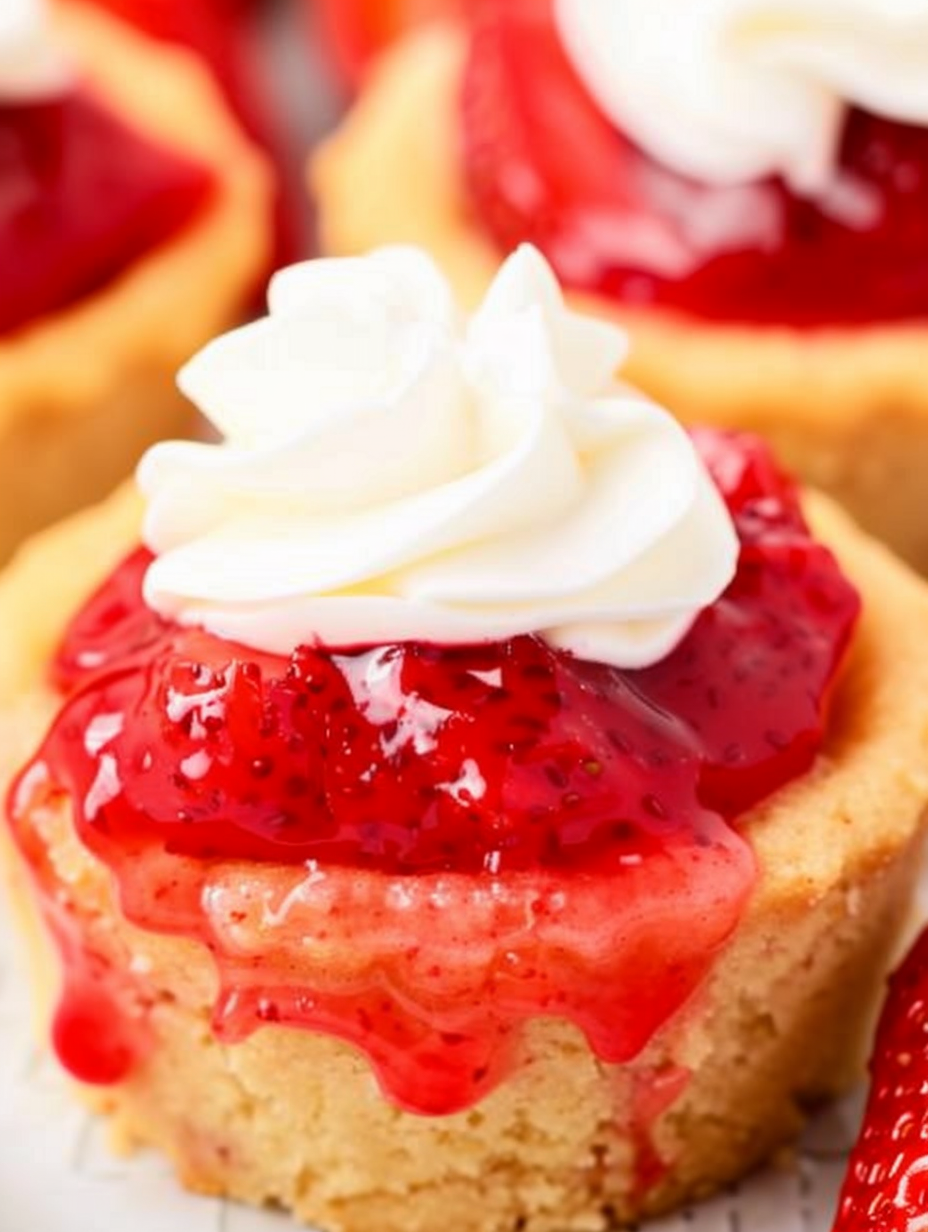
My favorite part is the moment of assembly when the warm, glossy filling meets the crisp-edged cookie cup and the kitchen fills with strawberry perfume. Watching family members discover the bright fresh fruit inside often outshines any fancy decoration. Little hands love them, and they make a simple holiday or spring centerpiece when arranged on a tray garnished with mint leaves.
Store assembled cups in a shallow airtight container in the refrigerator for up to 3 days. Place parchment paper between layers to prevent sticking. For longer storage, freeze baked cookie cups (without filling) on a tray until solid then transfer to a freezer-safe bag for up to one month; thaw at room temperature for 15 to 30 minutes before filling. Store the glaze separately in an airtight jar in the refrigerator for up to 3 days and rewarm gently in a saucepan over low heat if it thickens too much.
For a dairy-free version, substitute the butter with 1 cup (2 sticks) vegan butter that is solid at room temperature; texture will be similar. To reduce sugar, cut the cookie sugar by one quarter and taste the filling before adding more; be aware the glaze relies on sugar for body and gloss so reduce slowly. For a gluten-free option, use a 1-to-1 gluten-free flour blend and add a teaspoon of xanthan gum if your blend lacks it. If berries are out of season, swap equal parts frozen strawberries (thawed and drained) or use a medley of raspberries and strawberries for a slightly tart finish.
Serve chilled on a decorative platter garnished with small mint leaves and a light dusting of powdered sugar. These pair beautifully with a dollop of lightly sweetened whipped cream or a scoop of vanilla bean ice cream for an elegant dessert. For brunch, present alongside lemon bars or mini tarts to contrast citrus and berry flavors. Consider smaller portions for cocktail parties, or make them larger by using jumbo muffin tins for a shareable dessert.
Miniature fruit-topped pastries have roots in many traditions, but these bite-sized cups are an American take on handheld pies and tarts—combining the classic sugar cookie and fruit pie filling into an accessible party-ready shape. They echo the tradition of seasonal berry desserts celebrated at spring and summer gatherings across the country, where fresh fruit shines and simple techniques bring out the best of local produce.
Spring calls for bright strawberries, but the method adapts well to summer peaches or blueberries. In autumn swap the strawberries for diced baked apples with cinnamon and a splash of maple syrup. For a holiday twist, fold in grated orange zest into the filling and finish with a cinnamon-sugar dusting. The basic cup and glaze approach invites playful seasonal flavors while keeping the same reliable technique.
Make cookie cups and filling on different days to streamline hosting: bake cups up to one month ahead and freeze; prepare glaze two days ahead and refrigerate. On the day, defrost cups at room temperature for 20 minutes, stir the glaze to restore its shine, and assemble just before serving to keep the cups crisp. Use a small scoop for efficient portioning and a pastry bag for neat filling application when serving larger groups.
These little cups combine the nostalgia of scratch baking with an elegant presentation that’s surprisingly simple. Make them your own with seasonal fruit, and enjoy the way a single small bite can bring a room together.
Chill the dough for at least 30 minutes to make shaping easy and to prevent spreading in the oven.
Press the wells while the cookies are warm to create a deeper cup; if you wait until fully cool they may crack.
Cool the glaze to warm before folding in diced berries to preserve texture and avoid overcooking the fresh fruit.
Use a small cookie scoop for uniform dough balls to ensure even baking and consistent cup sizes.
This nourishing fresh strawberry pie cookie cups recipe is sure to be a staple in your kitchen. Enjoy every moist, high protein slice — it is perfect for breakfast or as a wholesome snack any time.
Yes. Baked cookie cups freeze well for up to one month; store frozen in a sealed bag and thaw before filling.
If using frozen strawberries, thaw and drain them well before mashing to avoid excess water in the glaze.
This Fresh Strawberry Pie Cookie Cups recipe makes perfectly juicy, tender, and flavorful steak every time! Serve with potatoes and a side salad for an unforgettable dinner in under 30 minutes.
Beat butter until smooth, add sugar and beat until light and fluffy. Add egg, vanilla, and salt, mixing to combine. Sift flour, baking soda, and cream of tartar, then add to wet ingredients and mix just until dough forms. Wrap and refrigerate for at least 30 minutes.
Preheat oven to 350 F. Grease a 24-cup muffin tin. Roll 1 1/2 tablespoon portions of chilled dough into balls, press into wells to form cups, and bake 12 minutes until edges are light golden. Press wells while warm with the back of a spoon to form deeper cups, then cool completely on a wire rack.
Combine mashed strawberries, sugar, cornstarch, and water in a saucepan. Heat over medium, stirring constantly. After it becomes hot, continue 2 to 5 minutes until glossy and thickened. Remove from heat, add optional food coloring, and let cool to warm.
Fold diced strawberries into the warm glaze and spoon about 1 tablespoon into each cooled cookie cup. Refrigerate until set, at least 30 minutes, before serving.
Keep assembled cups chilled and serve within 3 days for best texture. For make-ahead, freeze baked cups without filling and store glaze separately for up to one month frozen.
Last Step: Please leave a rating and comment letting us know how you liked this recipe! This helps our business to thrive and continue providing free, high-quality recipes for you.
Leave a comment & rating below or tag
@feastinarecipe on social media!

Cozy, bright, and ready fast, this Instant Pot lemon chicken orzo soup brings tender chicken, fresh veggies, and a sunny citrus finish.

Feather-light mini cheesecakes with bright strawberry sauce, a tender biscuit-style base, and creamy filling. Just 47 calories each and irresistibly fresh.

Silky mini cheesecakes swirled with melted chocolate and a splash of Kahlua, nestled on Oreo crusts and crowned with fresh whipped cream.
Leave a comment & rating below or tag @feastinarecipe on social media!
Enjoyed this recipe? Share it with friends and family, and don't forget to leave a review!
This recipe looks amazing! Can't wait to try it.
Comments are stored locally in your browser. Server comments are displayed alongside your local comments.

Join to receive our email series which contains a round-up of some of our quick and easy family favorite recipes.
