
Easy Apple Danishes

Flaky crescent-roll danishes filled with tender cinnamon apples and finished with a sweet vanilla glaze — quick to make and perfect for breakfast or dessert.
This recipe for Easy Apple Danishes has been one of my favorite quick-bake treats for years. I first discovered the idea on a sleepy weekend morning when I had a can of apple pie filling and a couple of tubes of crescent rolls in the fridge. I wanted something that smelled like a bakery without a lot of fuss, and rolling those buttery crescents into coils loaded with spiced apples produced exactly that — a warm, comforting pastry that fills the kitchen with the scent of cinnamon and browned butter.
What makes these danishes special is how effortless they are while still delivering a contrast of textures: the exterior crisps to a golden, flaky shell, the inside stays pillowy, and the apple filling becomes tender and saucy without any pre-cooking. I often make a batch for weekend brunches or holiday mornings; guests always think I spent hours crafting them. They pair beautifully with coffee and can be scaled up easily for a crowd.
Why You'll Love This Recipe
- Ready in under 30 minutes from start to finish — prep takes about 10 minutes, and baking is only 15–18 minutes, so it’s ideal for impromptu breakfasts or last-minute guests.
- Uses pantry staples and store-bought crescent dough (I recommend Pillsbury crescent rolls for consistent results), so no yeast or laminating required.
- Customizable: swap in peach or cherry pie filling, add chopped nuts, or stir dried cranberries into the apples for seasonal variations.
- Make-ahead friendly: you can assemble the coils and refrigerate them for an hour before baking, or freeze unbaked for later baking from frozen.
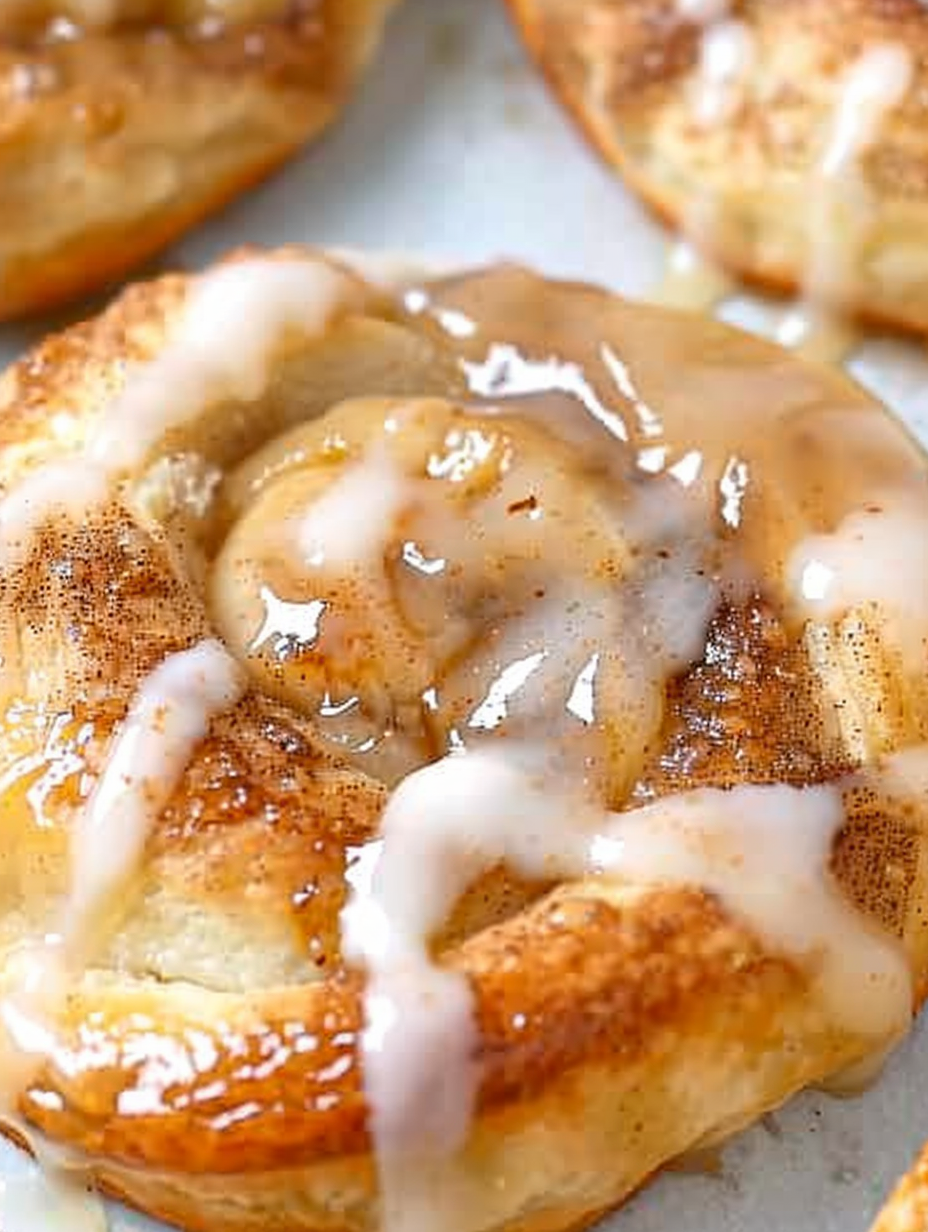
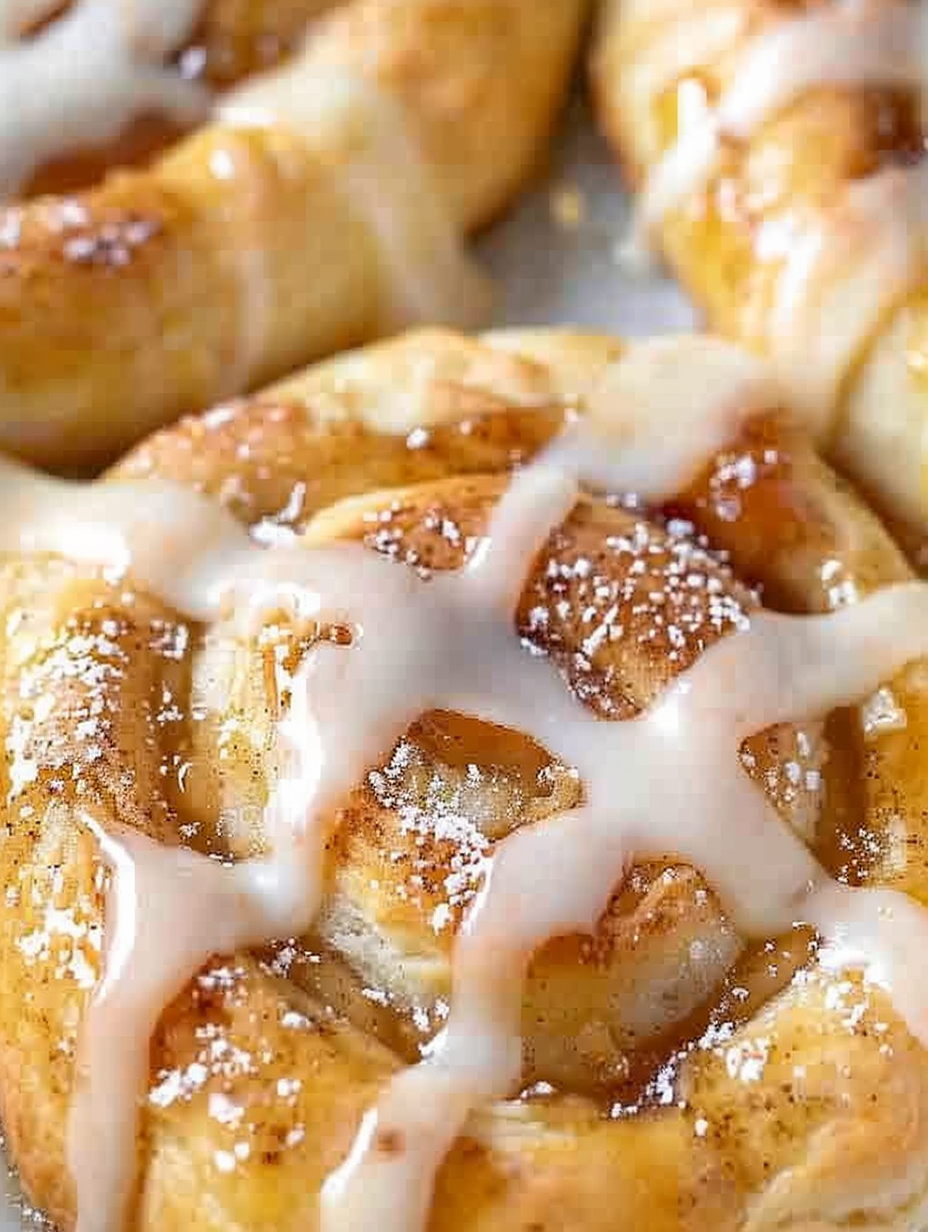
- Crowd-pleasing appearance with minimal effort — the coiled shape looks bakery-made, and the drizzle of vanilla glaze finishes them like a pro.
- Gluten and dairy swaps are possible for special diets; see substitutions below for exact ratios and recommendations.
My family’s reaction the first time I brought these to a holiday brunch was priceless: everyone reached for seconds before the glaze had fully set. I learned that small touches — brushing the dough with melted butter, pinching seams to trap steam, and not overfilling — make all the difference in achieving neat, evenly baked pastries.
Ingredients
- Crescent rolls: 2 (8 ounce) tubes crescent roll dough (16 triangles total). I use a well-known brand like Pillsbury for a consistent, buttery flavor and even browning.
- Apple pie filling: 1 (20 ounce) can apple pie filling. Choose a brand you like — the filling becomes the star, so a good-quality filling with tender apple slices yields the best results.
- Butter: 2 tablespoons salted butter, melted. Salted is fine; if you prefer, use unsalted and add a pinch of sea salt to the cinnamon sugar.
- Cinnamon sugar: 3 tablespoons total. I recommend mixing 2 tablespoons granulated sugar with 1 teaspoon ground cinnamon to sprinkle on the rolls, plus a little extra for the tops.
- Glaze: 1/2 cup powdered sugar, 1 teaspoon vanilla extract, and 3–4 teaspoons milk to reach a drizzleable consistency.
- Optional: a small knob of butter to dot on top of each filling mound for extra shine, or a handful of chopped toasted pecans for texture.
Instructions
Preheat the oven: Set your oven to 350 degrees F (175 degrees C) and position a rack in the middle. A preheated oven ensures even browning from the moment the danishes go in — expect 15–18 minutes of baking time. Prepare the dough rectangles: Unroll both tubes of crescent dough and press along the perforations to seal so you have eight rectangles. Two crescent triangles make one rectangle; sealing prevents gaps where butter or filling could escape while baking. Brush with butter and sugar: Using a pastry brush or the back of a spoon, spread melted butter across each rectangle. Sprinkle each with about 1/2 to 3/4 tablespoon of the cinnamon sugar mixture so the dough is evenly coated; this creates a caramelized interior and crispy exterior. Roll and coil: From the long side, roll each rectangle into a tight or slightly loose log depending on how tall you want the danish. Pinch the seam to seal, then hold one end and coil the roll into a spiral, tucking the tail under to secure. Arrange and make room for filling: Place each coil on a baking sheet lined with parchment or lightly sprayed with nonstick spray, spacing them 1 to 1.5 inches apart. Gently press down the center of each coil to create a shallow well for the apple filling. Prepare the apple filling: Open the can of apple pie filling and use a knife to cut the apple slices into smaller, bite-sized chunks (this distributes the fruit more evenly). Spoon 2–3 tablespoons of filling into the center of each coil; avoid overfilling so juices do not spill onto the sheet. Top and bake: Sprinkle a pinch more cinnamon sugar over each filled coil and bake at 350 degrees F for 15–18 minutes, or until the pastry is golden brown and puffed. Look for deep golden edges and a set base to know they’re done. Make the glaze and finish: While the danishes bake, whisk together 1/2 cup powdered sugar, 1 teaspoon vanilla extract, and 3–4 teaspoons milk until smooth. Adjust milk to reach a thin drizzle consistency. Drizzle over warm danishes once they come out of the oven.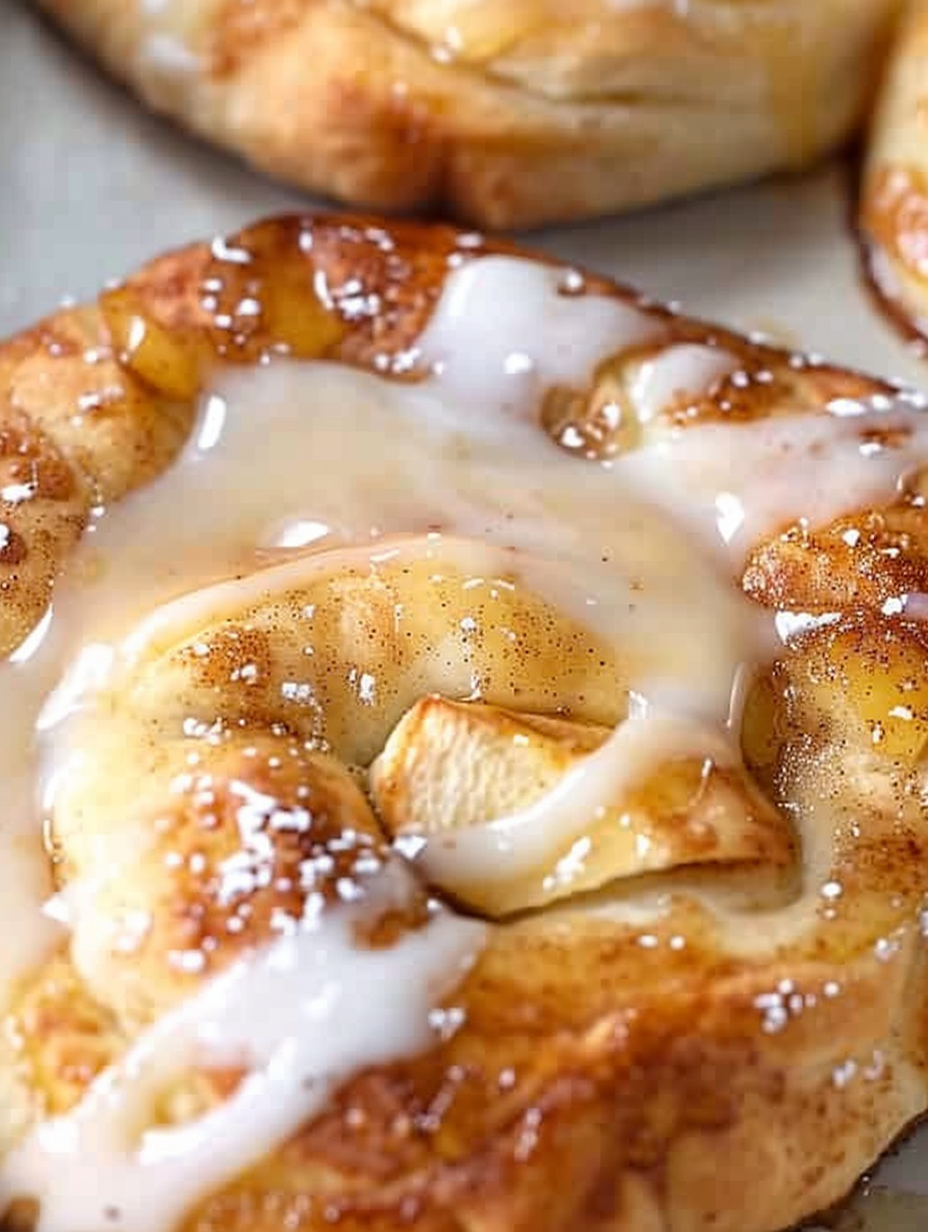
You Must Know
- These pastries are best served warm; the glaze will set as they cool but remains soft for several hours.
- Store leftovers in an airtight container at room temperature for up to 24 hours or refrigerate for up to 3 days. Reheat briefly in a 325 degrees F oven to re-crisp.
- They freeze well: freeze unbaked coils on a sheet, then transfer to a freezer bag for up to 3 months. Bake from frozen, adding 6–8 minutes to the bake time.
- Approximately 175 calories per danish; higher if you add extra butter or nuts.
My favorite thing about these danishes is how they transform simple store-bought ingredients into something that feels homemade and celebratory. I’ve made them for school mornings, office potlucks, and last-minute brunches; everyone thinks they’re fresh from a bakery, and I love that they’re so forgiving — a little extra filling or a looser coil still bakes up beautifully.
Storage Tips
To keep these danishes at peak quality, let them cool completely before storing. At room temperature, place them in a single layer in an airtight container for up to 24 hours. For longer storage, refrigerate up to 3 days — bring to room temperature or reheat at 325 degrees F for 6–8 minutes to refresh the pastry. If freezing, flash-freeze on a sheet tray until solid, then transfer to a freezer bag for up to 3 months. When baking from frozen, add a few extra minutes to ensure the center warms through.
Ingredient Substitutions
If you need swaps: use vegan crescent dough and a dairy-free butter alternative to make a dairy-free version (note: the texture will be slightly different). For gluten-free, use a certified gluten-free crescent dough if available, or make small hand-rolled pastries with a gluten-free puff pastry alternative. Swap the canned apple filling for homemade diced apples sautéed with 2 tablespoons sugar, 1 teaspoon cinnamon, and 1 tablespoon lemon juice until slightly softened — that will reduce added syrup and intensify fresh apple flavor.
Serving Suggestions
Serve these warm with a dusting of extra powdered sugar, a scoop of vanilla ice cream for dessert, or alongside a pot of strong coffee for breakfast. Garnish with thin strips of lemon zest for brightness or a sprinkling of chopped toasted pecans for crunch. They’re lovely on a brunch board with fruit, yogurt, and savory bites like quiche.
Cultural Background
While these danishes are a quick, Americanized take on classic filled pastries, the idea of coil-shaped or spiral pastries appears across many baking traditions — from European Danish pastries to Middle Eastern spirals. Using crescent dough is an American shortcut that captures the layered, buttery character of laminated dough without the time-consuming folding process, making bakery-style treats accessible at home.
Seasonal Adaptations
Adjust fillings by season: in summer, use canned peach or apricot filling and add a splash of almond extract to the glaze. In autumn, fold in a pinch of nutmeg and cloves to the cinnamon sugar and top with chopped toasted walnuts. For a winter holiday twist, stir 1/4 cup dried cranberries and 1 tablespoon orange zest into the apple filling.
Meal Prep Tips
Assemble coils the night before and refrigerate so you can bake fresh in the morning. If freezing for later, freeze assembled unbaked danishes on a sheet tray until solid, then pack in freezer bags. Thaw in the refrigerator overnight before baking or bake directly from frozen with slightly longer time. Store glaze separately and drizzle just before serving to preserve that glossy finish.
Success Stories
I once made a double batch for a community bake sale and people kept asking if they were from a local bakery. One neighbor said they reminded her of pastries her grandmother used to make, which made me smile — these simple crescents somehow carry that homemade nostalgia. Small changes I learned over time, like sealing seams and cutting apple slices smaller, made a big difference in consistent results.
These Easy Apple Danishes are an approachable, rewarding treat that prove impressive baking doesn’t have to be complicated. Try them for your next brunch or as a sweet afternoon pick-me-up — and don’t forget to warm them slightly before serving.
Pro Tips
Seal the crescent seams well to prevent butter and filling from leaking during baking.
Cut apple slices into smaller pieces so each danish gets evenly distributed fruit and avoids heavy wet centers.
Brush the dough with melted butter and sprinkle cinnamon sugar for a golden, slightly caramelized interior.
Bake on a middle rack and rotate the sheet once if your oven has hot spots for even browning.
Let the pastries cool slightly before drizzling so the glaze sets but still looks glossy.
This nourishing easy apple danishes recipe is sure to be a staple in your kitchen. Enjoy every moist, high protein slice — it is perfect for breakfast or as a wholesome snack any time.
FAQs about Recipes
Can I make these ahead and freeze them?
Yes. You can freeze unbaked assembled danishes on a sheet tray until firm, then transfer to a freezer bag for up to 3 months. Bake from frozen, adding 6–8 minutes to the bake time.
How do I get a smooth glaze?
Use a light drizzle of glaze; if it’s too thick add an extra teaspoon of milk until smooth. Warm danishes before drizzling for a glossy finish.
Tags
Easy Apple Danishes
This Easy Apple Danishes recipe makes perfectly juicy, tender, and flavorful steak every time! Serve with potatoes and a side salad for an unforgettable dinner in under 30 minutes.
Ingredients
Dough
Filling & Topping
Glaze
Instructions
Preheat oven
Preheat the oven to 350 degrees F (175 degrees C) and place a rack in the middle position.
Prepare dough rectangles
Unroll both tubes of crescent dough and press perforations to seal into 8 rectangles (two triangles per rectangle).
Brush with butter and sugar
Brush each rectangle with melted butter and sprinkle evenly with cinnamon sugar to coat the surface.
Roll and coil
Roll each rectangle from the long side, pinch the edge to seal, then hold one end and coil into a spiral, tucking the tail underneath.
Add filling
Place coils on a greased baking sheet, gently press a shallow well in the center, and spoon 2–3 tablespoons of chopped apple filling into each.
Bake
Bake at 350 degrees F for 15–18 minutes, until golden brown and puffed. Watch for deep golden edges as the doneness cue.
Glaze and serve
Whisk powdered sugar, vanilla, and milk until smooth. Drizzle over warm danishes and serve slightly warm.
Last Step: Please leave a rating and comment letting us know how you liked this recipe! This helps our business to thrive and continue providing free, high-quality recipes for you.
Nutrition
Did You Make This?
Leave a comment & rating below or tag
@feastinarecipe on social media!
Categories:
You might also like...

Lemon Chicken Orzo Soup
Cozy, bright, and ready fast, this Instant Pot lemon chicken orzo soup brings tender chicken, fresh veggies, and a sunny citrus finish.

50 Calorie Strawberry Cheesecakes
Feather-light mini cheesecakes with bright strawberry sauce, a tender biscuit-style base, and creamy filling. Just 47 calories each and irresistibly fresh.

Kahlua Chocolate Cheesecake Bites
Silky mini cheesecakes swirled with melted chocolate and a splash of Kahlua, nestled on Oreo crusts and crowned with fresh whipped cream.
Did You Make This?
Leave a comment & rating below or tag @feastinarecipe on social media!
Rate This Recipe
Share This Recipe
Enjoyed this recipe? Share it with friends and family, and don't forget to leave a review!
Comments (1)
This recipe looks amazing! Can't wait to try it.
Comments are stored locally in your browser. Server comments are displayed alongside your local comments.

Hi, I'm Sarah!
What's Popular

30-Minute Meals!
Join to receive our email series which contains a round-up of some of our quick and easy family favorite recipes.