
>>

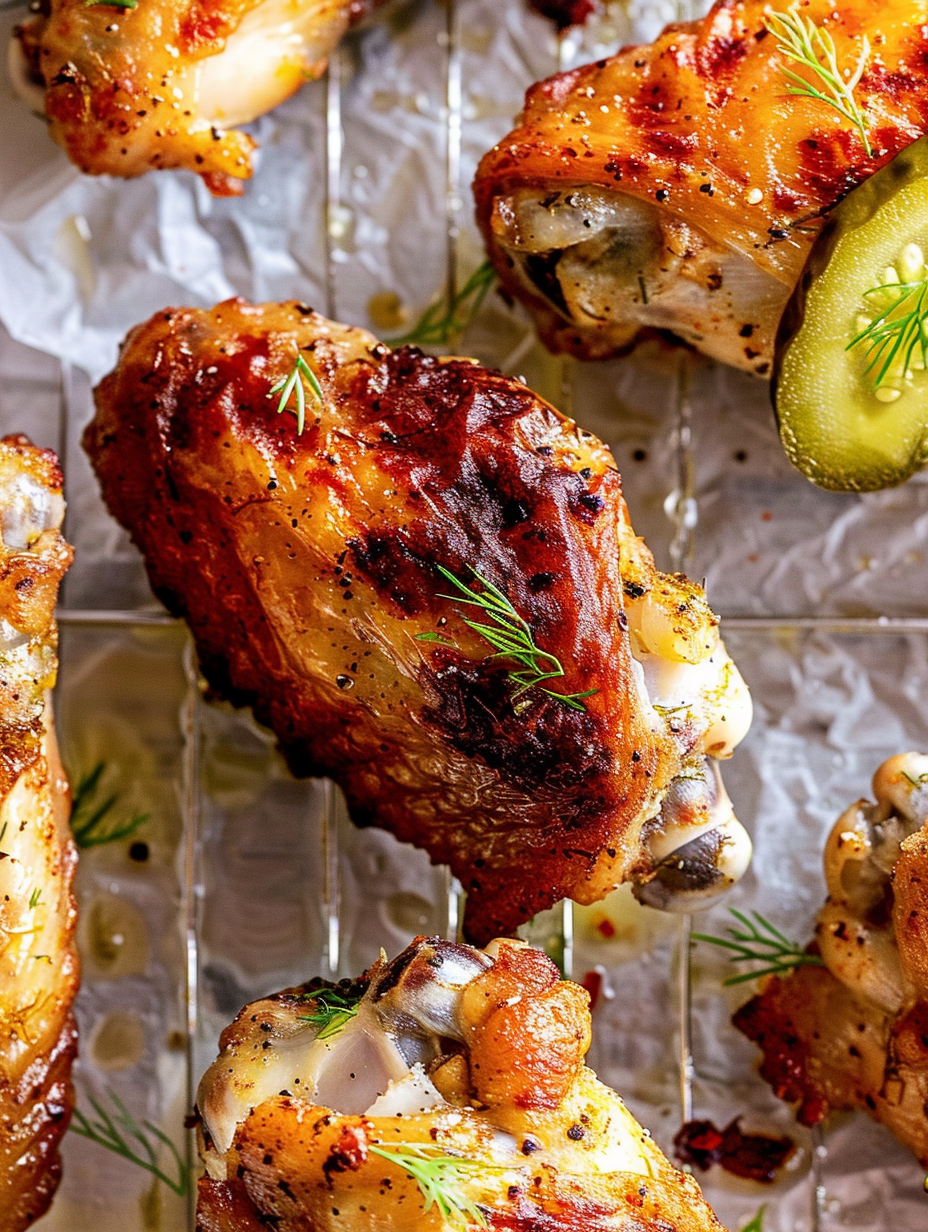
Juicy chicken wings soaked in dill pickle juice, dusted with a crisping dry rub and roasted until perfectly crisp. Tangy, savory, and ridiculously addictive.

This recipe for Dill Pickle Chicken Wings has been my go-to party appetizer whenever I want something that sparks conversation and disappears fast. I first discovered the magic of soaking wings in pickle brine at a summer cookout when a friend suggested using leftover pickle juice to tenderize chicken—what started as kitchen experimentation quickly became a favorite. The wings come out with a subtle tang that balances the savory, crunchy crust, and the aroma while they roast always makes everyone wander toward the kitchen.
What makes these wings special is the simple technique: a short brine in dill pickle juice followed by a quick toss in a baking powder–forward dry mix that promotes extra-crisp skin in the oven. There’s an interplay of briny acidity, a whisper of fresh dill, and toasty roasted chicken fat that makes each bite complex without a lot of fuss. I love serving these at casual gatherings—kids and grown-ups both reach for seconds—and they’ve earned a spot on our holiday appetizer board and on game day menus alike.
In my experience, these wings are the sort guests never forget. One holiday party my aunt asked for the recipe after sampling them for five minutes straight—she loved the briny pop and how the crisp exterior contrasted with the juicy meat. I’ve learned to watch the broiler closely during that final step; it’s the difference between perfect char and too-dark edges.
My favorite aspect is how approachable this technique is—no fancy equipment required and minimal hands-on time. Family and friends always comment on the tangy lift from the brine and how the skin manages to be both crisp and succulent. One game day I roasted three pans and they vanished in under 20 minutes; now I always make an extra batch.
Store cooled wings in an airtight container in the refrigerator for up to 3 days. For best texture, reheat in a 400°F oven on a wire rack set over a sheet pan for 8–12 minutes until the skin crisps up again. If freezing, freeze in a single layer first, then transfer to a freezer-safe bag to prevent clumping; thaw overnight in the fridge before reheating. Avoid microwaving if you care about crunch—microwaving will make the skin soggy.
If you don’t have dill pickle juice, substitute a mixture of 1 cup water, 1/4 cup white vinegar, 1 tablespoon dill relish brine, and 1 teaspoon sugar to mimic the flavor. For a dairy-free dipping sauce, mix vegan mayonnaise with minced dill and lemon juice. If fresh dill isn’t available, use 1/4 teaspoon dried dill in the brine and add a pinch more to the dry rub. Use avocado oil instead of olive oil for a higher smoke point if your oven tends to run hot.
Serve the wings on a large platter garnished with additional dill and lemon wedges for brightness. Offer dips like dill-ranch, blue cheese dressing, or a spicy sriracha-mayo to suit different tastes. These wings pair beautifully with crisp coleslaw, potato wedges, or a simple cucumber salad to echo the pickle notes. For a casual party, lay them on butcher paper with toothpicks and small ramekins of sauce for easy grabbing.
Pickle-brined chicken traces back to clever home-cooking techniques where nothing was wasted—leftover pickle juice was repurposed to add flavor and acidity to proteins. The modern popularity of tangy, pickle-forward snacks and sandwiches in American bar and diner culture inspired variations that pair brine’s acidity with fried or roasted textures. These wings reflect that American penchant for bold, briny flavors combined with crispy comfort-food textures.
In summer, serve these wings with fresh corn salad and chilled potato salad to create a light, picnic-style spread. In colder months, swap fresh dill for a rosemary-lemon rub to warm the palate and serve with roasted root vegetables. For holiday gatherings, double the batch and offer flavored brines—add a tablespoon of apple cider vinegar and 1/2 teaspoon mustard seeds for a festive twist.
Marinate wings in pickle juice up to 4 hours ahead—this can be done the night before. Keep the dry rub separate until just before you’re ready to roast so the baking powder remains active. Roast, cool, and store wings in meal-sized portions; when reheating, use a 425°F oven on a wire rack for about 10 minutes to revive crispness. Label containers with date and contents for easy grab-and-go hosting.
These wings combine simplicity and show-stopping flavor in equal measure. Whether you’re feeding a crowd or enjoying a cozy night in, the tangy, crispy results reward just a little planning. Make them once and you’ll see why they’re a repeat request at my table.
Pat wings completely dry after brining to ensure the baking powder can do its job for crisping.
Use aluminum-free baking powder to avoid a metallic taste and to get the best texture.
Watch the broiler carefully during the final step; it takes seconds to go from perfect char to burnt.
If your pickle juice is very salty, rinse the wings lightly and pat dry before applying the dry rub and reduce added salt.
This nourishing dill pickle chicken wings recipe is sure to be a staple in your kitchen. Enjoy every moist, high protein slice — it is perfect for breakfast or as a wholesome snack any time.
This Dill Pickle Chicken Wings recipe makes perfectly juicy, tender, and flavorful steak every time! Serve with potatoes and a side salad for an unforgettable dinner in under 30 minutes.
Combine wings, dill pickle juice, and fresh dill in a large bowl. Toss to coat, cover, and refrigerate for 2 to 4 hours. Avoid brining longer than 6 hours to prevent overly tart meat.
Preheat oven to 425°F. Drain brine and pat wings very dry with paper towels—dry skin is essential for crisping.
In a large bowl, toss wings with olive oil, garlic powder, baking powder (aluminum-free), salt, and black pepper until evenly coated.
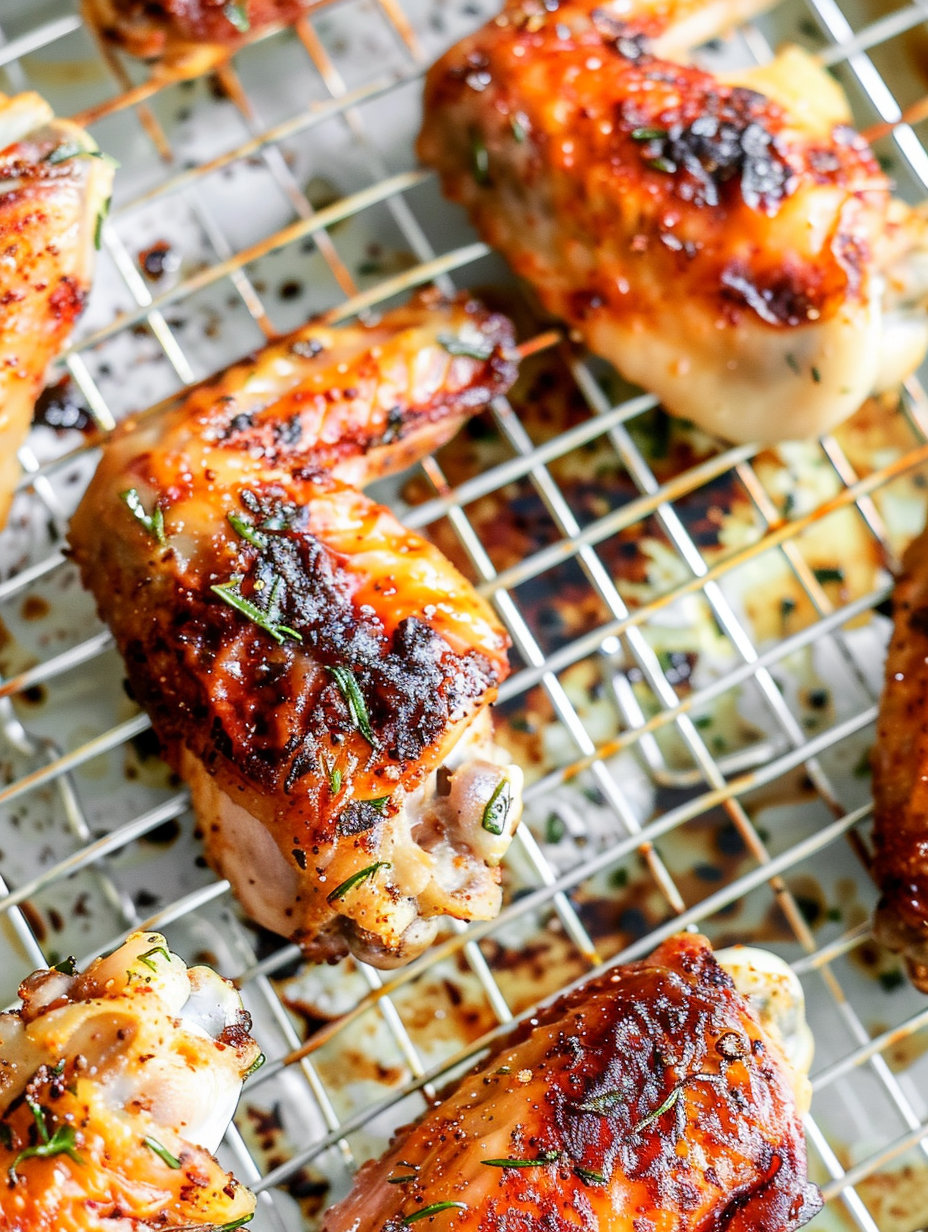
Place wings on a wire rack set over a sheet pan in a single layer. Bake for 30 minutes at 425°F, flipping halfway, until golden and juices run clear. Use a meat thermometer to check for at least 165°F.
Switch oven to high broil and broil wings 3–5 minutes until edges char and skin crisps. Watch constantly to avoid burning.
Let wings rest 3–5 minutes, garnish with dill, and serve with desired dipping sauce. Reheat in a hot oven to restore crunch if making ahead.
Last Step: Please leave a rating and comment letting us know how you liked this recipe! This helps our business to thrive and continue providing free, high-quality recipes for you.
Leave a comment & rating below or tag
@feastinarecipe on social media!

Cozy, bright, and ready fast, this Instant Pot lemon chicken orzo soup brings tender chicken, fresh veggies, and a sunny citrus finish.

Feather-light mini cheesecakes with bright strawberry sauce, a tender biscuit-style base, and creamy filling. Just 47 calories each and irresistibly fresh.

Silky mini cheesecakes swirled with melted chocolate and a splash of Kahlua, nestled on Oreo crusts and crowned with fresh whipped cream.
Leave a comment & rating below or tag @feastinarecipe on social media!
Enjoyed this recipe? Share it with friends and family, and don't forget to leave a review!
This recipe looks amazing! Can't wait to try it.
Comments are stored locally in your browser. Server comments are displayed alongside your local comments.

Join to receive our email series which contains a round-up of some of our quick and easy family favorite recipes.
