
>>

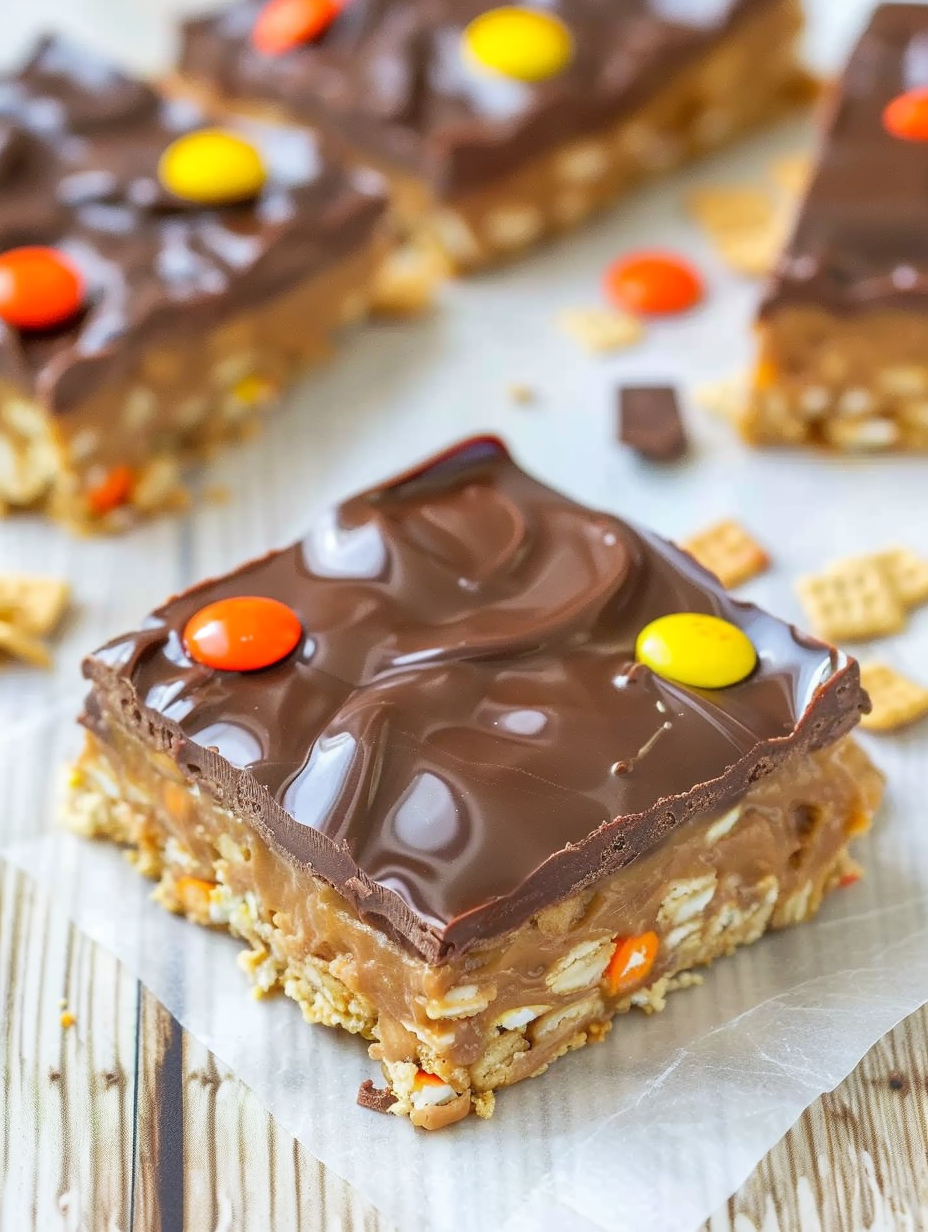
No-bake, chewy chocolate peanut butter candy bars loaded with bold peanut butter flavor, a crisp cereal base, and a generous chocolate-peanut butter topping studded with candy pieces.

This recipe is all about indulgence with the simplicity of no-bake assembly. These Chocolate Peanut Butter Candy Bars deliver bold peanut butter flavor, a dense and chewy cereal base, and a glossy chocolate-peanut butter topping studded with your favorite candy pieces. I discovered this combination on a rainy afternoon when I wanted something decadent that required no oven time; the result quickly became a go-to for potlucks, school bake sales, and last-minute dessert needs. The texture is wonderfully soft but firm enough to lift cleanly from the pan, and the flavor balance between sweet chocolate and salty peanut butter is reliably addictive.
What makes these bars special for me is how forgiving they are. The base comes together in one warm bowl and is pressed into the pan in minutes. The topping melts and spreads beautifully, and adding bite-sized candies on top gives each square a playful crunch and extra bursts of flavor. They map perfectly to rainy-day nostalgia and childhood candy-bar cravings, and they travel well — a single pan disappears at every gathering I bring them to.
In my family these became an instant classic; everyone has an opinion about the best candy combination for the top and my kids love helping press the cereal base into the pan. I learned early on that being generous with the candy pieces makes them disappear fastest — my neighbor told me they taste like a deluxe candy bar you can slice at home.

My favorite part is how customizable the final layer is — I once topped them with a mix of Rolos and chopped Butterfinger cups for a salty-sweet crunch that stole the show at a neighborhood potluck. Watching friends debate the best candy combo became part of the fun, and I often make two pans with different toppings so everyone gets to sample multiple variations.
Store bars in an airtight container at room temperature for up to one week. Place parchment between layers to prevent sticking. For longer storage refrigerate up to one month — bring to room temperature before serving to avoid a cold, firm peanut butter bite. For long-term storage freeze tightly wrapped in foil then placed in a freezer-safe bag for up to six months; thaw overnight in the refrigerator or at room temperature before slicing. Avoid frequent temperature swings which can cause the chocolate to bloom (a grayish film) — purely cosmetic but avoidable by keeping the bars covered.
If you need gluten-free bars, replace Special K with a gluten-free crispy rice or corn cereal in similar volume. Swap light corn syrup for light-colored golden syrup in equal measure if preferred, though corn syrup yields the classic chewy texture. For a dairy-free version use dairy-free chocolate chips and ensure candy bits are dairy-free; keep in mind flavor and texture will vary. Crunchy peanut butter can be used for more texture but will change the chewiness slightly. If you prefer less sweetness, reduce granulated sugar to 1/3 cup and slightly increase brown sugar for depth.
Cut into 9 generous squares for a substantial treat; you can slice into 12–16 pieces for smaller portions if serving a crowd. Serve with cold milk or coffee to balance richness. Garnish with a light sprinkle of flaky sea salt on each bar for a salted-sweet contrast. For party platters alternate plain and candy-studded bars for visual appeal. These are excellent wrapped individually for bake-sale packaging or holiday goodie boxes.
Celebrate holidays by swapping candy pieces: use peanut butter cup minis for Valentine’s Day, chopped peppermint bark or peppermint candies at Christmas, or chopped Halloween bars in October. For summer gatherings keep them at room temperature in a cool spot or use shaded coolers to avoid softening. Add festive sprinkles or drizzle white chocolate over the top for seasonal colors. You can also layer a thin salted caramel drizzle before placing candy pieces for a richer holiday version.
For make-ahead convenience, prepare the base and topping, then assemble and let set the day before serving. Cut only when fully set and store in a single layer or with parchment between layers. If transporting, keep in a shallow cooler to prevent melting. These bars freeze well individually wrapped — thawing in the fridge overnight helps retain texture and sheen of the chocolate top.
Readers and friends often tell me these are the first dessert to disappear at gatherings. A neighbor used them as a fundraiser item and sold out within an hour; another friend reported her picky-eater son loved them because the cereal gave a familiar texture. The most memorable moment was when I made a double batch for a community bake sale — people came back asking which candies I used and requested the recipe on the spot.
These Candy Bars are an enduring favorite because they deliver big flavor without fuss. Make a pan your own by choosing the candy pieces you love and enjoy sharing — they consistently bring smiles and disappear quickly.
Use jarred creamy peanut butter (Jif or Skippy) rather than natural to ensure the bars set correctly.
Press the cereal layer somewhat firmly into the pan so slices hold together when cut.
Allow at least 4 hours at room temperature for the topping to set fully to avoid sticky slices.
Heat the chocolate in short bursts and stir frequently to prevent scorching.
Pack bars with parchment between layers for easy storage and transport.
This nourishing chocolate peanut butter candy bars recipe is sure to be a staple in your kitchen. Enjoy every moist, high protein slice — it is perfect for breakfast or as a wholesome snack any time.
Yes. Store airtight at room temperature up to 1 week, in the refrigerator up to 1 month, or freeze up to 6 months.
Use a gluten-free crispy cereal and dairy-free chocolate to make a gluten-free or dairy-free version; results may vary slightly in texture.
This Chocolate Peanut Butter Candy Bars recipe makes perfectly juicy, tender, and flavorful steak every time! Serve with potatoes and a side salad for an unforgettable dinner in under 30 minutes.
Line an 8x8-inch square pan with aluminum foil with overhang and spray lightly with nonstick cooking spray. This makes lifting and slicing easier.
In a large microwave-safe bowl combine peanut butter, corn syrup, granulated sugar, and light brown sugar. Microwave on high for 1 minute, stir, microwave 1 more minute, stir, then microwave 30 seconds more. Stir until as smooth as possible and add vanilla.
Stir in Special K cereal until evenly coated and immediately press the mixture into the prepared pan with a spatula, packing down somewhat firmly to ensure the base holds together.
In a medium microwave-safe bowl, combine chocolate chips and 1/4 cup peanut butter. Microwave 30 seconds, stir, then heat in 20–30 second increments until melted and smooth, about 1 1/2–2 minutes total.
Pour the melted topping evenly over the cereal layer, smooth lightly, then scatter bite-sized candy pieces over the top and press gently to adhere. Cover and allow to cool at room temperature at least 4 hours until fully set.
Last Step: Please leave a rating and comment letting us know how you liked this recipe! This helps our business to thrive and continue providing free, high-quality recipes for you.
Leave a comment & rating below or tag
@feastinarecipe on social media!

Cozy, bright, and ready fast, this Instant Pot lemon chicken orzo soup brings tender chicken, fresh veggies, and a sunny citrus finish.

Feather-light mini cheesecakes with bright strawberry sauce, a tender biscuit-style base, and creamy filling. Just 47 calories each and irresistibly fresh.

Silky mini cheesecakes swirled with melted chocolate and a splash of Kahlua, nestled on Oreo crusts and crowned with fresh whipped cream.
Leave a comment & rating below or tag @feastinarecipe on social media!
Enjoyed this recipe? Share it with friends and family, and don't forget to leave a review!
This recipe looks amazing! Can't wait to try it.
Comments are stored locally in your browser. Server comments are displayed alongside your local comments.

Join to receive our email series which contains a round-up of some of our quick and easy family favorite recipes.
