
>>

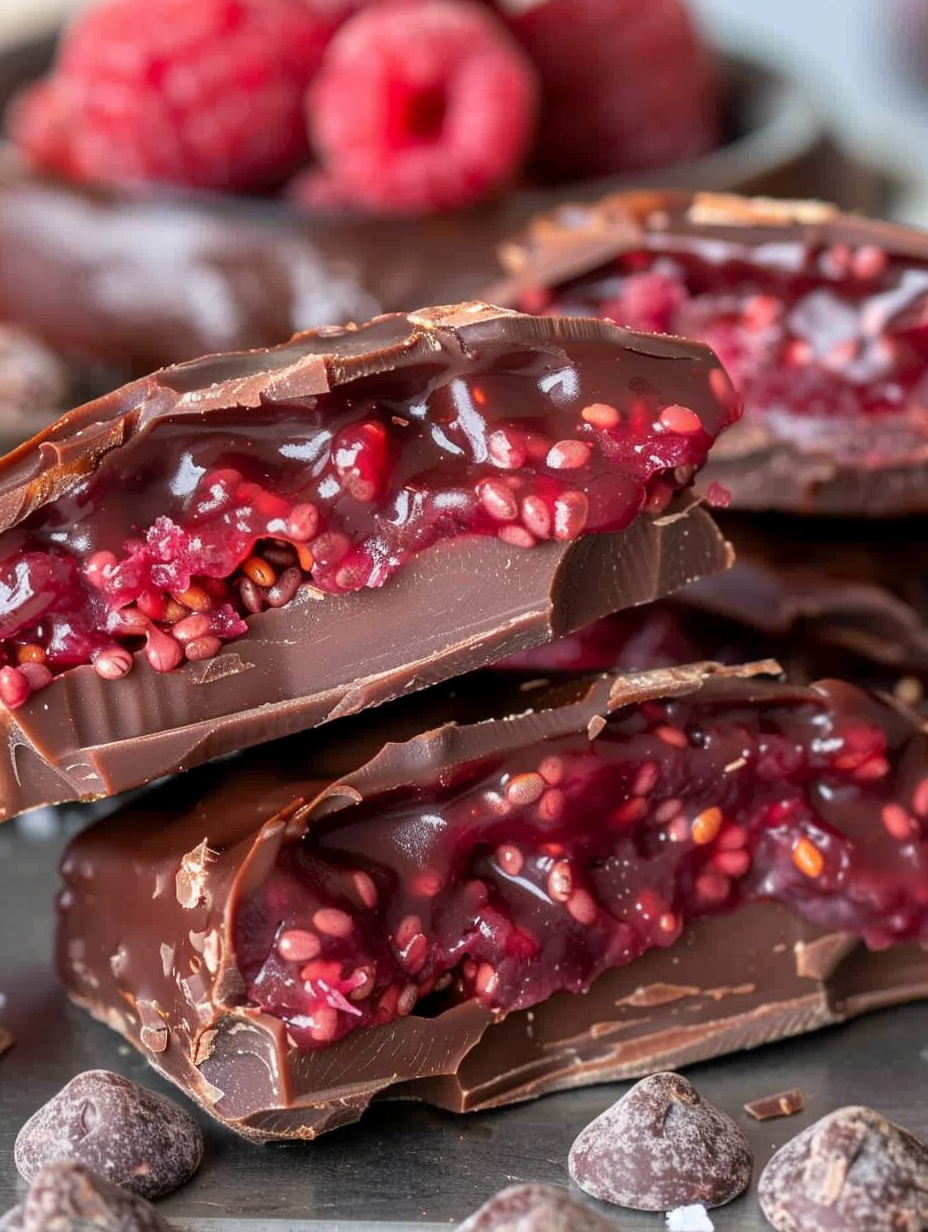
Tiny frozen raspberry jam clusters dipped in dark chocolate for a sweet, healthy treat that is simple to make and perfect for snacking or dessert.

This Chocolate Jam Bites recipe is one of those small discoveries that became a staple in my kitchen almost overnight. I first made these on a humid summer afternoon when I wanted something cold, sweet, and a little healthier than ice cream. The result was exactly what I hoped for: bright raspberry flavor, a jammy texture set by chia seeds, and a satisfying snap from dark chocolate. They are sweet without being overbearing, and the contrast between the cool fruit center and the slightly bitter chocolate is delightful.
Since that first batch I've made them for picnics, to finish dinner parties, and as a quick frozen treat for my kids after school. They come together in minutes and then wait patiently in the freezer, which makes them ideal for busy days when you want a homemade treat without spending a lot of hands-on time. What I love most is how adaptable they are: swap berries, change the chocolate, or skip the sweetener for a lower-sugar version. These bites are proof that small, thoughtful ingredients can make a memorable dessert.
My family always asks for these at summer barbecues. The first time I served them at a neighborhood potluck, they were the last plate on the table. People appreciated the small burst of fresh fruit balanced by the chocolate. I especially enjoy how the recipe lets the raspberry shine while the chocolate adds depth and texture without overwhelming the fruit.
My favorite part is how these feel like a grown-up candy. The slight tartness of the raspberry pairs with dark chocolate in a way that is both nostalgic and refined. Guests often ask if they were homemade, and I love telling the story of how a simple pantry experiment turned into a new go-to treat.
Keep the bites frozen in a single layer on a tray for the first hour so they do not stick together. After they are fully set, transfer them to an airtight container lined with parchment or to a freezer-safe resealable bag, separating layers with parchment paper. Properly stored, they will maintain quality for up to three months. When you want to serve, place a small portion in the refrigerator for 10 to 15 minutes or at room temperature for 2 to 3 minutes; this softens the center slightly without melting the chocolate.
If raspberries are not available, mashed strawberries, blackberries, or a mix of berries work well. For a no-sugar-added version, skip the maple syrup and increase the berries slightly to compensate; the natural fruit sugars will still give sweetness. Swap chia seeds for 1 tablespoon of ground flax seeds, though flax will have a slightly grittier texture. Choose a higher-cacao chocolate for less sweetness or a milk chocolate for a more dessert-like treat. Use coconut oil alternatives like a neutral-tasting oil sparingly if you prefer not to use coconut.
Plate these on a small dessert dish with a few fresh raspberries and a sprig of mint for color. They are lovely alongside a cup of espresso or a glass of dessert wine. For a brunch spread, serve them with Greek yogurt and granola so guests can enjoy a bite as a sweet finish. For parties, arrange them in mini paper liners on a platter and add a dusting of finely grated chocolate for a professional touch.

These little bites riff on classic fruit-and-chocolate pairings common in many cuisines, from European chocolate-dipped strawberries to Mediterranean preserves. Chia seeds as a gelling agent are a relatively modern pantry addition that borrows from South American tradition, where chia has long been used for nutrition. Combining the jammy fruit with chocolate is a contemporary, health-conscious take on chocolate-covered fruit that fits into both modern snacking and nostalgic dessert traditions.
Summer calls for ripe fresh raspberries to make the most of their brightness. In fall or winter, use thawed frozen berries and increase the chia by a little if the fruit is particularly watery. For holiday gatherings, add a pinch of warm spices like cinnamon or cardamom to the jam. For spring, try a lemon zest addition to brighten the flavor. You can also make a larger tray for outdoor events and let guests pick their favorites.
Make a double batch and keep several containers in the freezer so you always have a portioned treat on hand. Freeze the scooped jam on a tray first, then transfer to labeled bags to save space. If you are meal prepping desserts for a week of lunches, pack a couple of bites alongside an afternoon snack to enjoy after a meal. They also travel well in a cooler for picnics or beach days.
These Chocolate Jam Bites are small, thoughtful, and endlessly adaptable. Whether you make them for a party, a snack, or an after-dinner treat, they offer balanced flavor and simple preparation. Give them a try and make them your own with different berries or chocolate types. Enjoy the little moments of homemade sweetness.
Use slightly thawed frozen raspberries if fresh are not available; mash and drain any excess liquid before adding chia.
Chill your baking sheet briefly to help clusters freeze faster in warm kitchens.
If the melted chocolate thickens while dipping, warm it gently for 10 seconds in the microwave and stir; avoid overheating.
This nourishing chocolate jam bites recipe is sure to be a staple in your kitchen. Enjoy every moist, high protein slice — it is perfect for breakfast or as a wholesome snack any time.
Store in an airtight container in the freezer for up to 3 months. Thaw a couple minutes at room temperature before eating if you prefer a softer center.
Yes. Use a vegan-certified dark chocolate and maple syrup instead of honey to make them vegan.
This Chocolate Jam Bites recipe makes perfectly juicy, tender, and flavorful steak every time! Serve with potatoes and a side salad for an unforgettable dinner in under 30 minutes.
Line a baking sheet with parchment paper and make sure it fits in the freezer. This gives the clusters a cold surface to freeze quickly.
Mash raspberries in a bowl until mostly smooth. Stir in chia seeds and maple syrup or honey. Let sit 5 to 10 minutes until thickened and scoopable.
Scoop about 2 tablespoons per cluster onto the prepared sheet with 2 inches spacing. Freeze for 60 minutes or until solid.
Melt chocolate chips with coconut oil in 30-second bursts in the microwave or in a double boiler until smooth and glossy. Stir often to prevent burning.
Dip each frozen jam cluster in the melted chocolate, tap off excess, place back on the sheet, and sprinkle with flaky sea salt. Freeze 10 minutes to set.
Transfer set bites to an airtight container and keep frozen. Serve directly from the freezer or let sit a couple minutes at room temperature to soften slightly.
Last Step: Please leave a rating and comment letting us know how you liked this recipe! This helps our business to thrive and continue providing free, high-quality recipes for you.
Leave a comment & rating below or tag
@feastinarecipe on social media!

Cozy, bright, and ready fast, this Instant Pot lemon chicken orzo soup brings tender chicken, fresh veggies, and a sunny citrus finish.

Feather-light mini cheesecakes with bright strawberry sauce, a tender biscuit-style base, and creamy filling. Just 47 calories each and irresistibly fresh.

Silky mini cheesecakes swirled with melted chocolate and a splash of Kahlua, nestled on Oreo crusts and crowned with fresh whipped cream.
Leave a comment & rating below or tag @feastinarecipe on social media!
Enjoyed this recipe? Share it with friends and family, and don't forget to leave a review!
This recipe looks amazing! Can't wait to try it.
Comments are stored locally in your browser. Server comments are displayed alongside your local comments.

Join to receive our email series which contains a round-up of some of our quick and easy family favorite recipes.
