
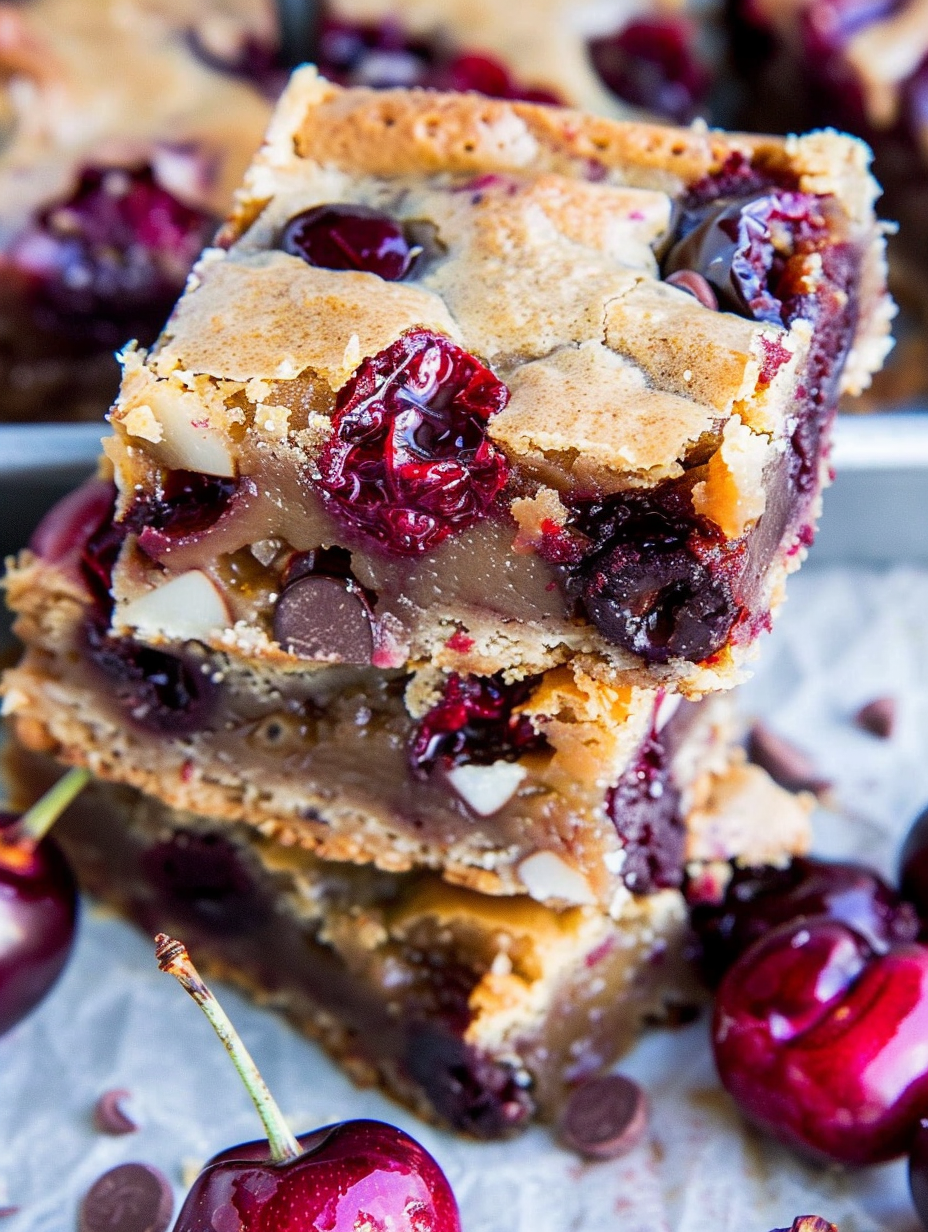
Chocolate Chip Cherry Bars

A reliable blondie base studded with juicy cherries and semi-sweet chips — tender, chewy, and perfect for summer or year-round baking.
This recipe for Chocolate Chip Cherry Bars started as a small experiment with pantry staples and a bag of cherries and became an instant favorite in my kitchen. I discovered this combination one summer afternoon when my fridge was full of cherries and I wanted something that showcased their sweet-tart flavor without a complicated crust or fuss. The blondie-style base gives these bars a tender, buttery chew, while the cherries add bright pockets of juicy flavor and the chocolate chips provide melty richness. It is a dessert that always pleases a crowd and one I reach for when I want something quick, comforting, and slightly nostalgic.
The texture is where these bars shine: a slightly crisp edge, a soft and chewy interior, and big, fruity bites of cherry that burst when you chew. I usually keep some frozen cherries on hand so this is a year-round treat; if cherries are in season, you will notice a dramatic difference in flavor and juiciness. Friends have described these bars as somewhere between a blondie and a fruit-forward brownie, and family members have asked me to bake them for special occasions simply because people always ask for seconds.
Why You'll Love This Recipe
- Ready quickly with just 10 minutes of active preparation and about 30 minutes of baking, so it works well for last-minute dessert plans or an afternoon bake with kids.
- Uses pantry staples and a single bowl for mixing, which minimizes cleanup and keeps the process approachable for novice bakers.
- Flexible fruit option: fresh or frozen cherries work well, and you can swap in other stone fruit or berries depending on season and preference.
- Make-ahead friendly: you can bake a day in advance and store at room temperature, or freeze leftovers for up to 3 months for grab-and-go treats.
- Kid-friendly and crowd-pleasing: the chocolate chips make these irresistible while the cherry pieces keep them from being too sweet or cloying.
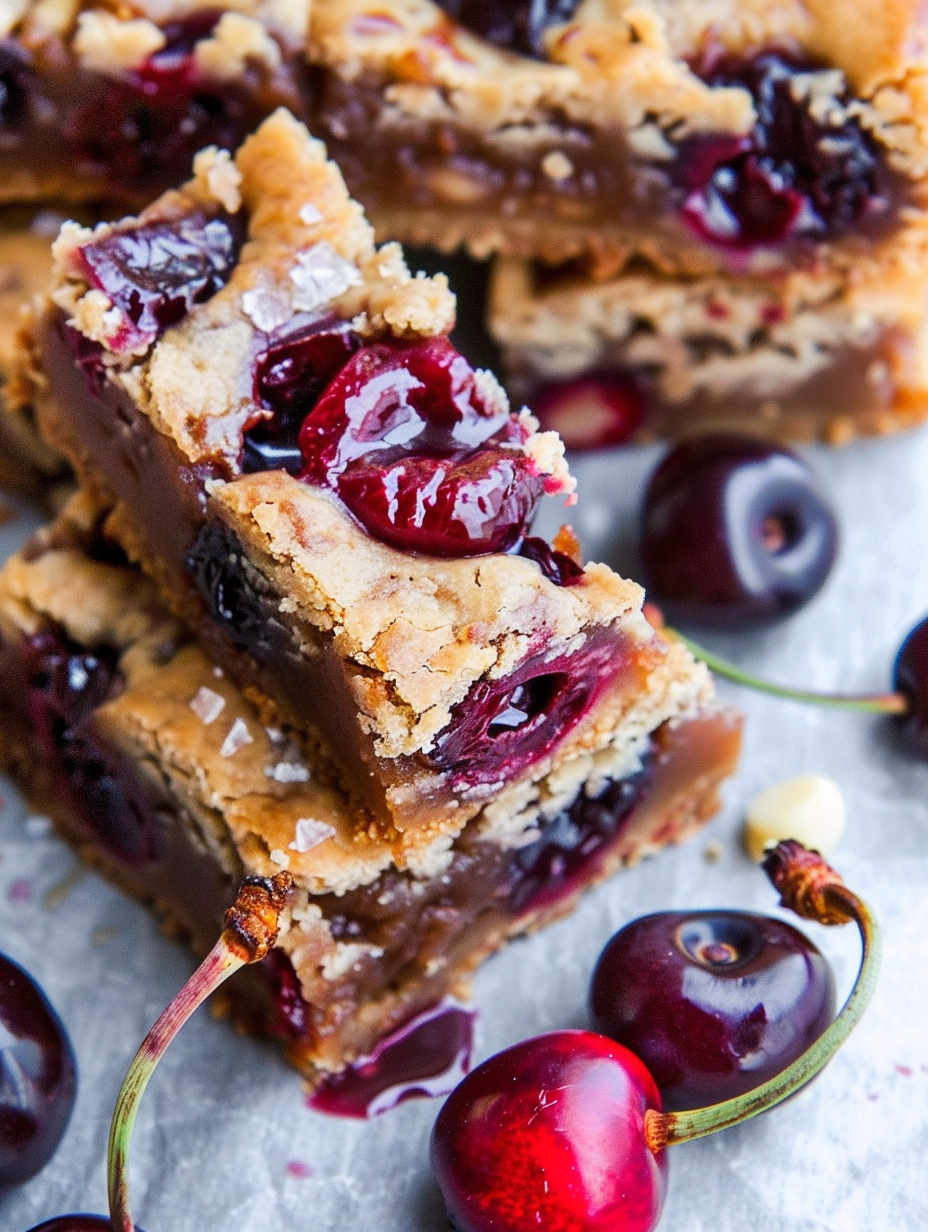
- Easy to customize: add toasted nuts, a sprinkle of coarse sea salt, or white chocolate chips to change the profile.
I often bake a pan when cherries are abundant and share the bars with neighbors. The memory of delivering a warm pan to an elderly neighbor who said they tasted like a childhood treat is one of my favorites. For weeknight treats, these come together fast and feel special without much fuss.
Ingredients
- Unsalted butter, 1/2 cup (1 stick), melted: Using unsalted allows you to control the salt level. I prefer European-style butter when I can find it for a richer flavor, but regular unsalted butter is fine.
- Light brown sugar, 1 cup, packed: Brown sugar adds moisture and a subtle caramel note that complements cherries. Pack it firmly into the measuring cup for accurate sweetness.
- Large egg, 1: Room temperature eggs incorporate more evenly and give a tender crumb.
- Vanilla extract, 2 teaspoons: Pure vanilla adds depth; paste or extract both work.
- All-purpose flour, 1 cup: Spoon and level for accuracy. If you substitute with a cup-for-cup gluten-free blend, expect a slightly different texture.
- Salt, 1/4 teaspoon, optional: A small pinch sharpens flavors; leave it out if using salted butter or if you prefer less salt.
- Semi-sweet chocolate chips, 3/4 to 1 cup: I like 3/4 cup for a balanced fruit-to-chocolate ratio, 1 cup if you want it extra chocolatey. Ghirardelli or Guittard chips hold up well.
- Cherries, 1 cup, fresh or frozen: I keep frozen pitted cherries for convenience. If using fresh, rinse, dry, and pit them; I prefer leaving them whole for juicy bites.
Instructions
Prepare the pan and oven: Preheat the oven to 350 degrees Fahrenheit. Line an 8-by-8-inch baking pan with aluminum foil, leaving an overhang to lift the bars out later. Lightly spray the foil with cooking spray or brush with melted butter so the bars release easily. Melt the butter and combine with sugar: In a medium microwave-safe bowl, melt the butter for about 60 seconds, stirring halfway. Add the packed brown sugar to the warm butter and stir until glossy and mostly dissolved; this step helps create a chewy texture. Add egg and vanilla: Whisk the egg into the butter-sugar mixture until smooth, then stir in the vanilla. The mixture should be cohesive and slightly shiny. If the butter was too hot, allow it to cool briefly so the egg does not scramble. Fold in flour and salt: Add the flour and salt and gently fold until just combined. Avoid overmixing to keep the bars tender; a few streaks of flour are fine. Overworking develops gluten and can make the bars tough. Add chocolate and cherries: Fold in the chocolate chips and cherries. If using frozen cherries, there is no need to thaw; fold them in straight from the freezer to minimize extra moisture in the batter. Pour the batter into the prepared pan and smooth the top with a spatula or offset knife. Bake and test for doneness: Bake for 27 to 32 minutes, depending on your oven and the moisture of the fruit. Look for edges that pull away slightly from the pan and a center that is set but still slightly soft. A toothpick may not come out completely clean because of chocolate and juicy fruit; that is okay if the center springs back lightly when touched. Cool before slicing: Allow the bars to cool for at least 1 hour in the pan to set. Use the foil overhang to lift the slab out, then slice into nine even bars. Chilling briefly makes cleaner slices if you prefer neat presentation.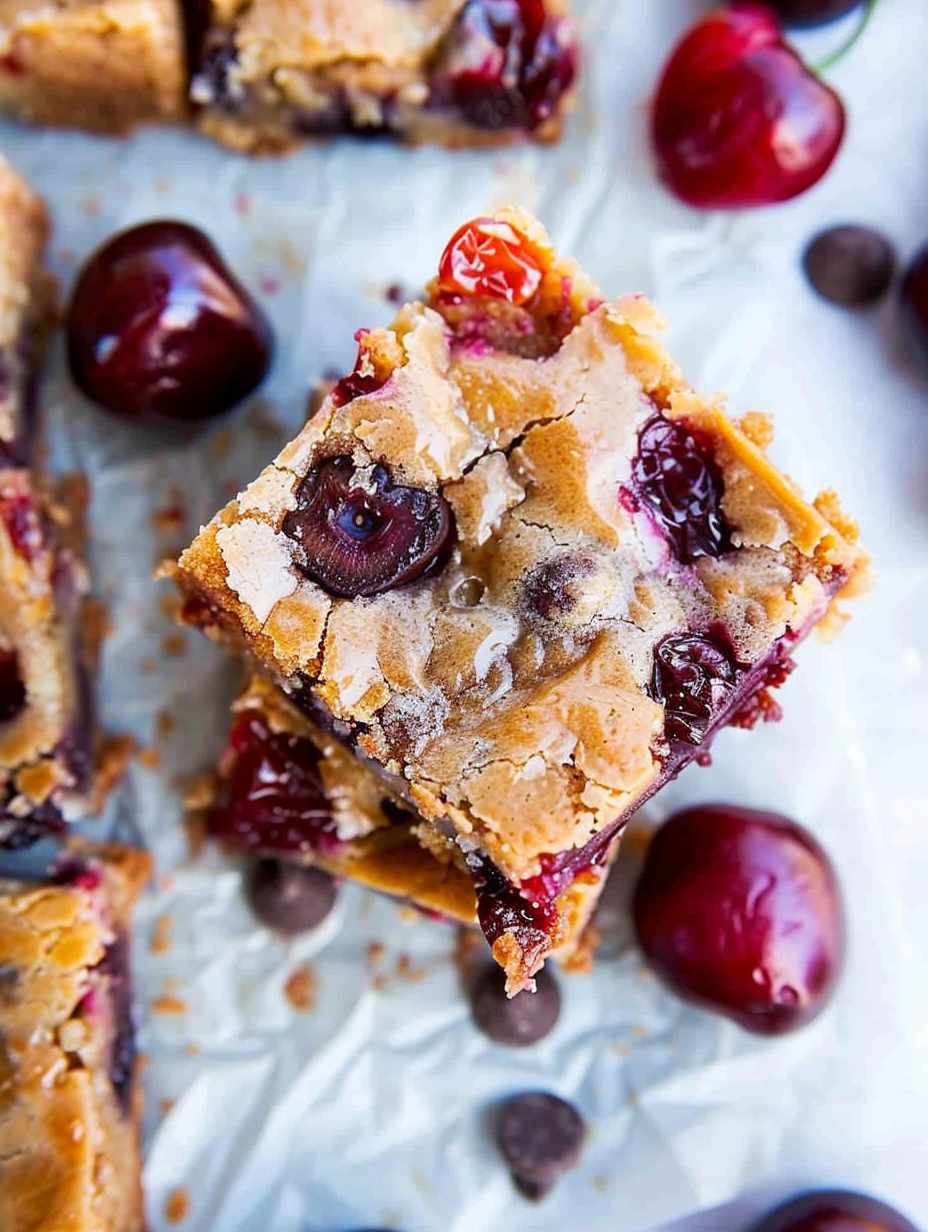
You Must Know
- Nutrition per serving is about 309 calories, making these an indulgent treat rather than a light snack; store at room temperature for up to one week or freeze for up to three months.
- Fruit moisture affects baking time: very juicy fruit increases bake time and can make the center seem underbaked if not accounted for.
- Using frozen cherries works well and often results in more consistent texture because they are less likely to release extra juice during mixing.
- These bars are high in sugar and fat, so keep them covered at room temperature to maintain chewiness; refrigeration will firm them up and change the texture slightly.
My favorite part about these bars is how people react to the first bite. The combination of buttery blondie and bright cherry always prompts a surprised happy noise before they ask for another piece. They travel well to potlucks and always seem to disappear first from dessert tables.
Storage Tips
Store cooled bars in an airtight container at room temperature for up to one week. If you prefer a firmer texture, refrigerate for up to seven days. To freeze, wrap the cooled slab in plastic wrap and then foil, or slice and arrange bars in a single layer separated by parchment paper in a freezer-safe container for up to three months. Reheat thawed bars in a warm oven for a few minutes or microwave briefly to restore softness.
Ingredient Substitutions
Swap the semi-sweet chips for dark chocolate to balance extra-sweet fruit or use white chocolate for a sweeter, creamier profile. Replace the all-purpose flour with a cup-for-cup gluten-free blend, noting that texture will be slightly different. Use coconut oil instead of butter for a dairy-free option, but reduce the amount slightly and be aware the flavor and texture will change.
Serving Suggestions
Serve warm with a scoop of vanilla ice cream or a dollop of lightly whipped cream for a classic dessert pairing. For brunch, top with a dusting of powdered sugar and serve alongside coffee or tea. Garnish with a few fresh halved cherries and a sprinkle of flaky sea salt for a bakery-style presentation.
Cultural Background
Blondies are the butterscotch-scented cousin of brownies, rooted in American baking traditions that favor simple, comforting tray bakes. Adding fresh fruit is a modern twist that draws on seasonal American fruit desserts, blending the chew of classic blondies with the bright acidity of stone fruit. This combination reflects a longstanding tendency to adapt familiar baked goods to seasonal produce.
Seasonal Adaptations
In summer use fresh sweet cherries or ripe peaches for a lighter profile. In late summer or fall incorporate plums or nectarines. In winter try frozen mixed berries to keep the dessert bright. Add a pinch of cinnamon and toasted almonds for autumnal warmth, or a touch of lemon zest in spring for brightness.
Meal Prep Tips
Double the batch and freeze half for later. Bake in two 8-by-8-inch pans and refrigerate one pan to slice that week while freezing the other. Pack single portions in reusable containers for lunches or snacks. Warm briefly before serving to revive the fresh-baked experience.
These bars are simple to make yet feel special, and I hope you find as much joy in making and sharing them as my family and neighbors have. Treat them as a canvas for seasonal fruit and your favorite chocolate and make them your own.
Pro Tips
Use frozen cherries to avoid extra moisture from fresh fruit and to keep the batter from becoming too wet.
Do not overmix after adding the flour; stop as soon as the batter comes together to keep the bars tender.
Allow the bars to cool completely before slicing for cleaner edges, or refrigerate briefly to make slicing easier.
This nourishing chocolate chip cherry bars recipe is sure to be a staple in your kitchen. Enjoy every moist, high protein slice — it is perfect for breakfast or as a wholesome snack any time.
FAQs about Recipes
Can I use frozen cherries?
Yes. You can use frozen pitted cherries straight from the freezer; fold them in frozen to minimize extra moisture and increase bake time slightly if needed.
How long do these bars keep?
Store cooled bars in an airtight container at room temperature for up to one week, refrigerate for a firmer texture, or freeze for up to three months wrapped well.
Tags
Chocolate Chip Cherry Bars
This Chocolate Chip Cherry Bars recipe makes perfectly juicy, tender, and flavorful steak every time! Serve with potatoes and a side salad for an unforgettable dinner in under 30 minutes.
Instructions
Preheat and prepare pan
Preheat oven to 350 degrees Fahrenheit. Line an 8-by-8-inch pan with aluminum foil, leaving an overhang, and spray or brush with butter.
Melt butter and combine with sugar
In a microwave-safe bowl, melt butter about 60 seconds, then stir in packed light brown sugar until glossy and mostly dissolved.
Add egg and vanilla
Whisk in the large egg and vanilla until smooth; allow the butter to cool slightly before adding the egg to prevent scrambling.
Fold in dry ingredients
Add the flour and optional salt, folding gently until just combined. Avoid overmixing to keep the texture tender.
Add chocolate chips and cherries
Fold in the semi-sweet chips and cherries. If using frozen cherries, fold them in frozen to reduce extra moisture in the batter.
Bake and cool
Bake 27 to 32 minutes until edges pull away and center is set but slightly soft. Cool for at least 1 hour before slicing.
Last Step: Please leave a rating and comment letting us know how you liked this recipe! This helps our business to thrive and continue providing free, high-quality recipes for you.
Nutrition
Did You Make This?
Leave a comment & rating below or tag
@feastinarecipe on social media!
Categories:
You might also like...

Lemon Chicken Orzo Soup
Cozy, bright, and ready fast, this Instant Pot lemon chicken orzo soup brings tender chicken, fresh veggies, and a sunny citrus finish.

50 Calorie Strawberry Cheesecakes
Feather-light mini cheesecakes with bright strawberry sauce, a tender biscuit-style base, and creamy filling. Just 47 calories each and irresistibly fresh.

Kahlua Chocolate Cheesecake Bites
Silky mini cheesecakes swirled with melted chocolate and a splash of Kahlua, nestled on Oreo crusts and crowned with fresh whipped cream.
Did You Make This?
Leave a comment & rating below or tag @feastinarecipe on social media!
Rate This Recipe
Share This Recipe
Enjoyed this recipe? Share it with friends and family, and don't forget to leave a review!
Comments (1)
This recipe looks amazing! Can't wait to try it.
Comments are stored locally in your browser. Server comments are displayed alongside your local comments.

Hi, I'm Sarah!
What's Popular

30-Minute Meals!
Join to receive our email series which contains a round-up of some of our quick and easy family favorite recipes.