
>>

Soft and chewy chocolate cookies finished with a glossy cherry center and a silky chocolate glaze. A nostalgic bake with modern technique for a perfect holiday cookie.
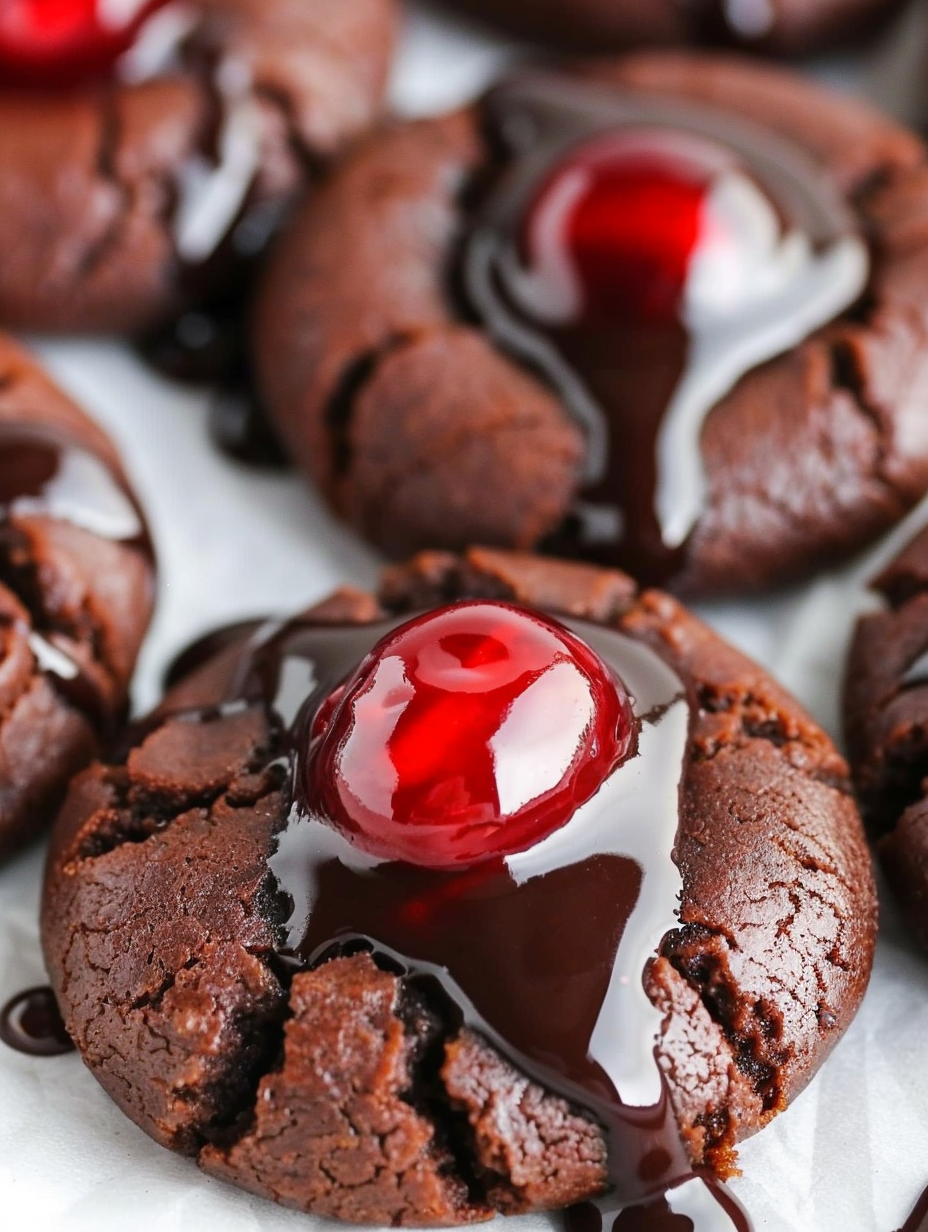
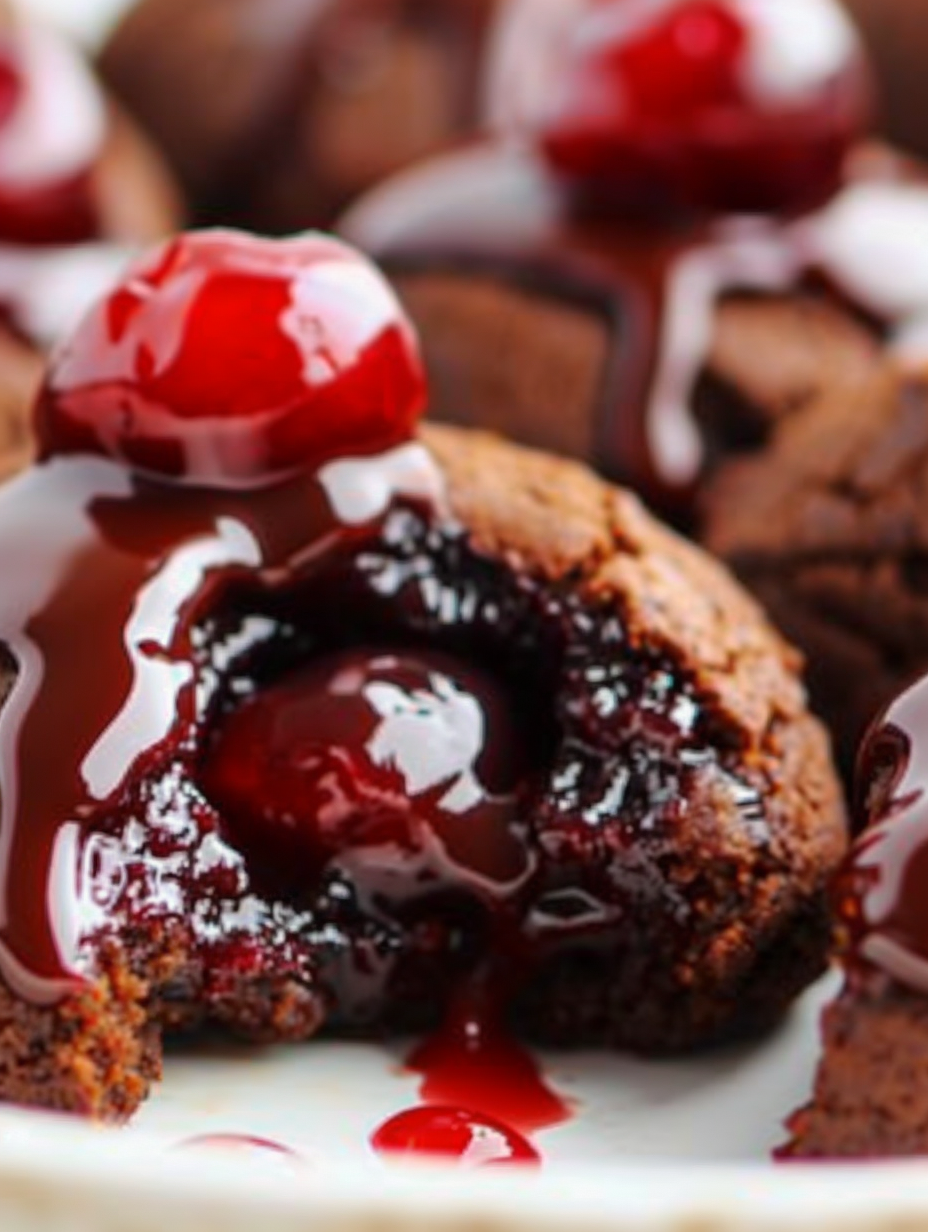
This batch of Chocolate Cherry Thumbprint Cookies is the one I make when I want something that feels festive and homey at the same time. I discovered this combination years ago when I was trying to recreate a bakery classic with a simpler, butter forward dough. The result is a cookie that is soft and slightly chewy in the center, with tender edges and a rich chocolate kiss from both cocoa in the dough and a glossy chocolate topping. The cherry filling gives bursts of bright acidity and a jammy texture that balances the chocolate beautifully. These cookies have become our holiday standard, but honestly they appear at birthday parties and casual tea afternoons too.
I remember the first time I pressed the thumbprint and worried it might collapse in the oven, but the double press that creates a shallow X holds the jam in place and prevents overflow. The dough is forgiving, easy to scoop, and it refrigerates well if you want to bake later. For a crowd I usually double the batch and keep the glaze warm in a small bowl so I can dip while the cookies are still slightly warm. These cookies are approachable enough for beginner bakers but offer a chef level finish when you pipe the chocolate glaze with a spoon or small offset spatula.
I always get questions about how many cherries to add to each indentation. I spoon about three cherries per cookie and it creates a bright jewel in the center without overwhelming the cookie. Family members call these the little chocolate nests and they disappear fast whenever I bring a plate to a gathering.
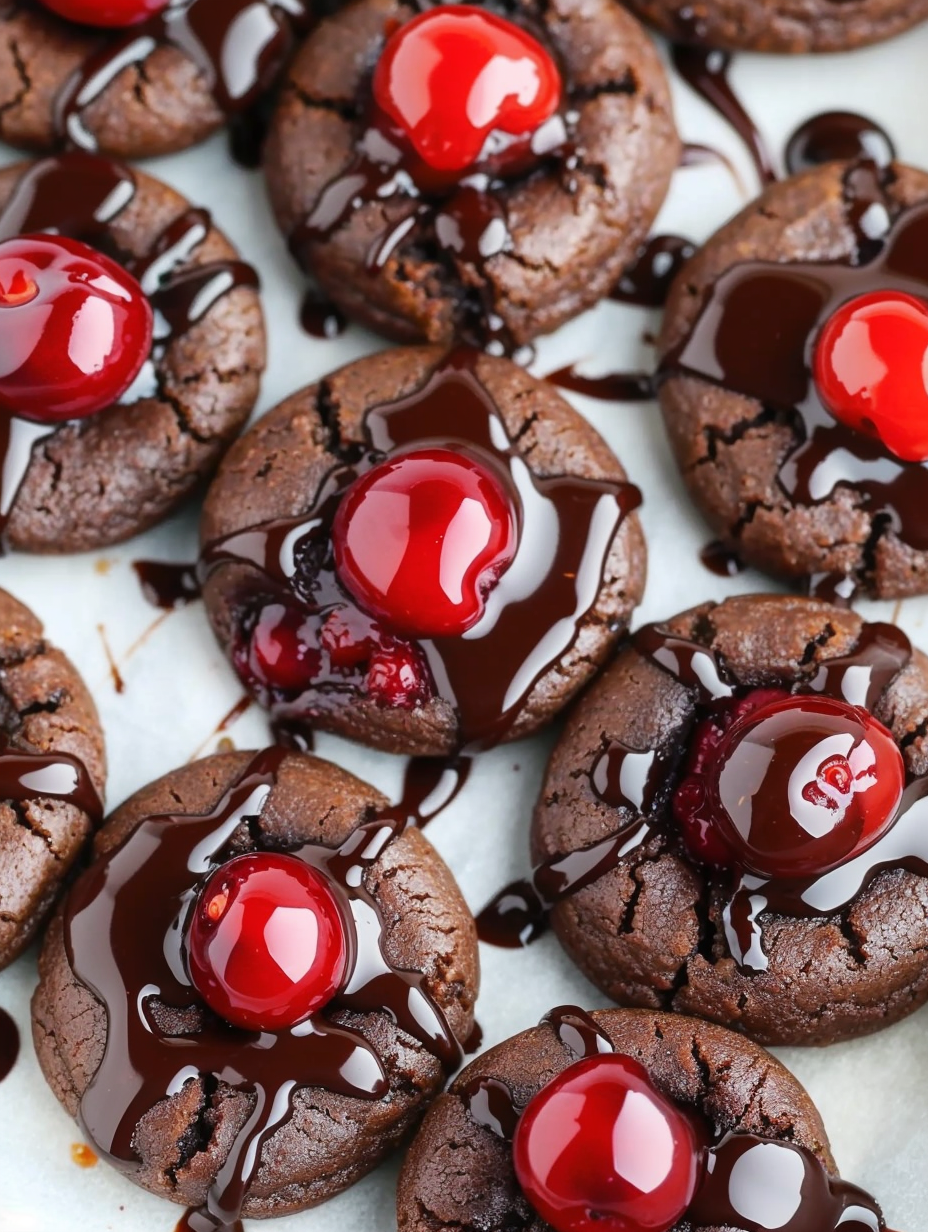
My favorite aspect is the contrast between the soft cookie and the glossy glaze. I have made these for cookie swaps and family gatherings and the reaction is always the same, they get comments for both appearance and texture. They also make a lovely edible gift when packed in a box with tissue paper.
Store the cookies in a single layer or with parchment between layers in an airtight container to maintain the glossy glaze and tender texture. At room temperature they stay fresh for about five days. For longer storage, freeze on a tray until firm then transfer to a resealable bag with parchment layers, frozen up to three months. Thaw at room temperature, then refresh by warming in a 300 degree Fahrenheit oven for 3 to 4 minutes if you prefer them slightly warm.
If you need a dairy free option swap the butter in the dough for a plant based stick butter and use a dairy free chocolate for the glaze. For a lower sugar version use a reduced sugar cherry filling and reduce the glaze corn syrup to 1 teaspoon while keeping the texture similar. To make them gluten free substitute a 1 to 1 gluten free baking flour and add 1 1/2 teaspoons xanthan gum if your blend does not contain it to help with structure.
Serve these with a dusting of powdered sugar for a snow kissed effect during the holidays. They pair beautifully with a brisk black coffee or a lightly whipped cream for an elevated dessert plate. For a party arrange them on a platter with fresh cherries and sprigs of mint to add color contrast. They are also great alongside vanilla ice cream for a warm and cold interplay.
Thumbprint style cookies have a long history in European baking where small jam filled cookies are common at winter celebrations. The chocolate variation blends classic thumbprint technique with American style chocolate flavors and commercially available pie fillings. This adaptation is popular for cookie exchanges and holiday trays and reflects a modern convenience approach that keeps the spirit of traditional jammed cookies intact.
For winter make spiced cherry filling by stirring in a pinch of cinnamon and ground cloves. In summer switch to fresh cherry compote for a less sugary bright center. For Valentine themes swap to heart shaped thumb depressions and use raspberry filling for a tart contrast. Changing the glaze to dark chocolate gives a deeper flavor for cooler months while a milk chocolate glaze is softer and sweeter for spring.
Prepare the dough up to two days ahead, portion into balls, and refrigerate on a tray covered until you are ready to bake. Alternatively freeze the unbaked dough balls for up to three months, then bake from frozen adding one to two extra minutes to the bake time. Make the glaze just before finishing so it is fluid and glossy for dipping. Store glaze in a sealed container and rewarm gently when needed.
These Chocolate Cherry Thumbprint Cookies are a small luxury that come together quickly and keep well for gifting. They are forgiving for home bakers and rewarding to share with friends and family. Try a batch this weekend and make them your new classic.
Use room temperature butter for a smooth creaming stage and better texture.
Spoon about three cherries per indentation to avoid overflow and get a balanced fruit to cookie ratio.
If glaze thickens rewarm over a warm water bath briefly and stir until glossy.
This nourishing chocolate cherry thumbprint cookies recipe is sure to be a staple in your kitchen. Enjoy every moist, high protein slice — it is perfect for breakfast or as a wholesome snack any time.
Yes, the dough can be refrigerated for up to two days wrapped tightly in plastic. Bring to room temperature if it becomes too firm before shaping.
Freeze on a baking tray until firm then transfer to a freezer safe bag. Thaw at room temperature or reheat briefly in a low oven.
This Chocolate Cherry Thumbprint Cookies recipe makes perfectly juicy, tender, and flavorful steak every time! Serve with potatoes and a side salad for an unforgettable dinner in under 30 minutes.
Preheat oven to 350 degrees Fahrenheit. In a medium bowl whisk the flour, baking soda, baking powder, salt and cocoa powder until evenly combined.
In a larger bowl beat softened butter with granulated and brown sugar until light. Add egg and vanilla and mix until combined.
Slowly beat dry ingredients into the wet mixture until just combined. Chill briefly if too sticky to handle.
Scoop rounded tablespoons of dough, roll into balls, press a shallow indentation with your thumb and cross press to form an X. Spoon about three cherries in each well.
Bake at 350 degrees Fahrenheit for nine to ten minutes until edges are set. Cool on the pan for five minutes then transfer to a rack.
Melt chocolate chips with butter, corn syrup and milk until glossy. Dip or spoon glaze over cooled cookies and allow to set.
Last Step: Please leave a rating and comment letting us know how you liked this recipe! This helps our business to thrive and continue providing free, high-quality recipes for you.
Leave a comment & rating below or tag
@feastinarecipe on social media!

Cozy, bright, and ready fast, this Instant Pot lemon chicken orzo soup brings tender chicken, fresh veggies, and a sunny citrus finish.

Feather-light mini cheesecakes with bright strawberry sauce, a tender biscuit-style base, and creamy filling. Just 47 calories each and irresistibly fresh.

Silky mini cheesecakes swirled with melted chocolate and a splash of Kahlua, nestled on Oreo crusts and crowned with fresh whipped cream.
Leave a comment & rating below or tag @feastinarecipe on social media!
Enjoyed this recipe? Share it with friends and family, and don't forget to leave a review!
This recipe looks amazing! Can't wait to try it.
Comments are stored locally in your browser. Server comments are displayed alongside your local comments.

Join to receive our email series which contains a round-up of some of our quick and easy family favorite recipes.
