
Chocolate Cheesecake Truffles

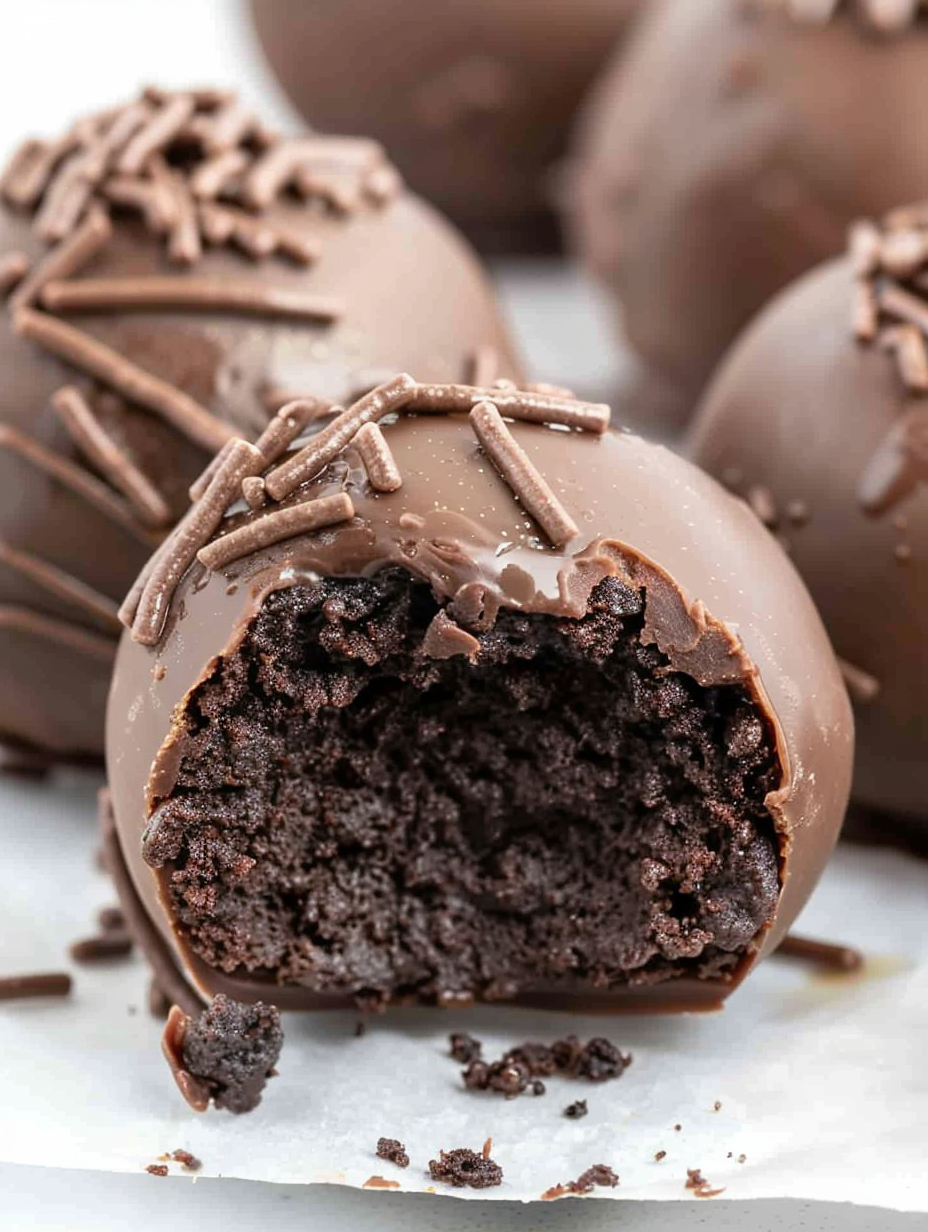
Decadent chocolate cheesecake truffles with a creamy cream cheese and cake mix center, dipped in a rich chocolate shell — perfect for potlucks or quiet nights in.
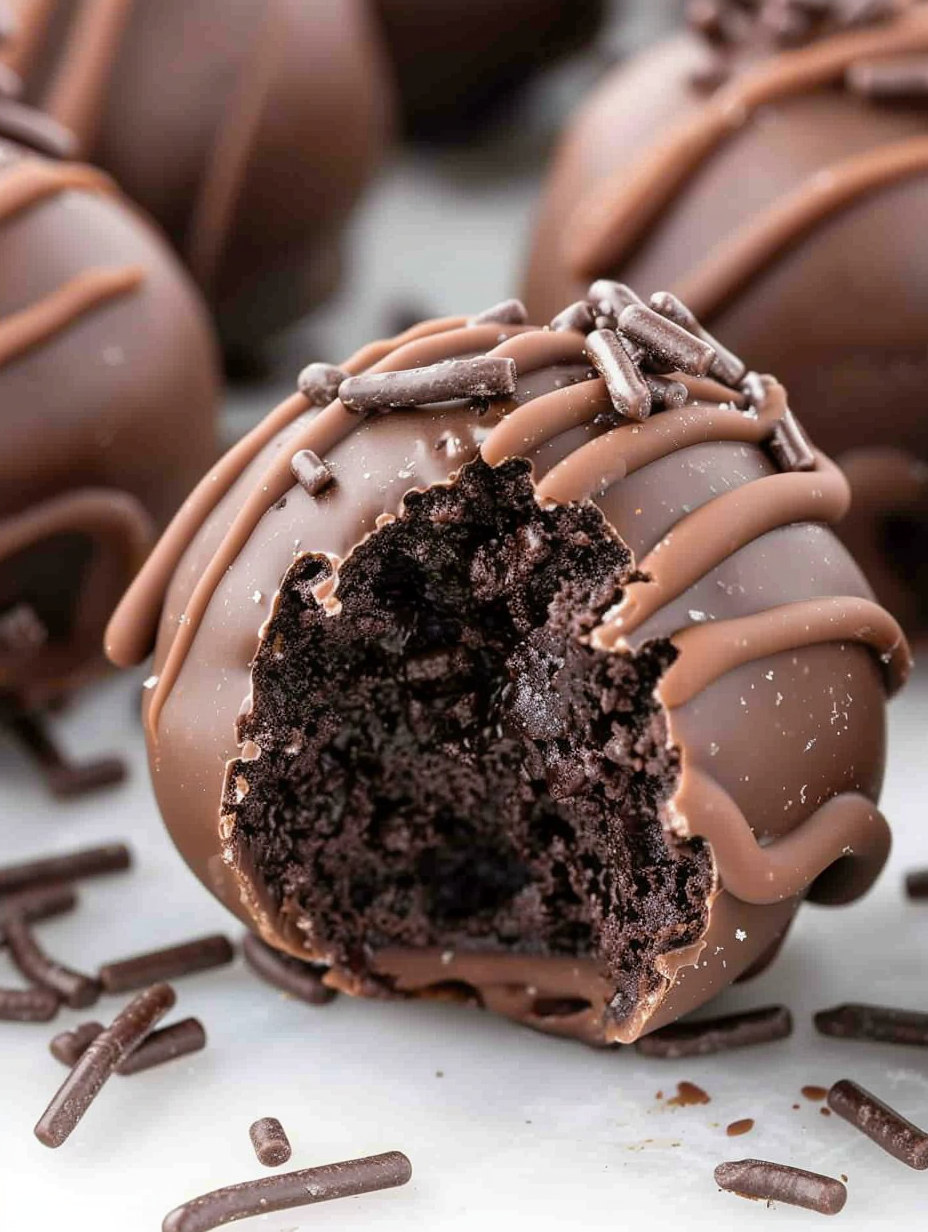
This recipe is all about bite sized indulgence and the kind of dessert that disappears faster than you can set a plate down. I first made these chocolate cheesecake truffles during a small holiday potluck when I only had a few pantry staples on hand and a stubborn sweet tooth. The combination of chocolate fudge dry mix folded into soft cream cheese created a dense, creamy center that tastes like a cross between frosting and no-bake cheesecake. Coating them in melted chocolate almond bark gives a satisfying snap and keeps each bite tidy and elegant.
What makes these little bites special is their deceptive simplicity. They require no oven, take about ten minutes of active work, and then some patient chilling. I remember bringing a tray to a family gathering and watching everyone try to guess the secret; once I told them the filling was mostly cake mix and cream cheese, they were surprised at how luscious and cheesecake-like the texture is. These truffles are the kind of party food that’s equally at home on a potluck table or tucked into a small box for a gift.
Why You'll Love This Recipe
- Ready with just 10 minutes of active prep and a couple hours of chill time; perfect for busy hosts who need a show-stopping dessert with minimal hands-on work.
- Uses pantry staples: a boxed chocolate fudge cake mix, cream cheese, and melting chocolate; no eggs or specialized equipment required.
- Textural contrast between a dense, creamy center and a crisp chocolate shell makes every bite feel indulgent rather than cloying.
- Make-ahead friendly: prepare the centers a day ahead and coat them just before serving to prevent cracking of the shell.
- Crowd-pleasing and portable; they travel well to potlucks and can be individually portioned for gifting or party platters.
- Customizable: swap the almond bark flavor or use different sprinkles, sea salt, or chopped nuts to match seasons or preferences.
In my experience these are the dessert that gets requested by name. I learned a couple of small tricks — heat treating the dry mix to avoid any raw flour concerns and waiting until the centers are fully chilled before dipping — and those two steps made the difference between a mess and a perfect glossy finish. Family members often ask for them when company is coming because they feel special without complicated technique.
Ingredients
- Chocolate fudge cake mix (15.25 ounces): The boxed mix provides concentrated chocolate flavor and structure for the center. Use a standard supermarket brand for consistent results. Heat treating is important to make it safe to eat unbaked.
- Cream cheese (8 ounces), softened to room temperature: Full fat cream cheese gives a rich, silky texture. Avoid chilled cream cheese; it will not blend smoothly and can leave lumps.
- Chocolate almond bark (8 ounces): This melting chocolate is formulated to set firm at room temperature and creates the crisp shell. You can use milk, dark, or white almond bark depending on desired sweetness and color.
- Chocolate sprinkles (2 tablespoons): For garnish and a little textural contrast. Use small sprinkles so they adhere easily to the melted coating.
Instructions
Heat Treat the Dry Mix: Pour the dry cake mix into a medium heat-safe bowl. Microwave in two 30-second intervals, stirring thoroughly between each interval to evenly disperse any hotspots. This brief heating reduces any risk associated with consuming dry mixes uncooked and also helps the mix blend more readily with the cream cheese. Allow the mix to cool completely before proceeding; if it is warm it will soften the cream cheese and affect texture. Soften and Beat the Cream Cheese: Place the room temperature cream cheese in a medium mixing bowl. Using a handheld mixer on medium-high, beat for 2 to 2.5 minutes until the cream cheese is completely smooth with no lumps. Properly softened cream cheese yields a silkier center and prevents graininess in the final bites. Combine the Cake Mix and Cream Cheese: Sprinkle the cooled, heat-treated dry cake mix over the beaten cream cheese. Mix on low speed just until incorporated. Overmixing can lighten the texture too much; you want a dense, paste-like consistency that holds shape when scooped. The mixture should be firm enough to roll; if it feels too loose, chill for 10 minutes and reassess. Chill the Dough: Cover the bowl tightly and refrigerate for at least 2 hours. Chilling firms the mixture, makes it much easier to scoop and roll, and prevents the chocolate coating from cracking after dipping. You can chill overnight for convenience; just keep in mind the cake mix can continue to absorb moisture and expand slightly. Scoop and Shape: Line a baking sheet with parchment paper. Using a 1 tablespoon cookie scoop, portion the chilled dough and roll between your palms into smooth balls. Place each ball on the prepared sheet about 1 inch apart. If the mixture sticks to your hands, lightly dampen them or dust with a tiny bit of powdered sugar to ease rolling. Melt the Almond Bark: In a heat-safe medium bowl, melt the chocolate almond bark in 30-second intervals in the microwave, stirring between intervals until fully melted and glossy. Do not overheat; if it becomes grainy, stir in a teaspoon of neutral oil or vegetable shortening to smooth it back out. Coat the Truffles and Decorate: Dip each chilled ball into the melted bark using a fork, tapping gently to remove excess and then placing back onto the parchment. Immediately sprinkle with chocolate sprinkles while the coating is still wet. For any gaps, use a small spoon to drizzle extra melted chocolate. Use a toothpick to remove any excess chocolate from the bottom of the fork before setting the truffle down. Final Chill and Serve: Refrigerate the coated bites until the shell is set, about 15 to 30 minutes. Store in the fridge until serving; bring to just below room temperature for the best flavor and mouthfeel. These keep well for several days refrigerated and can be frozen if desired.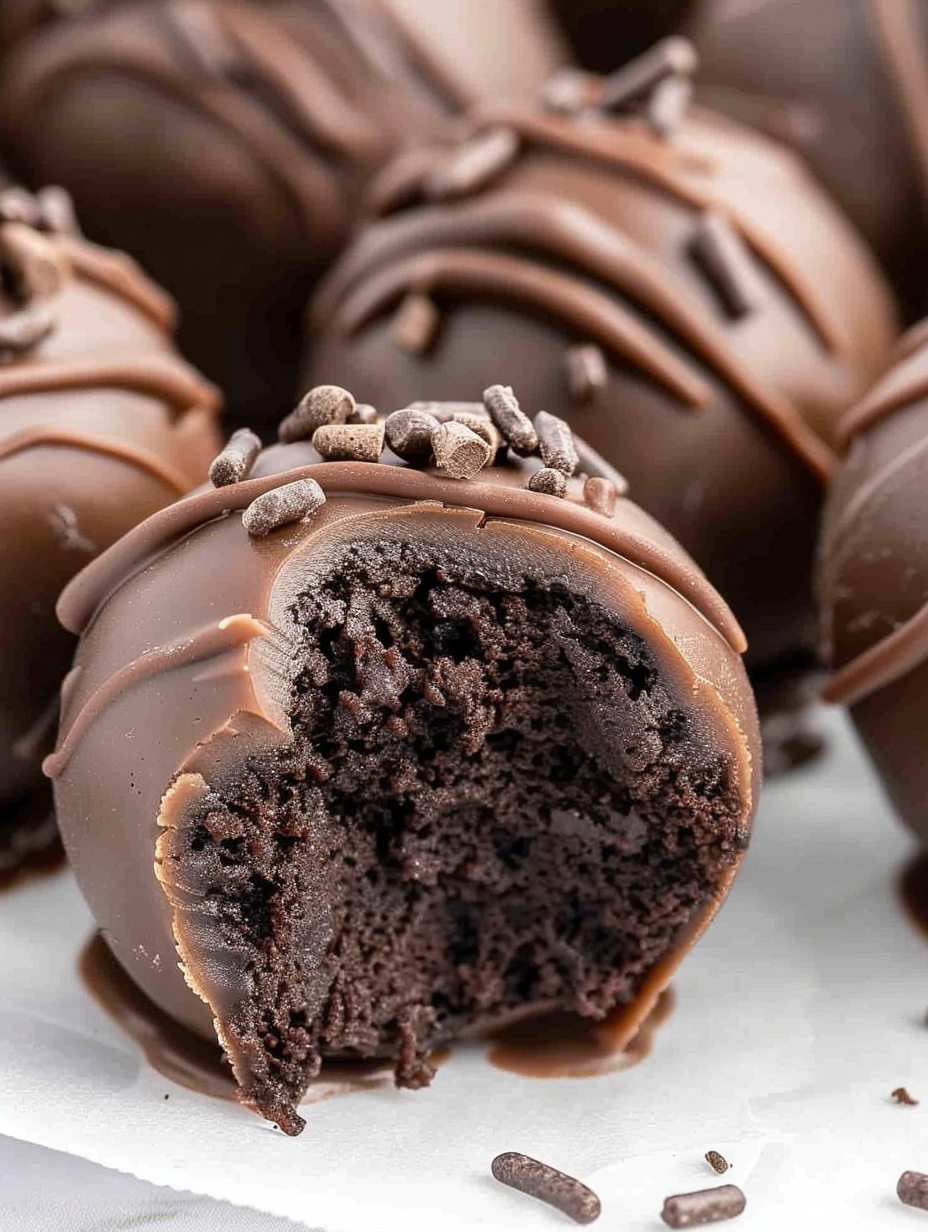
You Must Know
- These are refrigerator-stable treats; keep them chilled until serving to preserve texture and prevent melting of the coating.
- The recipe yields about 26 bites when using a 1 tablespoon scoop; adjust portion size if you prefer larger or smaller pieces.
- Heat treating the dry mix is a simple safety step that requires only brief microwaving and cooling.
- Full nutrition per bite is approximately 120 calories with about 18 grams of carbohydrates; store bought mixes and almond bark will affect exact values.
- Freezing is permitted; freeze on a tray until solid then transfer to a sealed container to keep them fresh for up to three months.
My favorite part of preparing these is the theater of dipping and decorating. At a birthday last year I set up a small dipping station with a bowl of warm almond bark and various toppings; guests loved customizing their own bites. Watching children carefully tap away excess chocolate and sprinkle on decorations always brings a smile. These little moments make the dessert more than just food; they become miniature experiences shared across ages.
Storage Tips
Store finished bites in an airtight container in the refrigerator for up to 5 days. Layer parchment between rows to prevent sticking. For longer storage, freeze on a baking sheet until firm, then transfer to a freezer-safe container with parchment between layers; they will keep well for up to three months. Thaw in the refrigerator overnight before serving. Avoid leaving them at room temperature for long periods; the almond bark shell will soften and may lose its crisp snap.
Ingredient Substitutions
If you do not have chocolate almond bark, you can use good quality melting wafers, compound chocolate, or tempered couverture chocolate for a superior finish. For a nut-free shell, choose a plain chocolate coating labeled nut-free. Swap the chocolate sprinkles for crushed freeze-dried raspberries for a tart contrast or finely chopped toasted pecans for crunch. To reduce sweetness, use a dark chocolate almond bark or mix in 1 tablespoon of unsweetened cocoa to the coating.
Serving Suggestions
Present the bites on a decorative platter lined with doilies for parties or arrange them in small paper candy cups for individual portions. They pair beautifully with strong coffee, espresso, or a glass of milk. For a holiday table, dust lightly with cocoa powder or sifted powdered sugar, or top with a few flakes of sea salt for balance. These also make thoughtful edible gifts when boxed with tissue paper and tied with ribbon.
Cultural Background
These little confections are a modern American adaptation of truffle-style treats and no-bake cheesecakes. They borrow the concept of decadent bite-sized sweets from European bonbons and pair it with American convenience baking mixes. Boxed cake mix desserts became popular in mid-20th century kitchens for their ease and versatility; home cooks discovered they could be transformed into cookies, bars, and no-bake bites, which led to creative recipes like these. Today they stand at the intersection of nostalgic convenience and contemporary party food.
Seasonal Adaptations
For winter holidays, swap the sprinkles for crushed peppermint and use dark almond bark for contrast. Spring gatherings are ideal for drizzling white chocolate and topping with pastel sprinkles. In summer, incorporate a small amount of citrus zest into the center for brightness or roll some bites in finely chopped freeze-dried strawberries for a fresher flavor. Adjust the coating to match seasonal themes or color palettes for celebrations.
Meal Prep Tips
Make the centers up to two days ahead and keep them tightly covered in the refrigerator. When ready to serve, melt the coating and dip; chilled centers will hold their shape well and reduce the chance of cracks. Portion the centers onto trays and freeze briefly to firm them if you need to speed up the process. Use a small scoop for uniform sizing and label containers with the preparation date for easy rotation.
These chocolate cheesecake truffles are proof that a few simple ingredients and small technique adjustments can produce an elegant treat. I hope they become a trusted option in your dessert repertoire for potlucks, holidays, and quiet evenings when only something truly indulgent will do.
Pro Tips
Always use room temperature cream cheese and beat it until fully smooth to avoid lumps in the center.
Heat treat the dry cake mix by microwaving briefly and allowing it to cool before mixing into the cream cheese.
Chill the formed centers for at least two hours before dipping to prevent cracking of the chocolate shell.
If the melted coating becomes grainy, stir in a teaspoon of neutral oil to smooth it out.
This nourishing chocolate cheesecake truffles recipe is sure to be a staple in your kitchen. Enjoy every moist, high protein slice — it is perfect for breakfast or as a wholesome snack any time.
Tags
Chocolate Cheesecake Truffles
This Chocolate Cheesecake Truffles recipe makes perfectly juicy, tender, and flavorful steak every time! Serve with potatoes and a side salad for an unforgettable dinner in under 30 minutes.
Ingredients
Main
Instructions
Heat Treat the Dry Mix
Pour the dry cake mix into a medium heat-safe bowl. Microwave in two 30-second intervals, stirring thoroughly between intervals. Allow to cool completely before use.
Soften and Beat Cream Cheese
Place room temperature cream cheese in a bowl and beat on medium-high for 2 to 2.5 minutes until completely smooth and lump-free.
Combine Cake Mix with Cream Cheese
Sprinkle the cooled dry mix over the beaten cream cheese and mix on low just until incorporated, creating a dense paste-like dough.
Chill the Dough
Cover tightly and refrigerate for at least 2 hours to firm up the mixture, which makes scooping and rolling much easier.
Scoop and Shape
Line a baking sheet with parchment. Using a 1 tablespoon scoop, portion the chilled mixture and roll into smooth balls. Place on the prepared sheet.
Melt the Almond Bark
Melt the almond bark in a microwave-safe bowl in 30-second intervals, stirring between each, until fully melted and glossy.
Coat the Balls and Decorate
Dip each chilled ball into the melted bark using a fork, tap off excess, return to the sheet, and immediately sprinkle with chocolate sprinkles.
Final Chill and Serve
Refrigerate until the coating is set, about 15 to 30 minutes. Store in an airtight container in the refrigerator until ready to serve.
Last Step: Please leave a rating and comment letting us know how you liked this recipe! This helps our business to thrive and continue providing free, high-quality recipes for you.
Nutrition
Did You Make This?
Leave a comment & rating below or tag
@feastinarecipe on social media!
Categories:
You might also like...

Lemon Chicken Orzo Soup
Cozy, bright, and ready fast, this Instant Pot lemon chicken orzo soup brings tender chicken, fresh veggies, and a sunny citrus finish.

50 Calorie Strawberry Cheesecakes
Feather-light mini cheesecakes with bright strawberry sauce, a tender biscuit-style base, and creamy filling. Just 47 calories each and irresistibly fresh.

Kahlua Chocolate Cheesecake Bites
Silky mini cheesecakes swirled with melted chocolate and a splash of Kahlua, nestled on Oreo crusts and crowned with fresh whipped cream.
Did You Make This?
Leave a comment & rating below or tag @feastinarecipe on social media!
Rate This Recipe
Share This Recipe
Enjoyed this recipe? Share it with friends and family, and don't forget to leave a review!
Comments (1)
This recipe looks amazing! Can't wait to try it.
Comments are stored locally in your browser. Server comments are displayed alongside your local comments.

Hi, I'm Sarah!
What's Popular

30-Minute Meals!
Join to receive our email series which contains a round-up of some of our quick and easy family favorite recipes.