
Chicken Stuffed Bell Peppers

Colorful bell peppers filled with creamy cheese, shredded chicken, and zesty salsa — a fun, family-friendly twist for taco night.

Why You'll Love This Recipe
- Comforting flavor profile that combines creamy cheese, seasoned shredded chicken, and bright salsa — all in under 40 minutes from start to finish.
- Uses pantry staples and leftover cooked chicken, making it perfect for meal rescue or last-minute dinners without a long shopping list.
- Minimal hands-on time: about 10 minutes to assemble and 30 minutes in the oven; the foil cover prevents drying so the filling stays moist.
- Kid-friendly presentation — halved peppers act like little boats — and easily customizable for different spice levels or dietary needs.
- Make-ahead friendly: assemble the peppers a day ahead and refrigerate, then bake when ready; freezes well if you want to preserve extra filling.
- Perfect for taco night with less clean-up; the filling can also be used as a dip, taco filler, or added to baked potatoes for variety.
In my experience, guests always comment on how colorful the plate looks and how satisfying the creamy filling is. My kids ask for these when we’re short on time but I still want a home-cooked meal, and I’ve learned a few tricks — like using an electric mixer to beat the cream cheese until silky — that make assembly faster and the texture more luxurious.
Ingredients
- Cream cheese (8 ounces): Full-fat cream cheese gives the silkiest texture; block-style cream cheese softened at room temperature blends best. I prefer Philadelphia for consistent texture.
- Taco seasoning (1 tablespoon): A store-bought blend or a homemade mix with chili powder, cumin, garlic powder, and smoked paprika adds depth — adjust to taste for salt and heat.
- Salsa (1 cup): Choose a medium-heat tomato salsa for freshness; chunkier salsas give more texture while smooth salsas integrate into the filling more uniformly.
- Cooked shredded chicken (2 cups): Rotisserie chicken works beautifully for speed and flavor; poached chicken breast or leftover roasted chicken both convert easily into the filling.
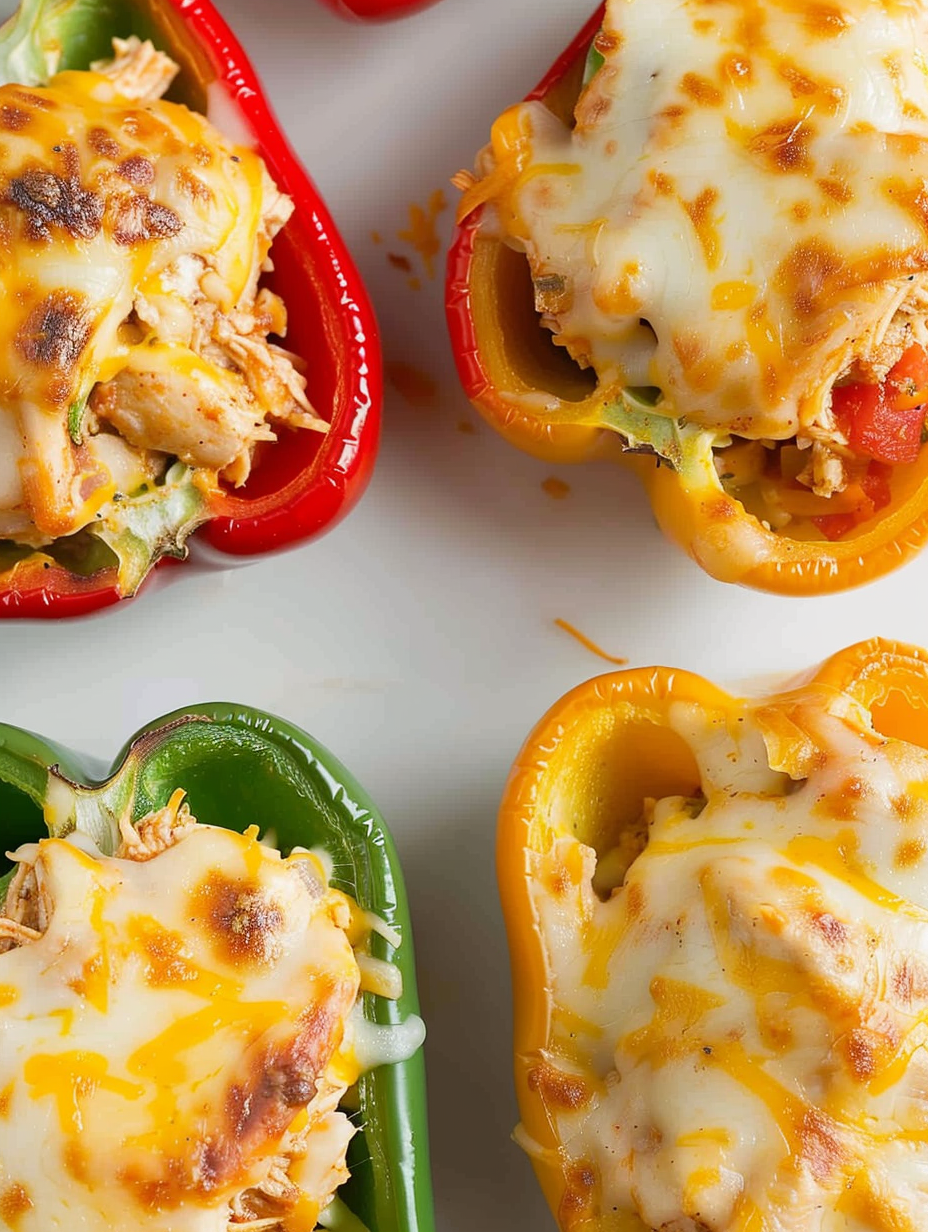
- Shredded cheese (2 cups total): Use a Mexican blend or cheddar; reserve half to mix into the filling and half to top the peppers so you get molten cheese inside and a nicely browned crust on top.
- Bell peppers (3 large): Choose bright, similarly sized peppers (red, yellow, orange) for even roasting and a pretty presentation; green peppers work, too, but are slightly more bitter.
Instructions
Preheat and prepare dish: Preheat the oven to 350°F. Lightly spray a 9 x 13-inch casserole dish with non-stick cooking spray so the bottoms of the pepper halves won’t stick and cleanup is easier. Prepare the peppers: Wash the bell peppers, cut off the tops or remove the stem area, then halve lengthwise. Remove seeds and membranes thoroughly so the filling sits flat; arrange the pepper halves cut-side up in the prepared dish. Choose peppers of similar size so they cook at the same rate. Make the filling: Place the softened cream cheese and taco seasoning in a large mixing bowl. Beat with an electric mixer until completely smooth and airy, about 1–2 minutes. This creates a silky base that spreads easily and prevents lumps. Combine filling ingredients: Fold in 1 cup of the shredded cheese, the cooked shredded chicken, and 1 cup of salsa until the mixture is evenly combined. Taste and adjust seasoning: add a pinch of salt or a squeeze of lime if you want more brightness. Stuff the peppers: Using a spoon, fill each pepper half generously with the chicken mixture, pressing slightly so the filling is compact. Sprinkle the remaining 1 cup of shredded cheese over the filled peppers to create a golden top while baking. Bake covered: Cover the baking dish with aluminum foil (spray the underside with non-stick spray to prevent the cheese from sticking). Bake at 350°F for 30 minutes until the peppers are tender and the filling is heated through. Finish and serve: Carefully remove the foil (watch for steam). If you like a browner top, switch the oven to broil and place under the broiler 1–2 minutes — watch closely. Serve warm with additional salsa, chopped cilantro, or a dollop of sour cream.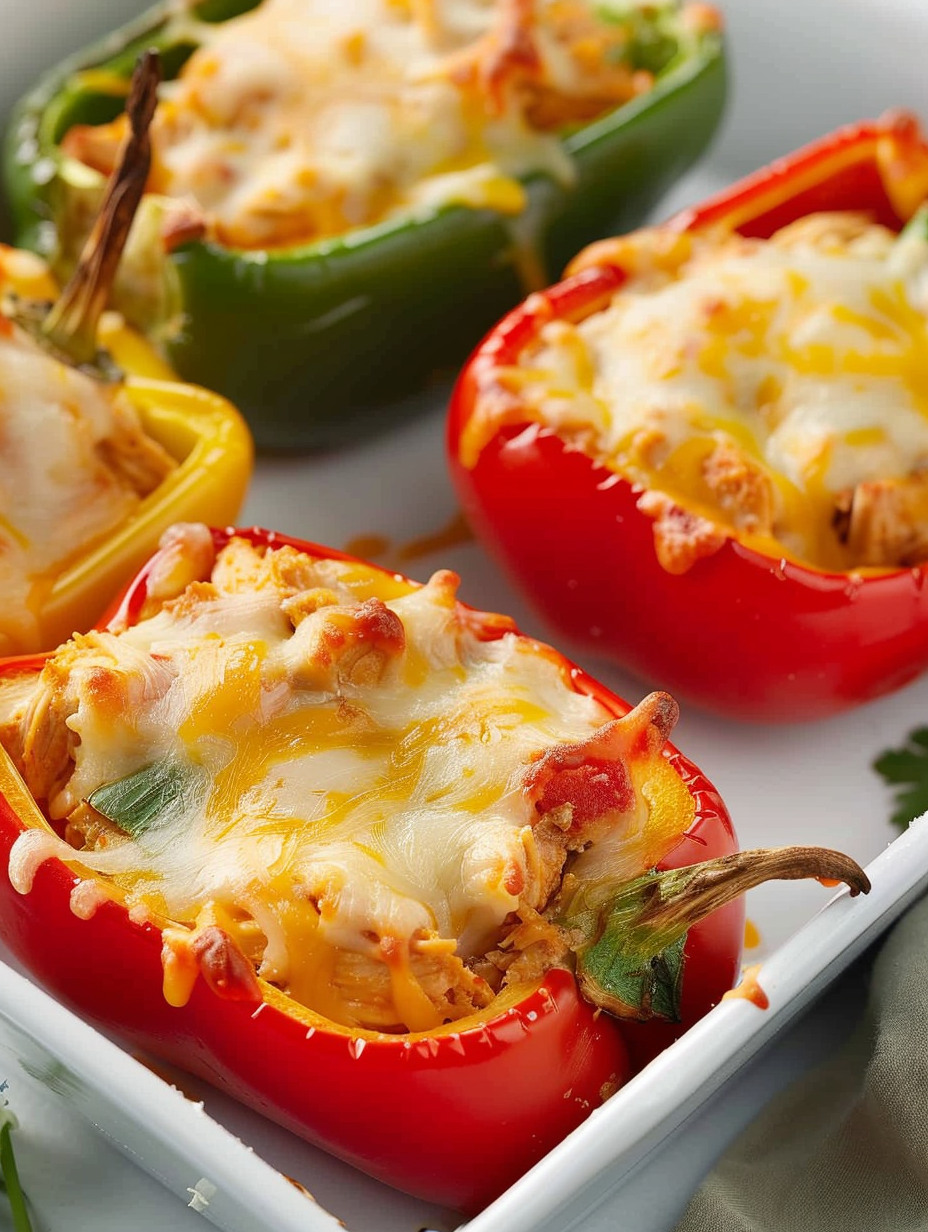
You Must Know
- These peppers are relatively low in carbohydrates (around 4 g per serving) and high in protein thanks to the shredded chicken — a satisfying main without heavy sides.
- Store leftovers in an airtight container in the refrigerator for up to 4 days; reheat covered in a 325°F oven until warmed through to preserve texture.
- This dish freezes well: assemble the peppers, freeze uncovered on a sheet until solid, then transfer to a freezer-safe container for up to 3 months. Thaw overnight before baking.
- If using pre-seasoned or salted chicken, reduce added seasoning and taste the filling before adding extra salt to avoid oversalting.
I love that this recipe doubles easily and still reheats without losing its charm. Once, I brought a pan to a family gathering and everyone asked for the recipe — the creamy filling and vibrant peppers make it a visually impressive yet humble dish. The ease of swapping proteins or upping the heat means it stays in heavy rotation at home.
Storage Tips
Store cooled leftovers in an airtight container in the refrigerator for up to 4 days. Reheat covered in a 325°F oven for 10–15 minutes depending on portion size to gently warm the filling and prevent the cheese from becoming rubbery. For freezing, place assembled filled peppers on a baking sheet and freeze until solid (about 2 hours), then transfer to a freezer-safe container or bag for up to 3 months. To bake from frozen, do not thaw — add 10–15 minutes to the covered baking time and then brown the top under the broiler briefly if desired.
Ingredient Substitutions
For a lighter version, swap half the cream cheese for plain Greek yogurt (use full-fat for a creamier result) — expect a tangier flavor and slightly looser filling. Replace shredded chicken with cooked ground turkey or beef for a different texture; brown the meat with taco seasoning before mixing. To make this dairy-free, use a dairy-free cream cheese and shredded dairy-free cheese, and ensure your taco seasoning is free of milk derivatives. For a lower-sodium option, choose a low-sodium salsa and reduced-salt cheese.
Serving Suggestions
Serve these alongside a simple green salad dressed with lime vinaigrette or with cilantro-lime rice for a heartier meal. Top with chopped cilantro, sliced green onions, extra salsa, or a dollop of sour cream or avocado crema for contrast. For a lighter meal, pair with a charred corn salad or grilled zucchini. They also make lovely party bites — halve smaller mini bell peppers and bake until just tender for an appetizer-sized version.
Cultural Background
Stuffed vegetables are a global concept — from Mediterranean dolmas to Middle Eastern mahshi — and this Americanized version borrows taco flavors to create something familiar yet different. Combining bell peppers with a creamy, seasoned filling nods to Tex-Mex influences where cheese, salsa, and seasoned proteins are central. While not a traditional dish from any single culture, it reflects how home cooks adapt global flavors into approachable family meals.
Seasonal Adaptations
In summer, take advantage of peak-season bell peppers for a sweeter, juicier shell — consider using roasted peppers for a smoky finish. In winter, swap in poblano peppers for a deeper, earthy flavor and add canned fire-roasted tomatoes if fresh salsa is scarce. For holiday gatherings, add chopped roasted corn and black beans to the filling for a heartier side, or top with panko mixed with a little melted butter for a crunchy finish.
Meal Prep Tips
Prepare the filling up to two days ahead and keep refrigerated; fill the peppers the night before and cover them in the baking dish so you only need to bake before serving. If you prefer single-serve prep, assemble in individual ramekins for grab-and-bake portions. Label and date frozen filled peppers and lay them flat when freezing so they stack neatly. When reheating portions, avoid microwaving if you want to retain pepper texture — oven reheating is gentler and preserves mouthfeel.
These peppers are comfort food with flexibility — small shifts in ingredients or technique make them suitable for busy weeknights, festive gatherings, and everything in between. Try them once and you’ll find new ways to use the filling over rice, in tacos, or as a warm dip at your next get-together.
Pro Tips
Soften cream cheese fully at room temperature for smooth filling and faster mixing.
Spray the underside of the foil to prevent melted cheese from sticking.
Choose peppers of similar size so they roast evenly and finish at the same time.
If the filling is too thick, add 1–2 tablespoons of salsa or a splash of milk to loosen it.
This nourishing chicken stuffed bell peppers recipe is sure to be a staple in your kitchen. Enjoy every moist, high protein slice — it is perfect for breakfast or as a wholesome snack any time.
FAQs about Recipes
Can I prepare these ahead of time?
Yes — assemble the peppers, cover tightly, and refrigerate for up to 24 hours before baking. Add a few extra minutes to the bake time if the filling is cold.
What type of chicken is best?
Use rotisserie chicken for the quickest option, or shred poached breasts. Leftover roasted chicken also works well.
Tags
Chicken Stuffed Bell Peppers
This Chicken Stuffed Bell Peppers recipe makes perfectly juicy, tender, and flavorful steak every time! Serve with potatoes and a side salad for an unforgettable dinner in under 30 minutes.
Ingredients
Filling
Peppers
Instructions
Preheat and prepare dish
Preheat the oven to 350°F and lightly spray a 9 x 13-inch casserole dish with non-stick cooking spray.
Prepare peppers
Wash, halve, and seed 3 large bell peppers. Arrange the halves cut-side up in the prepared dish.
Beat cream cheese
Place softened cream cheese and 1 tablespoon taco seasoning in a mixing bowl and beat with an electric mixer until smooth and creamy, about 1–2 minutes.
Combine filling
Stir in 1 cup shredded cheese, 2 cups shredded cooked chicken, and 1 cup salsa until evenly combined. Taste and adjust seasoning if necessary.
Stuff and top
Fill each pepper half with the chicken mixture, then sprinkle the remaining 1 cup shredded cheese over the tops of the peppers.
Bake covered
Cover the dish with foil (sprayed on the underside) and bake at 350°F for 30 minutes until peppers are tender and filling is heated through. Uncover and serve warm.
Last Step: Please leave a rating and comment letting us know how you liked this recipe! This helps our business to thrive and continue providing free, high-quality recipes for you.
Nutrition
Did You Make This?
Leave a comment & rating below or tag
@feastinarecipe on social media!
Categories:
You might also like...

Lemon Chicken Orzo Soup
Cozy, bright, and ready fast, this Instant Pot lemon chicken orzo soup brings tender chicken, fresh veggies, and a sunny citrus finish.

50 Calorie Strawberry Cheesecakes
Feather-light mini cheesecakes with bright strawberry sauce, a tender biscuit-style base, and creamy filling. Just 47 calories each and irresistibly fresh.

Kahlua Chocolate Cheesecake Bites
Silky mini cheesecakes swirled with melted chocolate and a splash of Kahlua, nestled on Oreo crusts and crowned with fresh whipped cream.
Did You Make This?
Leave a comment & rating below or tag @feastinarecipe on social media!
Rate This Recipe
Share This Recipe
Enjoyed this recipe? Share it with friends and family, and don't forget to leave a review!
Comments (1)
This recipe looks amazing! Can't wait to try it.
Comments are stored locally in your browser. Server comments are displayed alongside your local comments.

Hi, I'm Sarah!
What's Popular

30-Minute Meals!
Join to receive our email series which contains a round-up of some of our quick and easy family favorite recipes.