
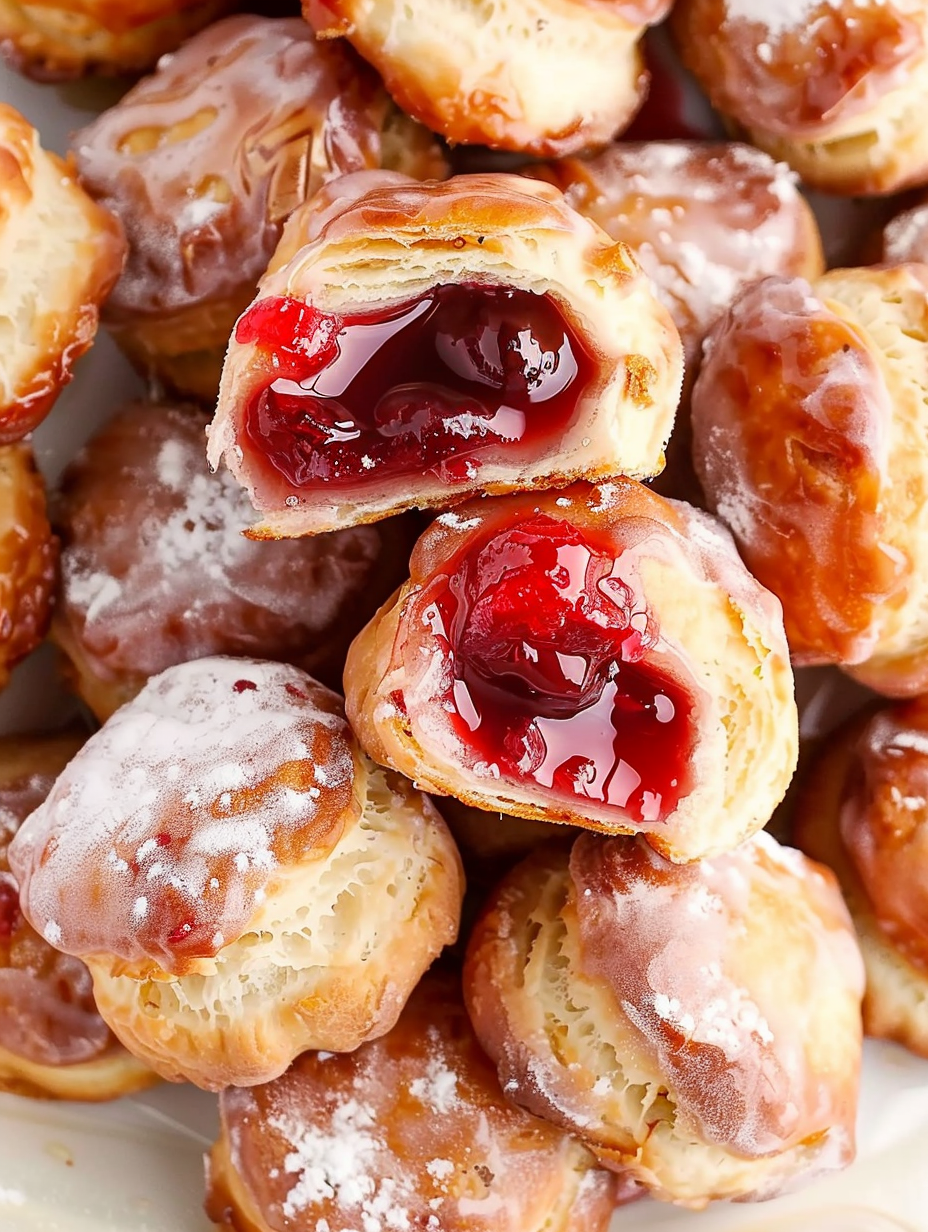
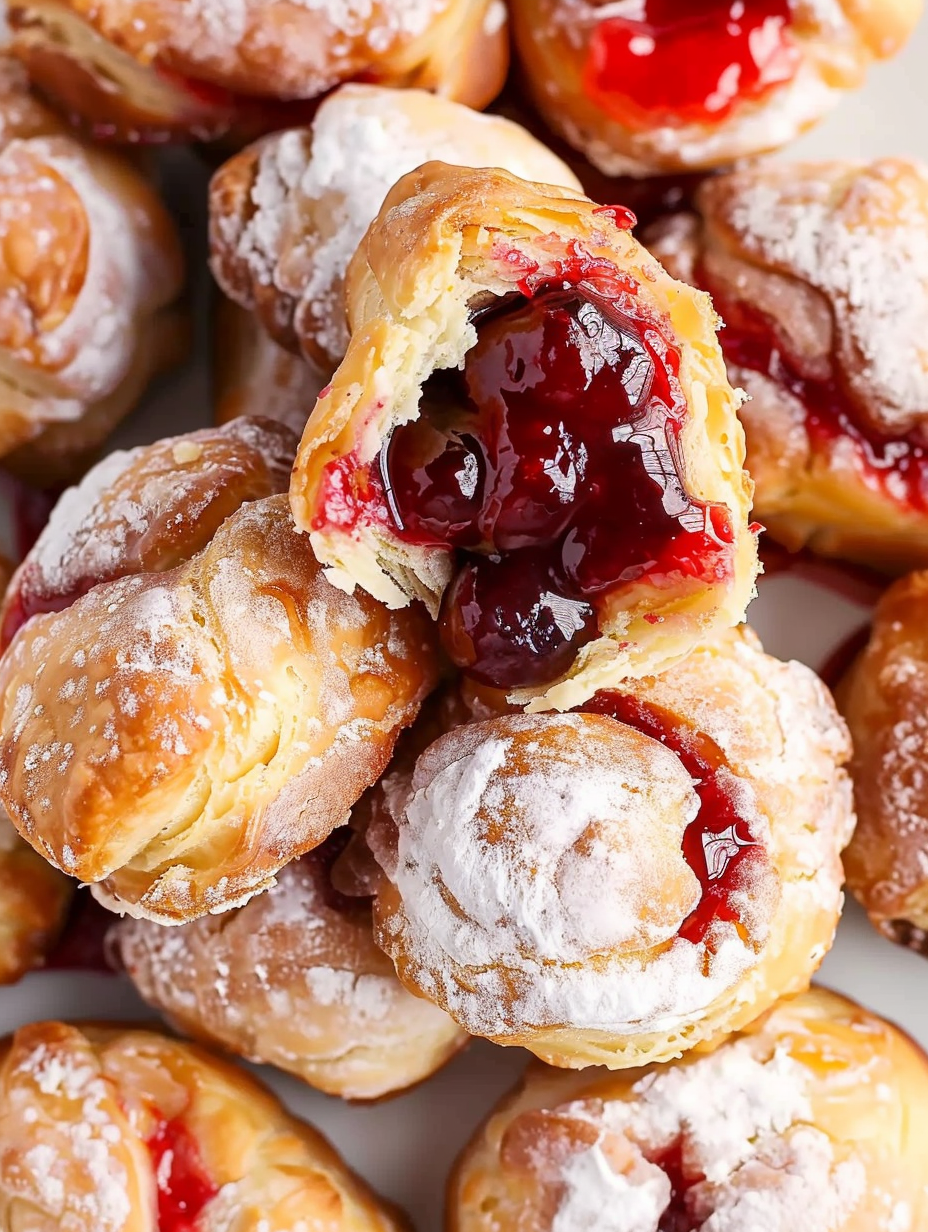
Cherry Pie Bombs

Bite-sized fried delights filled with warm cherry pie filling, glazed with a shiny sugar coating — all the flavor of a classic pie in a playful, easy-to-make package.
This recipe for Cherry Pie Bombs has been a weeknight lifesaver and weekend showstopper for my family. I discovered this method the first summer I wanted pie without the fuss of rolling crust and watching a full pie bake. These little pockets of cherry filling cook up in minutes and deliver the same sweet, comforting flavor of a homemade cherry pie with a fraction of the effort. They are perfect for impromptu guests, afternoons with kids, or when you want dessert without turning on the oven for an hour.
What makes these especially memorable is the contrast between the lightly crisp exterior and the molten cherry center. The biscuit shell crisps quickly in hot oil and seals in bright, jammy cherries. I often think back to the first time I brought a plate to a neighborhood potluck and watched people race to try them; by the end of the evening the platter was empty and the recipe was requested by several neighbors. They are forgiving, fast, and fun to assemble — a tiny, joyful way to serve pie.
Why You'll Love This Recipe
- Fast to prepare: ready in about 25 minutes from start to finish, making it ideal for last-minute desserts or weeknight treats.
- Minimal equipment: requires only a saucepan for frying, a slotted spoon, and a bowl for glaze, so cleanup is quick.
- Pantry-friendly ingredients: uses canned biscuits and canned cherry pie filling, both widely available and shelf-stable.
- Crowd-pleasing format: bite-sized pieces are perfect for parties, potlucks, and kids, eliminating the need for slicing and serving a whole pie.
- Make-ahead and freeze-friendly: you can assemble and freeze before frying, then cook directly from frozen, which saves time on busy days.
- Flexible: swap fillings or dough types to match seasonal fruit, dietary needs, or flavor preferences.
I still remember making a batch on a rainy afternoon and watching my teenage niece describe each texture in exaggerated detail. The way the glaze sets with a glossy sheen always wins compliments. Over the years I have learned small adjustments — like maintaining oil temperature and sealing edges carefully — that reliably improve every batch.
Ingredients
- Grands "Big" biscuits (1 can, 16.3 ounces): These canned flaky biscuits provide a pillowy, layered shell that fries to a golden crisp while remaining soft inside. I prefer Pillsbury Grands for consistent texture; separate the flaky layers for smaller bombs or use whole rounds for larger pieces.
- Cherry pie filling (1 can, 21 ounces): Choose a good-quality filling with whole cherries and a thick syrup so it holds together when you spoon it into the dough. If you prefer a tart edge, use sour cherry filling or add a squeeze of lemon juice to canned filling.
- Powdered sugar (2 cups): This forms the base of a glossy glaze; sift if lumpy. Confectioners sugar dissolves easily and gives a smooth finish.
- Milk (1/4 cup): Regular whole milk produces a rich glaze. For a slightly thinner glaze, use 2 percent; for dairy-free, substitute soy or almond milk.
- Light corn syrup (1 tablespoon): Adds shine and helps the glaze set without becoming too brittle. You can omit it, but expect a less glossy finish.
- Vegetable oil for frying: Use a neutral oil with a high smoke point such as canola, sunflower, or peanut oil. You need enough to submerge the dough balls, about 2 to 3 inches depth in a 2 to 3 quart saucepan.
Instructions
Prepare the oil: Fill a 2 to 3 quart heavy-bottomed saucepan just over halfway with vegetable oil so dough balls can float freely. Heat the oil to 325 degrees Fahrenheit and use a thermometer to maintain that steady temperature. Keeping the oil at 325 degrees ensures the exterior browns evenly while the center cooks through without the shell overbrowning. Prepare the dough: Open the biscuit can and gently separate each biscuit into its flaky layers by pulling at the center. Use your fingers or a small rolling pin to flatten each piece into a circle approximately 3 inches across. You want the dough thin enough to seal but not so thin that it tears when filled. Fill and seal: Place about 1 tablespoon of cherry filling in the center of each dough round. Carefully pinch the edges together to form a tight seal and roll the sealed edges under to create a smooth ball. The seal is key; a secure pinch prevents leakage during frying. Fry the bombs: Lower 2 to 3 dough balls into the oil using a slotted metal spoon and cook for about 4 to 5 minutes, turning frequently so all sides brown evenly. Maintain the oil at 325 degrees F, adjusting the heat as needed. Overcrowding lowers the oil temperature and produces greasy, undercooked centers. Drain and glaze: Remove cooked bombs to a plate lined with paper towels to drain excess oil. In a small bowl whisk together 2 cups powdered sugar, 1/4 cup milk, and 1 tablespoon light corn syrup until smooth. Toss each warmed bomb in the glaze, lift to allow excess to drip off, then place on parchment or a rack to set for about 10 minutes. Serve: Serve warm for best contrast between crisp shell and hot cherry center. If glazing ahead, wait until the glaze is fully set before stacking or storing to prevent sticking.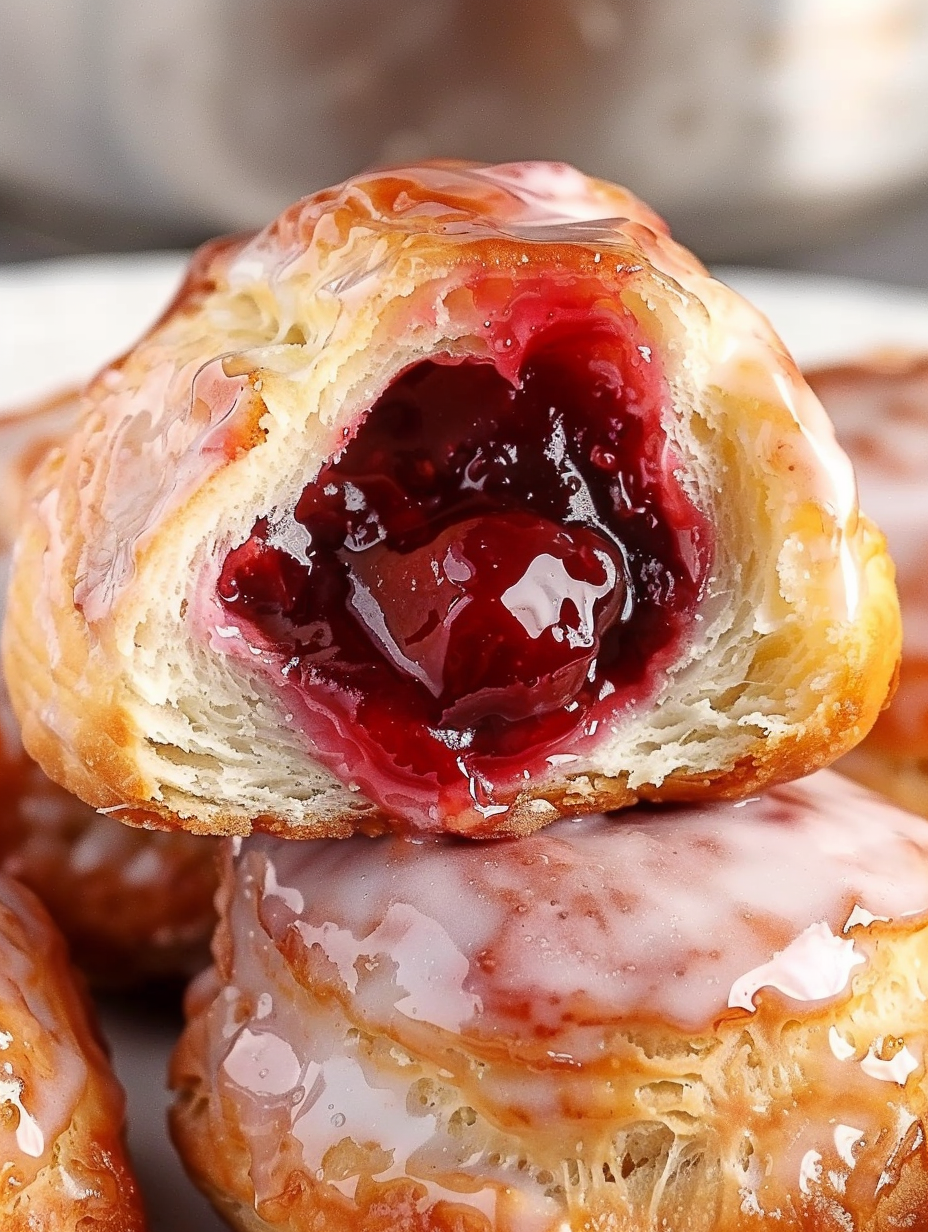
You Must Know
- Keep oil at a steady 325 degrees Fahrenheit to ensure the outside browns while the interior fully cooks; higher temps will brown too fast and lower temps will make them greasy.
- These are best eaten the day they are made; stored at room temperature in an airtight container they keep well for up to 2 days.
- They freeze well before frying; assemble and freeze on a tray, then transfer to a bag for up to 3 months. Fry from frozen, adding a minute or two to the cook time.
- Seal each piece tightly to prevent filling from oozing into the oil while frying — a secure pinch and rolling the seam under makes a big difference.
My favorite aspect is how portable and joyful these are to share. I have wrapped a small stack in parchment for neighbors, and their faces lit up when they bit into a warm cherry center. Friends have adapted the filling and glaze to suit their tastes and the conversation always turns to memories of pie and summer fruit.
Storage Tips
These bombs are at their best fresh from the fryer. Store cooled pieces in a single layer in an airtight container at room temperature for up to 48 hours. To avoid sogginess, place parchment between layers and do not refrigerate, as the cold can toughen the biscuit shell. For longer storage, freeze assembled but uncooked bombs on a tray until solid, then transfer to a freezer bag for up to three months. Fry straight from frozen and add a couple of minutes to the frying time, monitoring temperature closely.
Ingredient Substitutions
If you prefer a different dough, use pie dough instead of biscuits; note that pie dough is thinner so fry at a slightly higher temperature, around 350 degrees Fahrenheit, and watch carefully as cooking time will be shorter. For a dairy-free glaze, substitute non-dairy milk such as almond or oat milk and omit the light corn syrup if you like; a small amount of agave can provide sheen. Swap cherry filling with apple pie filling, blueberry preserves, or even chocolate-hazelnut spread for creative variations. If using regular canned biscuits instead of flaky layers, use one whole biscuit per bomb and reduce frying time slightly.
Serving Suggestions
Serve warm with a scoop of vanilla ice cream or a dollop of whipped cream for a classic pairing. For a party platter, dust lightly with extra powdered sugar and arrange with fresh cherries or lemon slices to add color. A drizzle of warmed caramel alongside makes a decadent option, while a sprinkle of flaky sea salt over the glaze introduces a pleasant sweet-salty contrast. These are great as a handheld dessert at outdoor gatherings or plated with a coffee or tea for a cozy afternoon treat.
Cultural Background
Fried sweet doughs have a long history in American and European kitchens, from doughnuts to hand pies. These cherry bombs borrow from that tradition, combining the familiar American cherry pie flavor with the portable fried-dough format. They are a modern, playful cousin of traditional pies and hand pies found in county fairs and kitchens where frying small pastries offered a quick way to transform pantry items into dessert. The convenience of canned biscuits and pie filling reflects a 20th century trend toward shelf-stable shortcuts for home cooks.
Seasonal Adaptations
In summer, swap canned filling for homemade cherry compote made from fresh cherries to brighten flavors. In autumn use spiced apple filling with a pinch of cinnamon and nutmeg for a harvest twist. For winter holidays, a cranberry-pear filling or mincemeat evokes seasonal notes. Adjust the glaze by adding citrus zest in spring or a splash of bourbon in winter for warmth. These little bombs adapt well to the seasons depending on fruit choices and spice additions.
Meal Prep Tips
For efficient prep, lay out an assembly station with flattened dough, measured filling in a small bowl, a plate for sealed bombs, and your thermometer ready at the stove. Assemble all bombs and freeze them in a single layer on a tray. Once frozen, transfer to labeled freezer bags. On the day you want dessert, heat the oil and fry directly from frozen in small batches, glaze, and serve. This approach lets you produce multiple batches ahead with minimal evening effort.
These Cherry Pie Bombs are a delightful shortcut to the nostalgia of pie without the labor. They are fun to make, easy to adapt, and always an excuse to gather friends and family. Try them with different fillings and glazes and let your own memories shape the way you serve them.
Pro Tips
Keep oil at a steady 325 degrees Fahrenheit to prevent over-browning and ensure a fully cooked interior.
Seal the edges tightly and roll the seam under to avoid the filling leaking during frying.
Use a slotted metal spoon and turn frequently so each side browns evenly.
Glaze while bombs are warm to help the glaze adhere and set with a glossy finish.
This nourishing cherry pie bombs recipe is sure to be a staple in your kitchen. Enjoy every moist, high protein slice — it is perfect for breakfast or as a wholesome snack any time.
FAQs about Recipes
Can I freeze these before frying?
Yes. Assemble and freeze uncooked bombs on a tray until solid, then transfer to a freezer bag for up to 3 months. Fry from frozen, adding an extra 1 to 2 minutes to cook time.
What oil temperature is best for frying?
Maintain the oil at 325°F and fry in small batches of 2 to 3 bombs to avoid overcrowding and temperature drop.
Tags
Cherry Pie Bombs
This Cherry Pie Bombs recipe makes perfectly juicy, tender, and flavorful steak every time! Serve with potatoes and a side salad for an unforgettable dinner in under 30 minutes.
Ingredients
Glaze
Instructions
Prepare oil and tools
Fill a 2 to 3 quart heavy-bottomed saucepan just over halfway with vegetable oil and heat to 325°F. Have a candy thermometer, slotted spoon, paper towels, and a cooling rack ready.
Flatten biscuits
Open the biscuit can and separate each round into flaky layers. Flatten each piece into a 3-inch circle using your fingers or a small rolling pin, leaving it slightly thick for structure.
Fill and seal
Place 1 tablespoon of cherry pie filling in the center of each dough circle. Pinch edges together tightly and roll the seam under to form a smooth ball so the filling will not leak.
Fry in batches
Carefully lower 2 to 3 bombs into the 325°F oil using a slotted spoon. Turn frequently and fry until all sides are golden brown, about 4 to 5 minutes per batch.
Drain and glaze
Transfer fried bombs to paper towels to drain. Whisk powdered sugar, milk, and corn syrup to make a smooth glaze, toss each warm bomb to coat, then place on parchment or a rack to set.
Serve warm
Allow glaze to dry for about 10 minutes, then serve warm for the best textural contrast between the crisp exterior and molten cherry center.
Last Step: Please leave a rating and comment letting us know how you liked this recipe! This helps our business to thrive and continue providing free, high-quality recipes for you.
Nutrition
Did You Make This?
Leave a comment & rating below or tag
@feastinarecipe on social media!
Categories:
You might also like...

Lemon Chicken Orzo Soup
Cozy, bright, and ready fast, this Instant Pot lemon chicken orzo soup brings tender chicken, fresh veggies, and a sunny citrus finish.

50 Calorie Strawberry Cheesecakes
Feather-light mini cheesecakes with bright strawberry sauce, a tender biscuit-style base, and creamy filling. Just 47 calories each and irresistibly fresh.

Kahlua Chocolate Cheesecake Bites
Silky mini cheesecakes swirled with melted chocolate and a splash of Kahlua, nestled on Oreo crusts and crowned with fresh whipped cream.
Did You Make This?
Leave a comment & rating below or tag @feastinarecipe on social media!
Rate This Recipe
Share This Recipe
Enjoyed this recipe? Share it with friends and family, and don't forget to leave a review!
Comments (1)
This recipe looks amazing! Can't wait to try it.
Comments are stored locally in your browser. Server comments are displayed alongside your local comments.

Hi, I'm Sarah!
What's Popular

30-Minute Meals!
Join to receive our email series which contains a round-up of some of our quick and easy family favorite recipes.