
Cheesecake Tacos

Crunchy street-taco shells filled with creamy cheesecake filling and crowned with cherry pie topping—an easy, crowd-pleasing dessert that’s ready in 25 minutes.
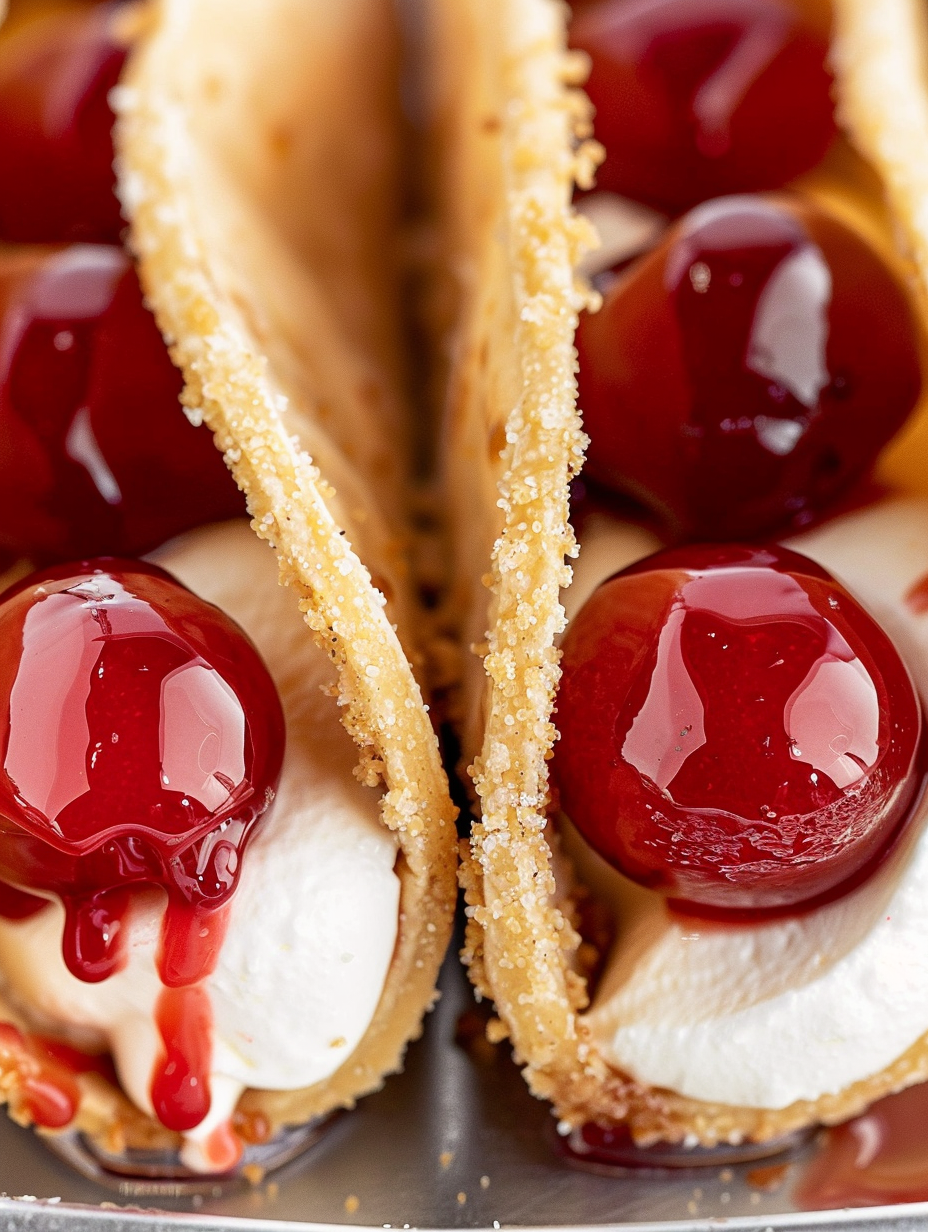
This playful dessert merges two beloved worlds: the creamy richness of classic cheesecake and the fun hand-held format of a taco. I first put these together on a warm summer evening when neighbors dropped by unexpectedly; with a handful of pantry staples and little fuss, I turned simple flour tortillas into crisp shells, filled them with a lightened cheesecake cream, and finished each with bright cherry pie filling. The contrast of warm, crunchy shells and cool, fluffy filling made everyone—kids and adults alike—perk up and ask for another.
What makes this version special is how approachable it is: nothing fussy, no water baths or lengthy chilling, and plenty of room for make-ahead steps. The cream cheese filling whips up silky smooth when the cheese is at room temperature, and using street taco-size tortillas keeps portions perfect for parties. I love serving these at summer gatherings and holiday buffets because they’re handheld, portable, and inevitably disappear first. If you enjoy desserts that combine texture and bright fruit flavors, these will become a repeat crowd-pleaser in your rotation.
Why You'll Love This Recipe
- Hand-held and party-ready: makes 18 easy-to-eat portions that guests can pick up and enjoy without plates.
- Fast prep: active time is about 15 minutes and the shells take 10 minutes in the oven—ready in roughly 25 minutes from start to finish.
- Pantry-friendly ingredients: uses flour tortillas, graham cracker crumbs, cream cheese, and canned cherry pie filling—no specialty shopping required.
- Make-ahead flexibility: shells can be baked and stored, filling can be chilled, and assembly is quick when guests arrive.
- Texture contrast: crisp, buttery shells paired with airy cheesecake filling and glossy cherry topping creates a satisfying balance.
- Kid-approved and adaptable: swap pie filling flavors or add toasted nuts for more crunch.
I remember my first batch disappearing in under 10 minutes—neighbors were sneaking them between conversations. My teenager declared them the best dessert for movie night because they’re easy to hold and not overly sweet, and my aunt appreciated the simplicity when she needed a quick treat for a bridge club. These small successes convinced me to keep the components handy for last-minute celebrations.
Ingredients
- Street Taco Size Flour Tortillas (18): Look for 4–6 inch flour tortillas labeled street-taco or small soft taco size; these shape easily into shells and crisp up without getting too thick. If unavailable, cut larger tortillas into 4-inch rounds with a glass or cookie cutter.
- Graham Cracker Crumbs (1 cup): Adds sweet, toasty crunch to the shell exterior. Use pre-crumbled or blitz full sheets in a food processor; regular or cinnamon graham crumbs both work—cinnamon adds a subtle warm note.
- Granulated Sugar (2 tablespoons): Combines with the crumbs to enhance caramelized surface color and add a touch of sweetness to the shell coating.
- Butter, melted (1/3 cup): Brushing the tortillas with butter helps the crumbs adhere and gives the shells a golden, buttery crunch—unsalted or salted both fine.
- Cream Cheese, softened (8 ounces): Full-fat cream cheese yields the creamiest filling. Make sure it reaches room temperature so it blends smoothly without lumps—brands like Philadelphia are easy to find and consistently smooth.
- Powdered Sugar (1/3 cup): Sweetens and stabilizes the filling without grittiness; sift if clumpy. Adjust slightly if you prefer a less sweet filling.
- Vanilla Extract (2 teaspoons): Use pure vanilla for depth of flavor; it brightens the cream cheese and pairs wonderfully with cherry topping.
- Whipped Topping, thawed (8 ounces Cool Whip): Lightens the filling into a fluffy, pipeable texture. If you prefer, make stabilized whipped cream at home (heavy cream + powdered sugar + a touch of cream cheese) for a fresher flavor.
- Cherry Pie Filling (21 ounces): Canned pie filling brings glossy, syrupy cherries that crown each taco; use high-quality brands or substitute cherry preserves for a chunkier finish.
Instructions
Step 1 — Preheat and Prep: Preheat the oven to 400°F. Line a shallow bowl with the graham crumbs mixed with the granulated sugar. Lightly pierce each tortilla 6–7 times with a fork to prevent large air pockets that could cause uneven baking. Step 2 — Butter and Coat: Using a pastry brush, coat both sides of each tortilla with the melted butter. Immediately press each side into the graham-sugar mixture so the crumbs adhere evenly; tweak pressure with your fingers to avoid tearing. The butter melts into the crumbs during baking and creates a crisp, golden surface. Step 3 — Shape the Shells: Flip a standard muffin or cupcake pan upside down and fold each tortilla in half. Drape and press them into the cups so the folded crease rests between two inverted cups—this keeps the taco shape while they bake and prevents collapse. Step 4 — Bake until Golden: Bake for 10–11 minutes, watching closely after 8 minutes; the shells should be deep golden and crisp but not burned. Rotate the pan once halfway through if your oven runs hot. Remove and cool in the pan until completely set and crisp—this ensures they hold filling without softening. Step 5 — Make the Filling: In a large bowl, beat the softened cream cheese with the powdered sugar and vanilla until smooth and completely lump-free—about 2–3 minutes with a hand mixer. Fold in the thawed whipped topping and beat on low until the texture is silky and light. Chill for at least 30 minutes to firm slightly; chilled filling is easier to pipe and holds shape better in the shells. Step 6 — Assemble: Transfer the chilled filling to a piping bag (or a zip-top bag with a corner snipped). Pipe a generous amount into each cooled shell, then top with 3–4 cherries and a spoonful of cherry sauce from the can. Serve immediately for the best contrast of textures.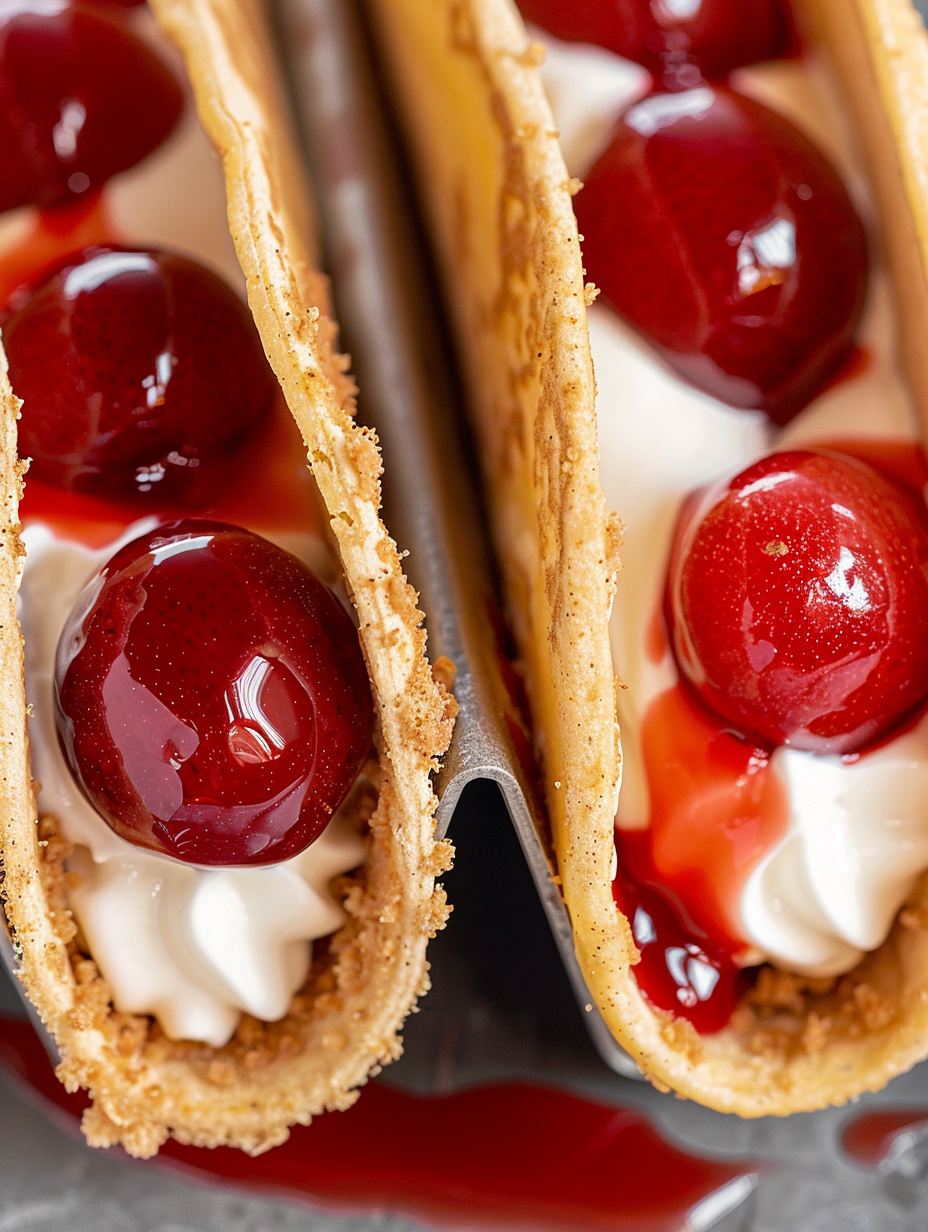
You Must Know
- Chill the filling: refrigerating the cream-cheese mixture at least 30 minutes firms it so it pipes neatly and doesn’t weep into the shell.
- Shell storage: baked shells keep well in an airtight container at room temperature for 1–2 days—avoid refrigeration which softens them.
- Allergy note: contains dairy and gluten; swap to gluten-free tortillas and gluten-free crumbs to adapt.
- Make-ahead tip: shells and filling can be prepared the day before; assemble just before serving for crisp shells.
My favorite part is the first bite—the crack of the shell gives way to a cloud of tangy, sweet filling, and the cherry topping adds a burst of bright acidity. The recipe has saved several impromptu gatherings for me: once I brought a platter to a summer potluck and returned to empty plates and insisted-on-the-recipe requests. It’s a deceptively simple trick that reads fancy on a dessert table.

Storage Tips
Store baked shells at room temperature in a single layer inside an airtight container for up to 48 hours—stacking will risk breakage. The cheesecake filling keeps refrigerated for 3 days in a sealed container; if you plan longer storage, freeze the filling in a flat container for up to 1 month and thaw overnight in the fridge. Avoid assembling and refrigerating finished tacos: the shells will absorb moisture and lose their crispness. If you must refrigerate assembled portions for travel, pack shells and filling separately and assemble on arrival.
Ingredient Substitutions
For a gluten-free version, use certified gluten-free small tortillas and substitute gluten-free graham crumbs or crushed gluten-free cookies. To lighten the filling, replace the whipped topping with Greek yogurt (strain it first) and reduce powdered sugar slightly—expect a tangier, less sweet profile. For a richer texture, use mascarpone in place of half the cream cheese. Swap cherry pie filling for blueberry, apple, or lemon curd for different flavor profiles; adjust sweetness to taste when using tart toppings.
Serving Suggestions
Arrange them on a long platter and garnish with a light dusting of powdered sugar and a few mint leaves for color contrast. Pair with espresso or a sparkling rosé for adult gatherings, or serve alongside vanilla ice cream for a buttoned-up dessert spread. For a brunch twist, add a few toasted almond slices and a drizzle of warmed raspberry sauce. These are ideal for buffet-style entertaining where guests can self-serve without cutlery.
Cultural Background
This mash-up draws inspiration from American hand-held desserts and the playful street-food approach to portioning. While tacos are traditionally savory and rooted in Mexican cuisine, transforming the format into a dessert has become popular in informal American entertaining—think fried ice cream tacos or churro tacos. The use of graham crackers and cream cheese nods to classic American cheesecake flavors, while the handheld format keeps things casual and festive.
Seasonal Adaptations
Switch toppings with the seasons: use canned peach or berry pie filling in summer, spiced apple in autumn, or a cranberry-orange compote for winter holidays. For spring parties, top with macerated fresh strawberries and a little lemon zest. You can also add seasonal garnishes—toasted pecans in the fall or edible flowers in spring—to make the presentation feel timely and celebratory.
Meal Prep Tips
To streamline entertaining, bake shells a day ahead and store them at room temperature in an airtight container. Make the filling in the morning and chill; transfer to a piping bag and keep refrigerated until 15 minutes before serving. Keep the pie filling sealed until use. For large crowds, arrange assembly as a station where someone pipes filling and another adds fruit toppings—this keeps assembly efficient and prevents shells from softening while waiting to be filled.
These tacos are a small but joyful dessert—easy to scale, simple to prepare, and full of nostalgic flavors. I hope they become your go-to party trick when you want to impress without stress.
Pro Tips
Make sure cream cheese is fully softened to avoid lumps in the filling; leave on the counter 30–60 minutes before mixing.
Pierce tortillas several times with a fork to prevent large air pockets while baking.
Chill the filling for at least 30 minutes before piping to achieve a stable, pipeable consistency.
Use a pastry brush to evenly coat tortillas with melted butter so crumbs stick uniformly.
Assemble just before serving to maintain shell crunch; store components separately if prepping ahead.
This nourishing cheesecake tacos recipe is sure to be a staple in your kitchen. Enjoy every moist, high protein slice — it is perfect for breakfast or as a wholesome snack any time.
FAQs about Recipes
Can I make the shells ahead of time?
Yes—baked shells keep crisp for 1–2 days stored at room temperature in an airtight container. Avoid refrigerating baked shells.
Can I make these gluten-free?
Use gluten-free tortillas and gluten-free graham crumbs; the texture will be similar but check package instructions for baking times.
Tags
Cheesecake Tacos
This Cheesecake Tacos recipe makes perfectly juicy, tender, and flavorful steak every time! Serve with potatoes and a side salad for an unforgettable dinner in under 30 minutes.
Ingredients
Shells
Filling & Topping
Instructions
Preheat and Prep
Preheat oven to 400°F. In a shallow bowl, combine graham cracker crumbs and granulated sugar. Lightly stab tortillas with a fork 6–7 times to prevent large air bubbles during baking.
Butter and Coat Tortillas
Brush both sides of each tortilla evenly with melted butter, then press each side into the graham-sugar mixture until coated. Take care not to tear the tortillas while pressing.
Shape Shells
Flip a muffin pan upside down and fold each tortilla in half, tucking the crease between two inverted cups so the tortilla holds a taco shape while baking.
Bake Until Golden
Bake shaped tortillas for 10–11 minutes, monitoring after 8 minutes. They should be golden brown and crisp but not burned. Cool in the pan to set shape before removing.
Beat Filling
Beat softened cream cheese with powdered sugar and vanilla until smooth. Fold in thawed whipped topping and beat until light and fluffy. Chill at least 30 minutes to firm.
Assemble and Serve
Pipe chilled filling into cooled shells, then top each with 3–4 cherries and a spoonful of cherry sauce. Serve immediately for best texture contrast.
Last Step: Please leave a rating and comment letting us know how you liked this recipe! This helps our business to thrive and continue providing free, high-quality recipes for you.
Nutrition
Did You Make This?
Leave a comment & rating below or tag
@feastinarecipe on social media!
Categories:
You might also like...

Lemon Chicken Orzo Soup
Cozy, bright, and ready fast, this Instant Pot lemon chicken orzo soup brings tender chicken, fresh veggies, and a sunny citrus finish.

50 Calorie Strawberry Cheesecakes
Feather-light mini cheesecakes with bright strawberry sauce, a tender biscuit-style base, and creamy filling. Just 47 calories each and irresistibly fresh.

Kahlua Chocolate Cheesecake Bites
Silky mini cheesecakes swirled with melted chocolate and a splash of Kahlua, nestled on Oreo crusts and crowned with fresh whipped cream.
Did You Make This?
Leave a comment & rating below or tag @feastinarecipe on social media!
Rate This Recipe
Share This Recipe
Enjoyed this recipe? Share it with friends and family, and don't forget to leave a review!
Comments (1)
This recipe looks amazing! Can't wait to try it.
Comments are stored locally in your browser. Server comments are displayed alongside your local comments.

Hi, I'm Sarah!
What's Popular

30-Minute Meals!
Join to receive our email series which contains a round-up of some of our quick and easy family favorite recipes.