
Carmelitas — Soft & Chewy Oatmeal Caramel Bars

For serious caramel lovers: soft, chewy oatmeal bars overflowing with melted caramel and chocolate. One-bowl, no-mixer method for an impressive, easy treat.
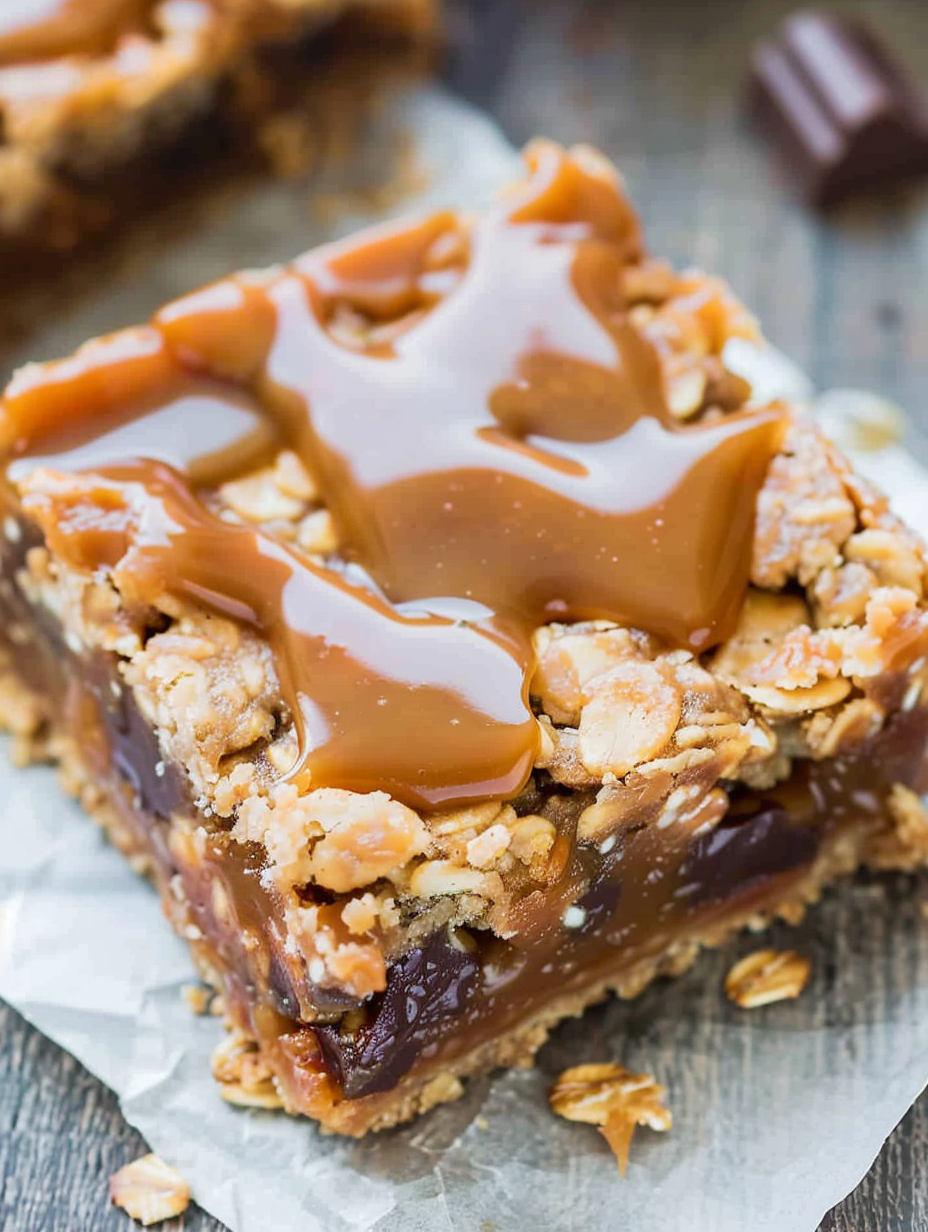
These Carmelitas are the sort of dessert that makes you close your eyes and smile after the first bite. I first stumbled on this combination on a rainy afternoon when I wanted something sticky, chocolatey, and nostalgic without fuss. The result — an oat-brown-sugar base, a molten caramel middle, and a chocolate layer that softens but doesn’t completely melt — became an instant favorite in my house. They’re soft and chewy, but with enough structure to be lifted by the corner without collapsing into a gooey puddle, and that texture contrast is exactly what gives them personality.
What makes these bars special is how few moving parts there are: one bowl, no mixer, and simple pantry staples. I love that the base uses whole rolled oats for chew and a toasted flavor, while the caramel brings that deep, buttery sweetness that everyone loves. They feel indulgent but familiar — like a bakery treat you could make on a weeknight. Friends routinely request these for potlucks and birthday parties, and I’ve learned a few small tricks (line the pan, let them fully cool, use soft caramels) that keep the process straightforward and the results perfect every time.
Why You'll Love This Recipe
- Soft, chewy oat base made in one bowl — no electric mixer required, so cleanup is minimal and technique is simple.
- Loaded with gooey melted caramel and a blanket of semi-sweet chocolate for the perfect sweet-and-salty balance.
- Ready ingredients and short hands-on time: about 15 minutes active prep and a single bake session; total time includes cooling so plan ahead.
- Flexible caramel options — use individually wrapped soft caramels or caramel bits; both melt beautifully with a little cream.
- Great for make-ahead: cool completely and store airtight at room temperature for up to a week, or freeze for up to 4 months.
- Crowd-pleaser that travels well — cut into squares for parties, school lunches, or a weekend treat.
My family’s reaction the first time I made these was unforgettable: my partner declared them “dangerous” and the kids kept asking for seconds until the pan was gone. Over the years I’ve tweaked the bake time, tried different caramels, and learned that a slow cooling period is the secret to neat slices. These small discoveries turned a good bar into something I make again and again.
Ingredients
- Butter (3/4 cup melted): Unsalted works best so you control salt; that’s 1 1/2 sticks in U.S. measurements. Melting the butter brings a nutty note and helps bind the oats while keeping the base tender.
- Light brown sugar (3/4 cup packed): Adds moisture and a hint of molasses; packed brown sugar creates chewiness in the oat layer. If you only have dark brown sugar, it’ll be richer but still delicious.
- Vanilla extract (1 tablespoon): Use pure vanilla for depth — it amplifies the caramel and chocolate without being obvious.
- All-purpose flour (1 cup): Gives structure so the bars hold together; spoon and level the cup to avoid a dry base.
- Old-fashioned rolled oats (1 cup): Whole rolled oats provide chew and toasted flavor; don’t use instant or quick-cook here — they’ll make the texture too soft.
- Baking soda (1 teaspoon): Aids a light lift in the base and keeps the crumb tender.
- Salt (1/2 teaspoon): Balances sweetness — adjust to taste, especially if using salted butter.
- Soft caramel squares (about 35 pieces): I use Werther’s Originals Soft Caramels; two bags usually give the right amount. If using smaller individually wrapped caramels, add a couple more for full coverage.
- Heavy cream (1/2 cup): Thinned into the caramels to create a glossy, pourable sauce — cream keeps the caramel soft and sliceable after cooling.
- Semi-sweet chocolate chips (1 cup): Or chopped chocolate; a mix of chips and chunks gives melting variety and pockets of chocolate in every bite.
Instructions
Prepare the pan and oven: Preheat the oven to 350°F. Line an 8x8-inch pan with aluminum foil so edges overhang for easy removal; lightly spray the foil with nonstick cooking spray. Lining the pan prevents caramel from sticking and makes cleanup effortless. Make the oat-brown sugar base: In a large microwave-safe bowl, melt 3/4 cup butter on high for about 90 seconds. Whisk in 3/4 cup packed light brown sugar and 1 tablespoon vanilla until smooth. Add 1 cup all-purpose flour, 1 cup old-fashioned rolled oats, 1 teaspoon baking soda, and 1/2 teaspoon salt; stir until combined. Mixture will be thick and sticky — that’s perfect. Form the first layer and bake briefly: Transfer about half of the oat mixture to the prepared pan and press into an even layer with the back of a spoon or an offset spatula; reserve the rest for the topping. Bake this base for 10 minutes so it sets slightly and develops a toasted edge. Make the caramel sauce: While the base bakes, place about 35 soft caramel squares and 1/2 cup heavy cream in a microwave-safe bowl. Microwave in 60-second bursts, stirring after each burst, until the caramels melt and the mixture is smooth — usually 4–5 minutes total. Alternatively, melt in a saucepan over medium-low heat, stirring constantly to avoid scorching. Add a pinch of salt if your caramels are very sweet. Assemble the layers: Remove the partially baked base from the oven and evenly sprinkle 1 cup semi-sweet chocolate chips over it. Slowly pour the warm caramel sauce over the chocolate so it melts into the chips and creates a glossy middle layer. Evenly crumble the reserved oat mixture over the caramel to form the top. Final bake: Return the pan to the oven and bake 15–18 minutes, until the edges are lightly browned and the center is just bubbling. I often check at 16 minutes for a perfect chew and to avoid overbaking, which dries the bars. Cool completely before slicing: Allow the bars to cool fully in the pan so the caramel firms up — at least 4 hours at room temperature, or overnight for the cleanest cuts. To speed cooling, place the pan in the refrigerator covered loosely with foil to prevent fridge odors. If you cut while warm they’ll be delicious but messy.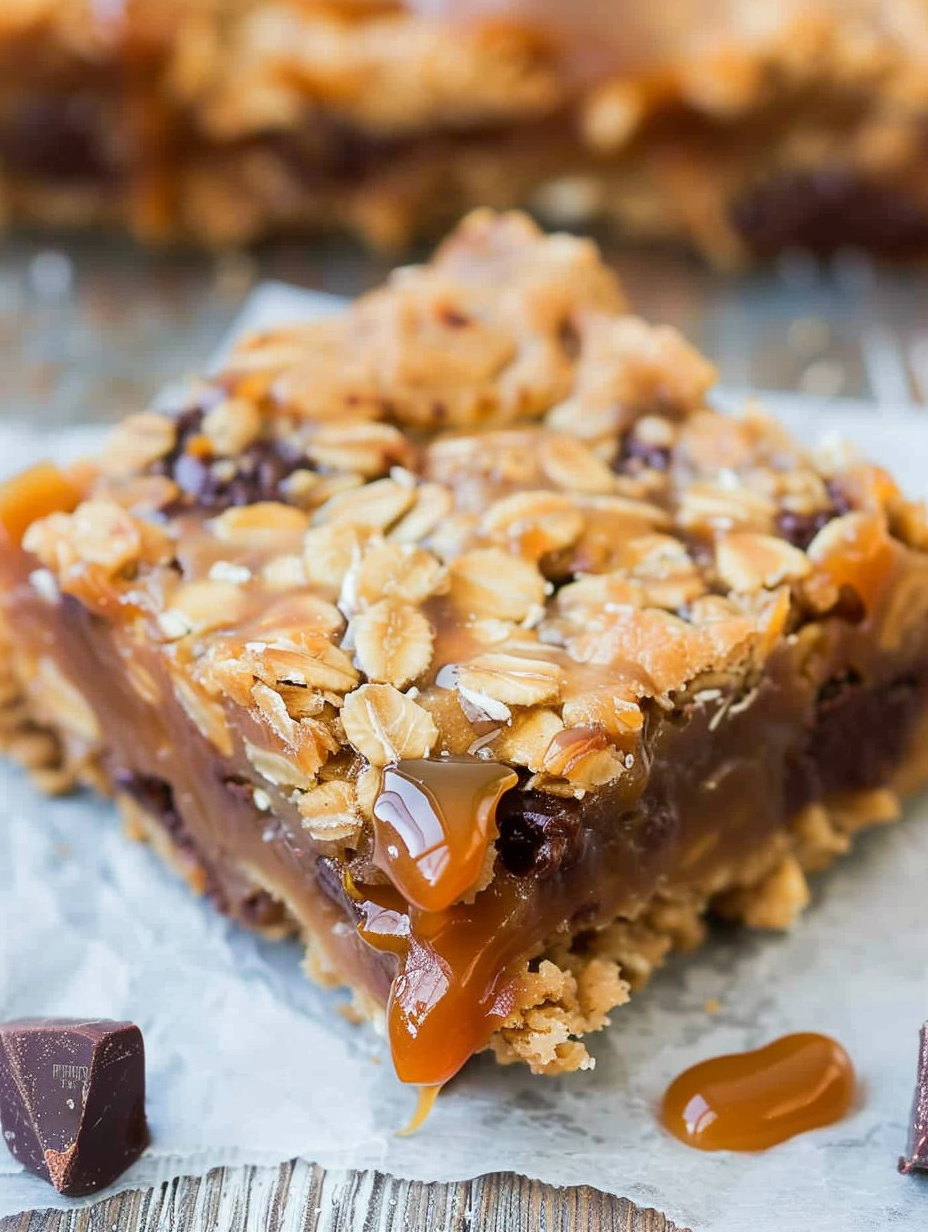
You Must Know
- These bars are high in calories and sugar — expect about 339 kcal per serving; they’re an indulgent treat best enjoyed in moderation.
- Storage: keep airtight at room temperature for up to 1 week, or freeze for up to 4 months. Thaw in the refrigerator or at room temperature before serving.
- Cooling is crucial: waiting allows the caramel to set so slices cut cleanly. Rushing this step often leads to a sticky mess.
- Use soft, buttery caramels (like Werther’s Soft) or caramel bits — they melt reliably. If using firmer caramels, increase cream slightly or melt on the stovetop slowly.
My favorite thing about these bars is how they hit memory triggers: my grandmother’s toasted oats, my college dorm chocolate stash, and holiday baking all at once. I once brought them to a small family reunion and a cousin asked for the recipe three times while still standing at the table. The combination of textures — crisp edge, chewy oat, gooey caramel, soft chocolate — is what keeps people coming back for more.
Storage Tips
Store fully cooled bars in an airtight container at room temperature for up to one week. For longer storage, freeze cut squares in a single layer on a baking sheet until firm, then stack with parchment between layers in a freezer-safe container for up to four months. Reheat briefly in a warm oven (300°F for 5–8 minutes) to restore chew and soften the chocolate, or allow to come to room temperature to retain the firm caramel center. Always label frozen portions with the date so you can enjoy them at peak freshness.

Ingredient Substitutions
If you need to swap ingredients, here are reliable options: replace heavy cream with evaporated milk for a slightly less rich caramel; use dark brown sugar for a deeper molasses flavor; substitute chopped milk chocolate for semi-sweet if you prefer a sweeter bar. For a gluten-free version, use a certified gluten-free flour blend and certified gluten-free rolled oats — texture will be slightly different but still delicious. If you want a dairy-free version, explore plant-based caramel alternatives or coconut-based caramels and use vegan butter, but note the flavor and setting of the caramel will change.
Serving Suggestions
Serve squares at room temperature for the best texture. For parties, cut into smaller bite-sized pieces and present on a platter with salted nuts for contrast. They pair beautifully with strong coffee or a glass of cold milk. For a dessert plate, add a dollop of lightly sweetened whipped cream or vanilla ice cream — the contrast of warm ice cream against the caramel is heavenly if you reheat briefly before serving.
Cultural Background
Bars like these blend North American baked-good traditions — oats and brown sugar have roots in rustic cooking, while milk caramel and chocolate reflect European confectionery influences. The idea of layered bars is a classic American technique: make a base, add a luscious middle, and top with a crumb or streusel. Over time, variations have proliferated across bakeries and kitchens, but the allure is always the same — simple assembly producing deeply comforting sweets.
Seasonal Adaptations
In autumn, stir in 1 teaspoon ground cinnamon and 1/4 teaspoon nutmeg to the oat base for warming spice. For holidays, fold in 1/2 cup chopped toasted pecans or walnuts into the base or sprinkle chopped toffee bits on top before the final bake. In summer, serve chilled with berries to cut the sweetness. Small swaps can adapt the bars to any season while maintaining the core caramel-chocolate-oat profile.
Meal Prep Tips
Make a double batch and freeze squares for easy grab-and-go treats. When prepping, measure and pre-melt the butter so you can assemble quickly. If preparing for a party, bake the day before and cool overnight; slices will be tidy and the flavors meld beautifully after resting. Use a sharp knife warmed under hot water and wiped dry between cuts for clean edges.
These Carmelitas are both nostalgic and modern — a perfect example of how humble ingredients can produce something show-stopping. Make them for a crowd or keep them all to yourself; either way, they’ll disappear fast. Happy baking!
Pro Tips
Line the pan with foil and spray the foil for the easiest cleanup — caramel sticks terribly to unlined pans.
Allow bars to cool completely (at least 4 hours) before slicing to ensure neat squares and firm caramel.
Use whole old-fashioned rolled oats, not quick oats, to preserve a chewy texture.
When melting caramels in the microwave, heat in 60-second bursts and stir between bursts to avoid scorching.
Warm your knife under hot water and dry it between slices for cleaner cuts.
This nourishing carmelitas — soft & chewy oatmeal caramel bars recipe is sure to be a staple in your kitchen. Enjoy every moist, high protein slice — it is perfect for breakfast or as a wholesome snack any time.
Tags
Carmelitas — Soft & Chewy Oatmeal Caramel Bars
This Carmelitas — Soft & Chewy Oatmeal Caramel Bars recipe makes perfectly juicy, tender, and flavorful steak every time! Serve with potatoes and a side salad for an unforgettable dinner in under 30 minutes.
Ingredients
Oat Base
Caramel Layer
Topping
Instructions
Preheat and prepare pan
Preheat oven to 350°F. Line an 8x8-inch pan with aluminum foil with overhang and spray with nonstick spray. This prevents sticking and makes removal simple.
Make oat base in one bowl
Melt 3/4 cup butter in a microwave-safe bowl (about 90 seconds). Whisk in 3/4 cup packed light brown sugar and 1 tablespoon vanilla. Add 1 cup flour, 1 cup rolled oats, 1 teaspoon baking soda, and 1/2 teaspoon salt. Stir until combined; mixture will be thick.
Bake base
Press about half the oat mixture into the prepared pan to form an even layer. Bake for 10 minutes to set and toast the base slightly.
Prepare caramel sauce
Combine about 35 soft caramels and 1/2 cup heavy cream in a microwave-safe bowl. Heat in 60-second bursts, stirring between bursts, until smooth (about 4–5 minutes), or melt gently on the stovetop. Stir in a pinch of salt to balance sweetness.
Assemble layers
Remove base from oven and sprinkle 1 cup chocolate chips evenly over the warm crust. Slowly pour the caramel sauce over the chocolate so it melts and forms a glossy layer. Crumble the reserved oat mixture evenly over the caramel.
Final bake and cool
Return to oven and bake 15–18 minutes until edges are lightly browned and center is bubbling. Cool completely in the pan for at least 4 hours or overnight before slicing for neat bars. Refrigerate to speed cooling if needed.
Last Step: Please leave a rating and comment letting us know how you liked this recipe! This helps our business to thrive and continue providing free, high-quality recipes for you.
Nutrition
Did You Make This?
Leave a comment & rating below or tag
@feastinarecipe on social media!
Categories:
You might also like...

Lemon Chicken Orzo Soup
Cozy, bright, and ready fast, this Instant Pot lemon chicken orzo soup brings tender chicken, fresh veggies, and a sunny citrus finish.

50 Calorie Strawberry Cheesecakes
Feather-light mini cheesecakes with bright strawberry sauce, a tender biscuit-style base, and creamy filling. Just 47 calories each and irresistibly fresh.

Kahlua Chocolate Cheesecake Bites
Silky mini cheesecakes swirled with melted chocolate and a splash of Kahlua, nestled on Oreo crusts and crowned with fresh whipped cream.
Did You Make This?
Leave a comment & rating below or tag @feastinarecipe on social media!
Rate This Recipe
Share This Recipe
Enjoyed this recipe? Share it with friends and family, and don't forget to leave a review!
Comments (1)
This recipe looks amazing! Can't wait to try it.
Comments are stored locally in your browser. Server comments are displayed alongside your local comments.

Hi, I'm Sarah!
What's Popular

30-Minute Meals!
Join to receive our email series which contains a round-up of some of our quick and easy family favorite recipes.