
>>

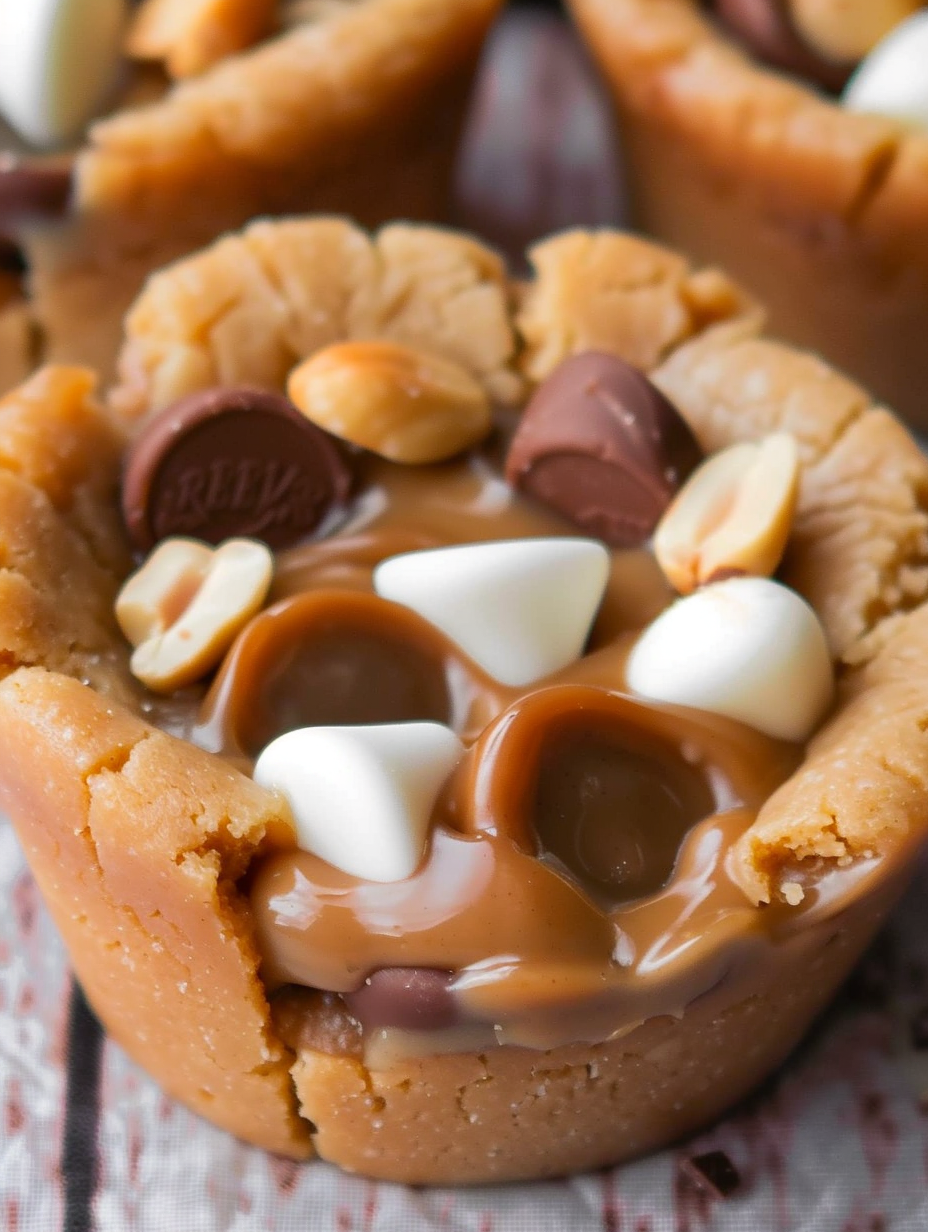
Buttery peanut butter cookie cups filled with gooey caramels, mini peanut butter cups, white chocolate minis and roasted peanuts—an easy, crowd-pleasing dessert.
This recipe for Caramel Peanut Butter Cookie Cups began as a late-night pantry experiment the winter I wanted something nostalgic but a little more playful than a standard cookie. I grew up with peanut butter and caramel candies around the holidays, and one evening I pressed a soft peanut butter dough into a muffin tin and discovered the magic when a caramel melted into the center and the edges crisped up while the center stayed tender and chewy. It became an instant hit: friends, coworkers, and family members kept asking for the brown-paper-bag version at parties.
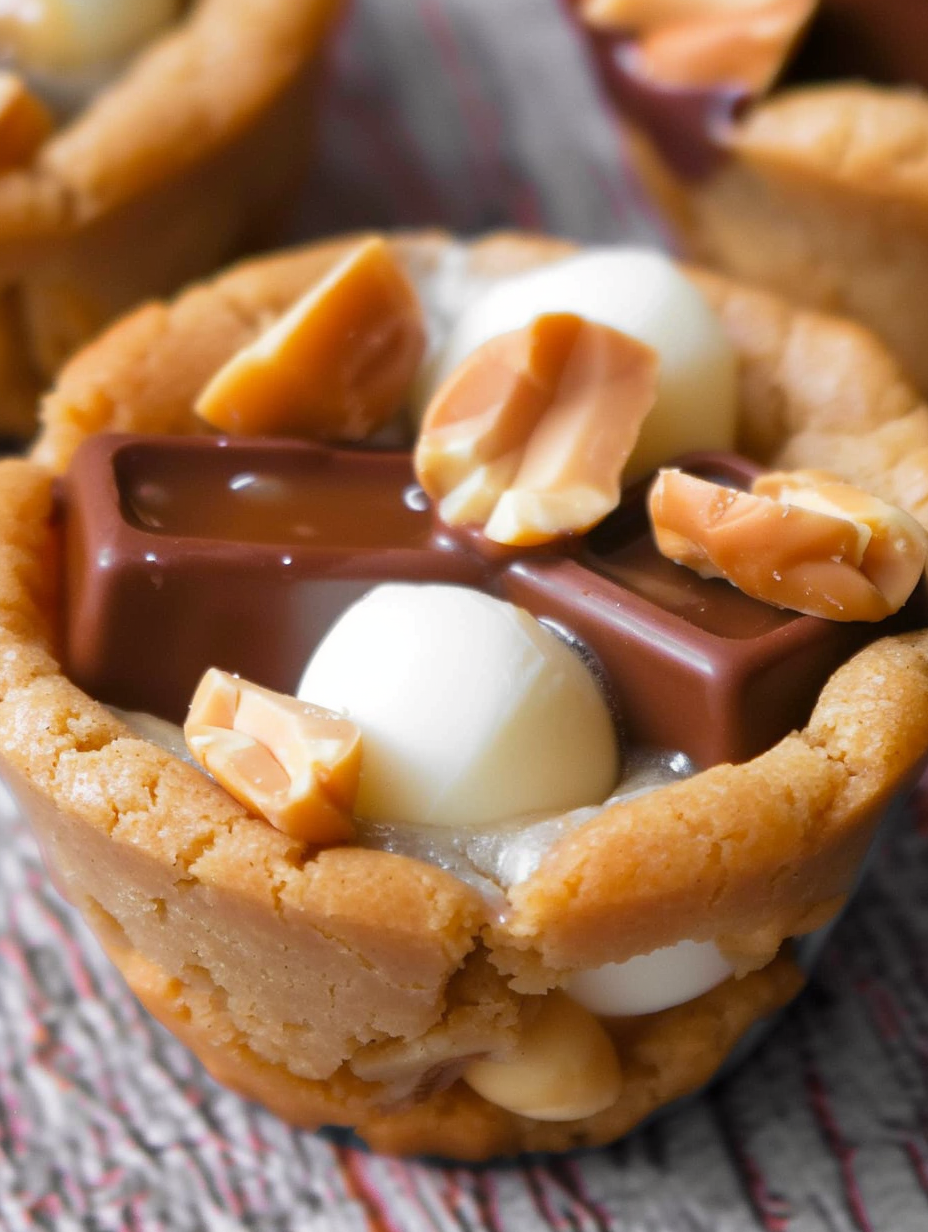
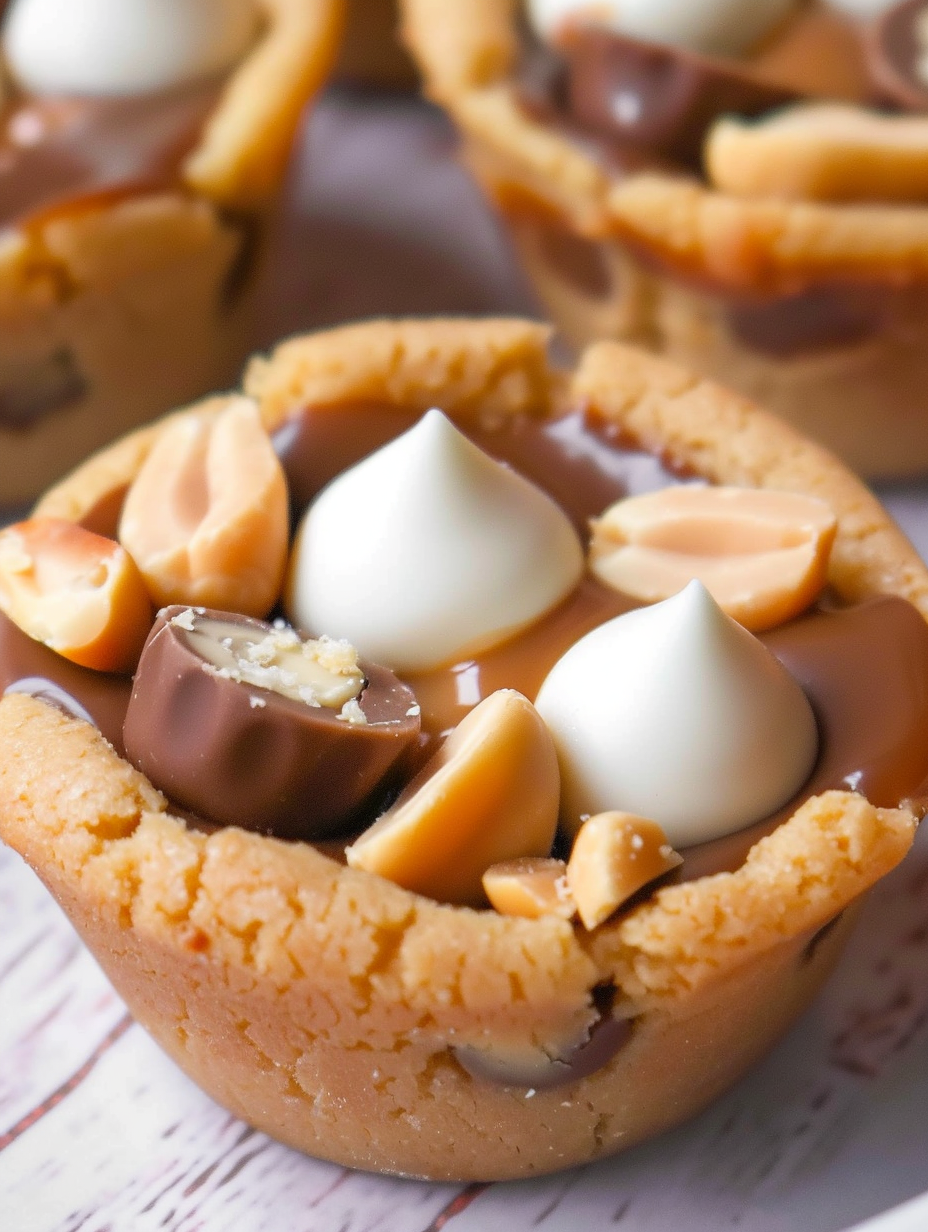
What makes these little cups special is the contrast of textures and temperatures: a slightly crisp, buttery rim, a pillowy cookie interior, a warm, gooey caramel center, and the crunchy pop of roasted peanuts. Toss in mini chocolate peanut butter cups—both classic and white chocolate—and you have a layered dessert that tastes like a cross between a candy bar and a freshly baked cookie. They take minimal hands-on time, use pantry staples, and the presentation is charming for gatherings. I often make a double batch for holiday trays because they travel well and look indulgent without demanding complicated techniques.
I first made these one chilly December and watched everyone hover around the cooling rack; the room smelled faintly of toasted peanuts and brown sugar. My neighbor, who usually passes on sweets, took three and called the recipe "dangerously good." Over the years I’ve tweaked the bake time, learned that a short second bake helps the candies meld into the cookie without making the crust soggy, and now I rarely show up to holiday exchanges without a tin of these.
My favorite thing about these cups is how they balance nostalgia with a baker's tweak: the caramel gives warm, buttery notes while the peanut butter dough holds a classic cookie profile. Family members often make a beeline for the white chocolate-topped cups first, demonstrating how a small change in candy can shift preferences dramatically. At a recent potluck, someone guessed they were store-bought—one of the highest compliments I get.
Store completely cooled cups in an airtight container. If keeping at room temperature, layer parchment between rows to prevent sticking and consume within 3–4 days. For longer storage, refrigerate up to 2 weeks; bring to room temperature before serving for softer centers. To freeze, flash-freeze on a sheet tray until firm, then transfer to a freezer-safe container for up to 3 months. Reheat frozen cups at 325°F for 6–8 minutes to soften the caramel center before serving—watch closely to avoid melting the chocolate completely.
If peanuts are an issue, swap the peanut butter for cookie butter or sunflower seed butter and use allergy-friendly chocolate cups—note that flavor and texture will change. For a dairy-free version, choose vegan caramels and dairy-free chocolate minis and use a plant-based butter. Use natural peanut butter with added 2–3 tablespoons sugar if your peanut butter is runny. To reduce sweetness, opt for unsalted roasted peanuts and slightly decrease the brown sugar by 2 tablespoons; the caramel center will remain sweet but overall balance improves.
Serve warm with a scoop of vanilla ice cream or a dollop of whipped cream for contrast. For party platters, arrange on a tiered tray alternated with small fruit kebabs—the saltiness pairs beautifully with tart apple slices. Garnish with a sprinkle of flaky sea salt or extra chopped roasted peanuts for texture. They make an elegant finish for casual dinners and are excellent packaged in cello bags as edible gifts.
These cups are a modern American mashup inspired by candy-stuffed cookies and classic peanut butter desserts. Peanut butter has a long history in the U.S. as an accessible, protein-rich pantry staple, while caramels and candy cups reflect mid-century candy manufacturing traditions. Combining them into a handheld, shareable confection taps into a contemporary trend of hybrid desserts that fuse nostalgic flavors with simple baking techniques.
In colder months, stir 1/2 teaspoon ground cinnamon into the dough for a warm spice note; around holidays swap the white chocolate minis for peppermint pieces or sprinkle crushed candy canes on top after baking. Summer gatherings benefit from serving chilled alongside a citrusy sorbet to cut richness. For autumn, replace some peanuts with toasted pecans and drizzle a little brown butter caramel on top for a deeper, toasty flavor.
Portion dough into a lined baking sheet and freeze scoops for quick baking later; bake directly from frozen adding 1–2 minutes to the initial bake. Pre-wrap the filled, cooled cups in parchment and store in the freezer for grab-and-go desserts—defrost overnight in the fridge. If making ahead for a party, bake, cool, and refrigerate; return to a low oven for 4–5 minutes before serving to refresh the caramel centers.
Readers have told me these were the first cookies their picky toddlers gladly ate, and hosts say they vanish within the first 30 minutes of parties. One friend made them for a bake sale and sold out in an hour; another adapted them for a nut-free school event by swapping in sunflower seed butter and allergy-safe chocolate. Those anecdotes keep me tweaking the technique—shorter second bakes for softer rims, and a slightly thicker rim so the cups hold their shape when lifted.
These Caramel Peanut Butter Cookie Cups are a joyful blend of candy and baking that invite experimentation. Whether you stick to the original or try one of the variations, they are easy to love and even easier to share. Make a batch, warm one for yourself, and keep the rest for friends—these cups bring cozy, nostalgic flavors to any table.
Chill the dough 10 minutes if it feels too sticky; this helps form neat cups that hold shape while baking.
Use a #60 scoop or about 1.5 tablespoons of dough per cup for even sizing and consistent bake times.
Allow the cups to cool 15 minutes in the tin to set; unmolding too soon causes them to fall apart.
Flash-freeze baked cups on a sheet tray before storing in a container to prevent sticking and preserve shape.
If caramels are too firm, microwave them for 5–7 seconds before pressing into the warm cookie to help them meld.
This nourishing caramel peanut butter cookie cups recipe is sure to be a staple in your kitchen. Enjoy every moist, high protein slice — it is perfect for breakfast or as a wholesome snack any time.
This Caramel Peanut Butter Cookie Cups recipe makes perfectly juicy, tender, and flavorful steak every time! Serve with potatoes and a side salad for an unforgettable dinner in under 30 minutes.
Preheat oven to 350°F. Grease a 12-cup muffin tin well or use sturdy liners. Ensure butter and eggs are at room temperature for even mixing.
In a large bowl, cream 1 cup softened salted butter, 1 cup smooth peanut butter, 1 1/2 cups packed golden brown sugar, and 1/2 cup granulated sugar with an electric mixer until light and fluffy, about 2–3 minutes.
Beat in 2 large eggs one at a time, then mix in 2 teaspoons vanilla extract until just combined. Avoid overmixing to keep the dough tender.
On low speed, add 2 1/2 cups all-purpose flour, 2 teaspoons baking powder, and 1 teaspoon salt until the dough comes together. If dough is sticky, chill 10 minutes.
Press about 1.5 tablespoons of dough into each greased muffin cup, pressing up the sides to form a cup with a slightly thicker rim so the edge crisps during baking.
Bake at 350°F until edges are just starting to brown, roughly 11–13 minutes. Centers will look soft; this is correct so the caramel melts into the center during the second bake.
Remove tin from oven and press one caramel into each center. Add two Reese's Peanut Butter Cup Minis and two Reese's White Chocolate Minis per cup, then sprinkle chopped peanuts. Return to oven for 5 minutes.
Allow cups to cool in the tin for about 15 minutes so the centers set. Use an offset spatula to loosen if necessary, then transfer to a wire rack to cool completely before serving or storing.
Last Step: Please leave a rating and comment letting us know how you liked this recipe! This helps our business to thrive and continue providing free, high-quality recipes for you.
Leave a comment & rating below or tag
@feastinarecipe on social media!

Cozy, bright, and ready fast, this Instant Pot lemon chicken orzo soup brings tender chicken, fresh veggies, and a sunny citrus finish.

Feather-light mini cheesecakes with bright strawberry sauce, a tender biscuit-style base, and creamy filling. Just 47 calories each and irresistibly fresh.

Silky mini cheesecakes swirled with melted chocolate and a splash of Kahlua, nestled on Oreo crusts and crowned with fresh whipped cream.
Leave a comment & rating below or tag @feastinarecipe on social media!
Enjoyed this recipe? Share it with friends and family, and don't forget to leave a review!
This recipe looks amazing! Can't wait to try it.
Comments are stored locally in your browser. Server comments are displayed alongside your local comments.

Join to receive our email series which contains a round-up of some of our quick and easy family favorite recipes.
