
>>

Mini caramel cheesecake bites — creamy cheesecake centers wrapped in a silky salted caramel coating. A simple no-bake treat perfect for parties and make-ahead dessert trays.
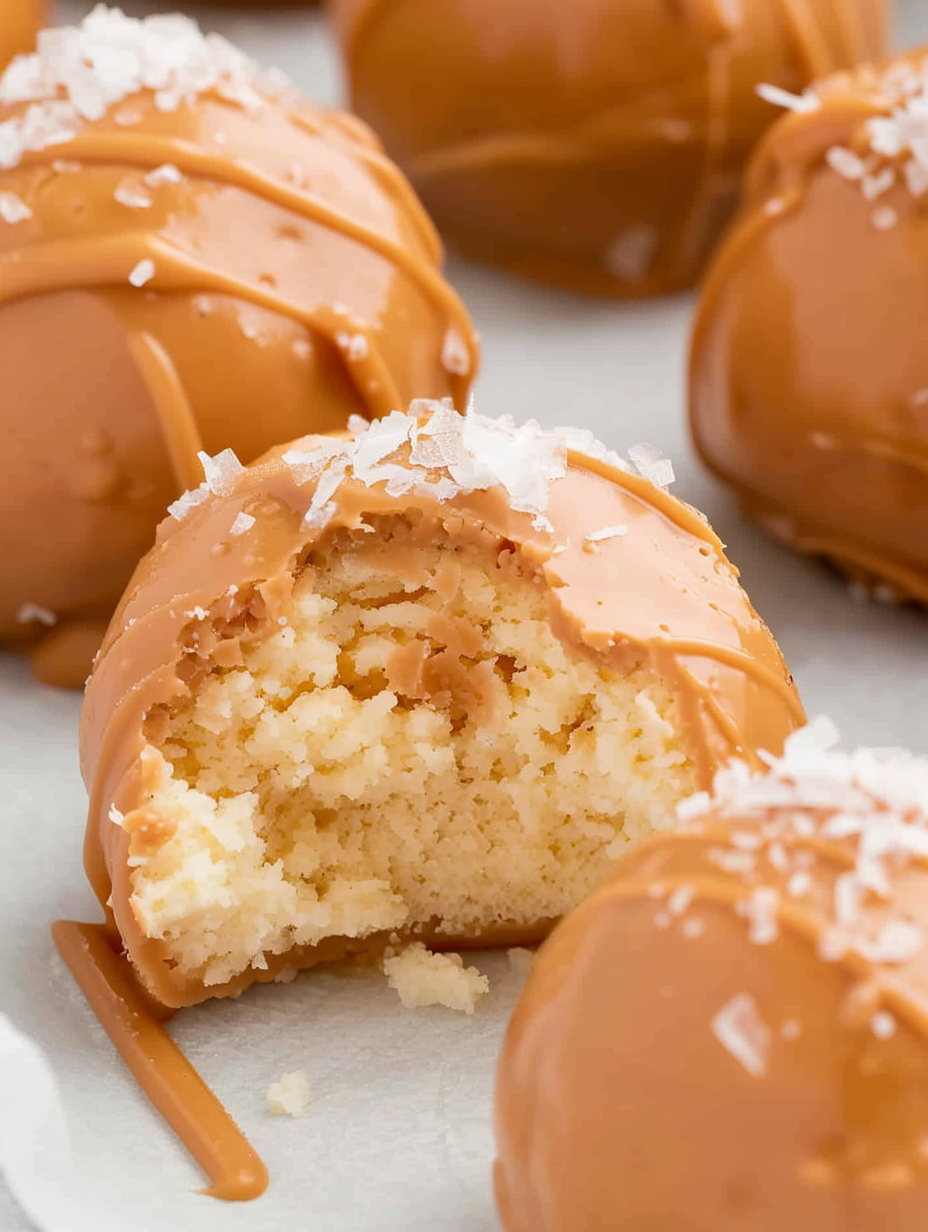
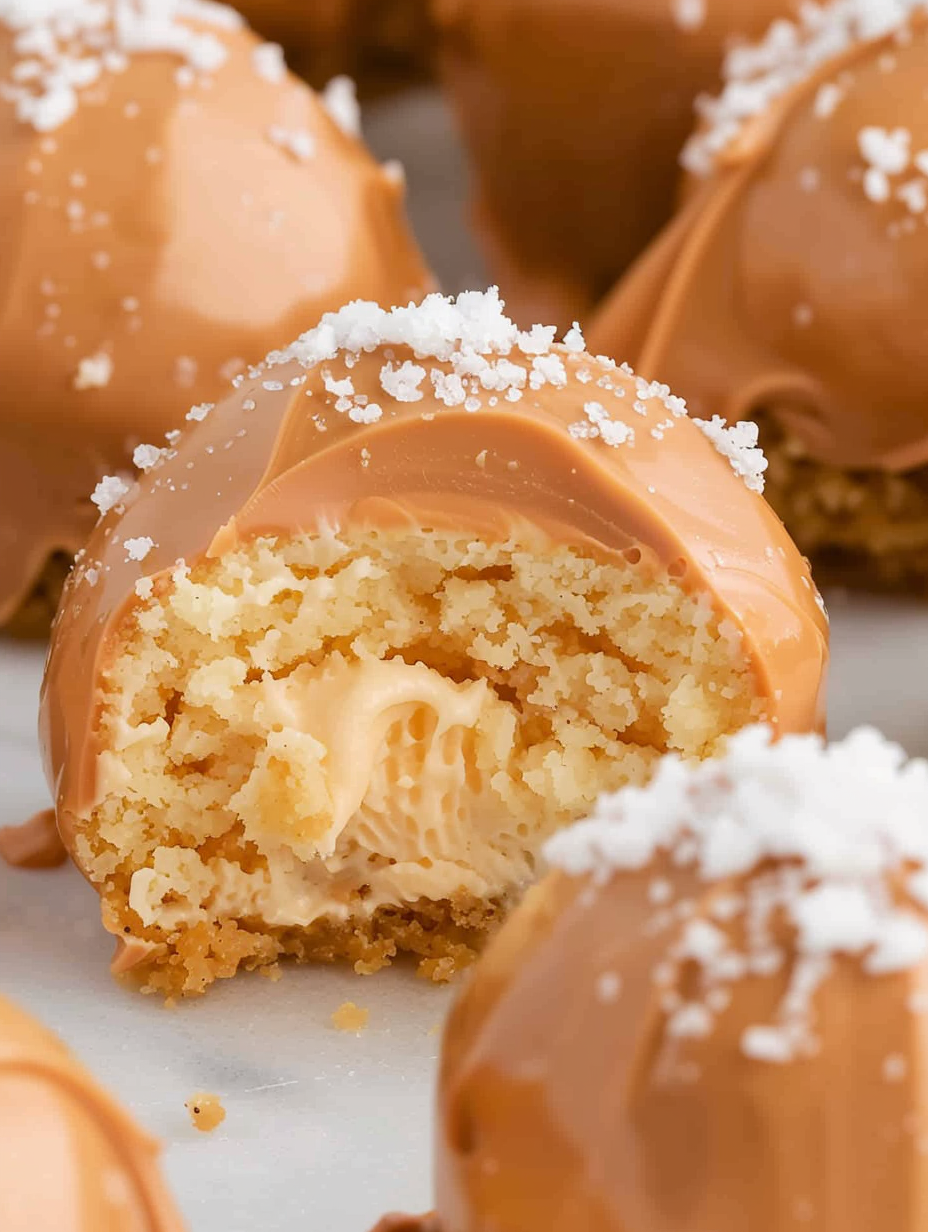
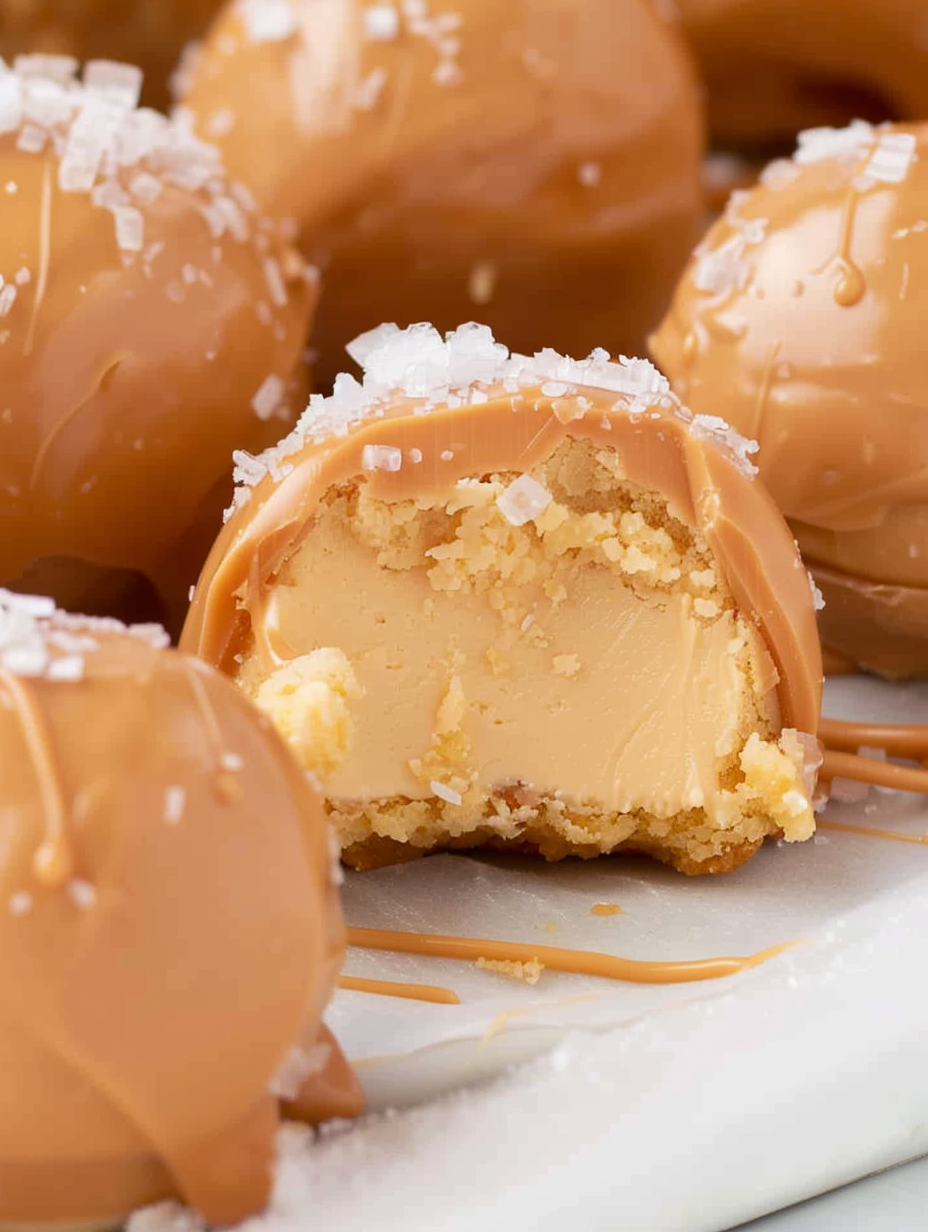
This recipe for mini caramel cheesecake bites is one of those approachable desserts that always earns compliments and disappears from the platter before I can get a second taste. I first put these together the week of my daughter’s birthday when I needed a dessert that was elegant, easy to transport, and could be made mostly ahead. The silky, tangy cream cheese centers contrast beautifully with the glossy salted caramel coating, creating the kind of sweet-salty balance that keeps people coming back for another bite.
I love how the texture plays out: the center is dense and creamy but still tender, while the outer shell adds a satisfying snap and a buttery caramel flavor. These bites are a no-bake dream for busy hosts because you can prepare the centers, chill them for stability, and coat them right before serving. They store well and travel beautifully, which is why they’re my go-to for potlucks and holiday cookie exchanges.
On my first try I underestimated how quickly these would vanish. At a family brunch I set out a plate and returned minutes later to a clean sheet of parchment and many surprised questions about how they could be so rich yet so light. The caramel flavoring lifts the cream cheese in a way that feels indulgent without being cloying — a small addition with a big payoff.
One of my favorite things about these bites is their portability. I frequently make a double batch and freeze half on the baking sheet before transferring to a freezer-safe container; frozen, the coating cracks pleasingly when bitten into. My aunt keeps a small stash in the freezer for unexpected guests and says they’re a lifesaver when dessert is needed at a moment’s notice.
Store the finished bites in an airtight container layered with parchment to prevent sticking. In the refrigerator they will keep fresh for about five days; the coating may soften slightly but will remain pleasant. For longer storage, freeze them on a baking sheet until solid, then transfer to a sealed freezer container for up to three months. Thaw in the refrigerator for several hours before serving to preserve texture. When transporting, keep them cool or pack with an ice pack to avoid sweating and stickiness in warm weather.
If you don’t have salted caramel candy melts, try caramel-flavored chocolate chips or butterscotch chips melted with a teaspoon of vegetable oil to thin for dipping. For a gluten-free option, use a certified gluten-free yellow cake mix and verify the candy melts are GF. To cut sweetness, replace half the candy melts with semi-sweet coating and add a small pinch of flaky salt after coating. For a lighter center, substitute half the cream cheese with mascarpone, but note the centers may be softer and need extra chilling time.
Arrange these bites on a tiered platter or alongside fresh berries and espresso for an elegant dessert display. They pair well with black coffee, rich hot chocolate, or a glass of dessert wine. For holiday platters, alternate caramel bites with chocolate-dipped strawberries for color contrast. Garnish individual bites with a tiny sprinkle of flaked sea salt or a toasted pecan half for texture and visual appeal.
While bite-sized cheesecakes are a modern American party staple, the concept of small individual desserts traces back to classic European petit fours and hors d’oeuvre traditions. Using boxed cake mix as a base is a distinctly American convenience innovation — it creates a consistent, shelf-stable crumb used in many retro-style no-bake confections. Coating centers in candy melts gives them a professional patisserie look without specialized tempering skills.
These bites adapt well to seasons: in summer, use milk chocolate coating with a sprinkle of freeze-dried raspberry powder for bright acidity. In autumn, stir a pinch of cinnamon and nutmeg into the centers and finish with chopped toasted pecans. For winter holidays, fold a teaspoon of peppermint extract into the coating and sprinkle crushed candy cane on top for a festive crunch.
For efficient prep, make the centers the day before and chill overnight. Scoop and flash-freeze on the parchment-lined sheet before coating; frozen centers are easier to dip and reduce heat transfer to the coating. Label containers with dates and store in the back of the fridge or freezer where temperature is most stable. When coating a large batch, work in small batches to keep the coating at the right temperature and prevent the candy melts from cooling and seizing.
In short, these caramel-coated bites are a versatile, crowd-friendly treat you can customize for any season or celebration. They’re simple enough for weeknight baking and fancy enough for special occasions—give them a try and then tweak flavors to make them your signature small dessert.
Heat-treat the dry cake mix in short microwave intervals and allow it to cool completely before mixing to ensure food safety.
If centers soften while you work, chill them on the baking sheet for 10–15 minutes before coating to maintain shape.
Use a small cookie scoop for uniform bites; it helps with even chilling and consistent coating coverage.
To prevent seizing, stir candy melts frequently and avoid overheating; add a teaspoon of vegetable oil if the coating is too thick.
This nourishing caramel cheesecake bites recipe is sure to be a staple in your kitchen. Enjoy every moist, high protein slice — it is perfect for breakfast or as a wholesome snack any time.
This Caramel Cheesecake Bites recipe makes perfectly juicy, tender, and flavorful steak every time! Serve with potatoes and a side salad for an unforgettable dinner in under 30 minutes.
Place the dry yellow cake mix in a microwave-safe bowl and microwave in two 30-second bursts, stirring between intervals. Allow to cool completely before use.
In a medium bowl, beat the softened cream cheese with the caramel flavoring on medium-high for 1½ to 2 minutes until smooth and lump-free.
Sprinkle the cooled cake mix over the whipped cream cheese and fold gently until just combined, forming a slightly sticky dough.
Cover the bowl tightly and refrigerate for 2 hours, or until the mixture is firm enough to scoop and shape.
Using a 1-tablespoon cookie scoop, portion the chilled dough and roll into balls. Place on a parchment-lined baking sheet and return to the fridge if they begin to soften.
Melt the salted caramel candy melts in a microwave-safe bowl in 30-second intervals, stirring well between each until completely smooth.
Dip each chilled ball into the melted coating, tapping off excess and using a toothpick to transfer back to the parchment. Add garnish before coating sets if desired.
Allow the coating to harden at room temperature or refrigerate for faster setting. Store in an airtight container in the fridge for up to 5 days or freeze for up to 3 months.
Last Step: Please leave a rating and comment letting us know how you liked this recipe! This helps our business to thrive and continue providing free, high-quality recipes for you.
Leave a comment & rating below or tag
@feastinarecipe on social media!

Cozy, bright, and ready fast, this Instant Pot lemon chicken orzo soup brings tender chicken, fresh veggies, and a sunny citrus finish.

Feather-light mini cheesecakes with bright strawberry sauce, a tender biscuit-style base, and creamy filling. Just 47 calories each and irresistibly fresh.

Silky mini cheesecakes swirled with melted chocolate and a splash of Kahlua, nestled on Oreo crusts and crowned with fresh whipped cream.
Leave a comment & rating below or tag @feastinarecipe on social media!
Enjoyed this recipe? Share it with friends and family, and don't forget to leave a review!
This recipe looks amazing! Can't wait to try it.
Comments are stored locally in your browser. Server comments are displayed alongside your local comments.

Join to receive our email series which contains a round-up of some of our quick and easy family favorite recipes.
