
Baked Cheese Crisps

Super quick, crunchy baked cheese crisps seasoned with garlic powder. Ready in 10 minutes, customizable, and perfect for low-carb snacking.
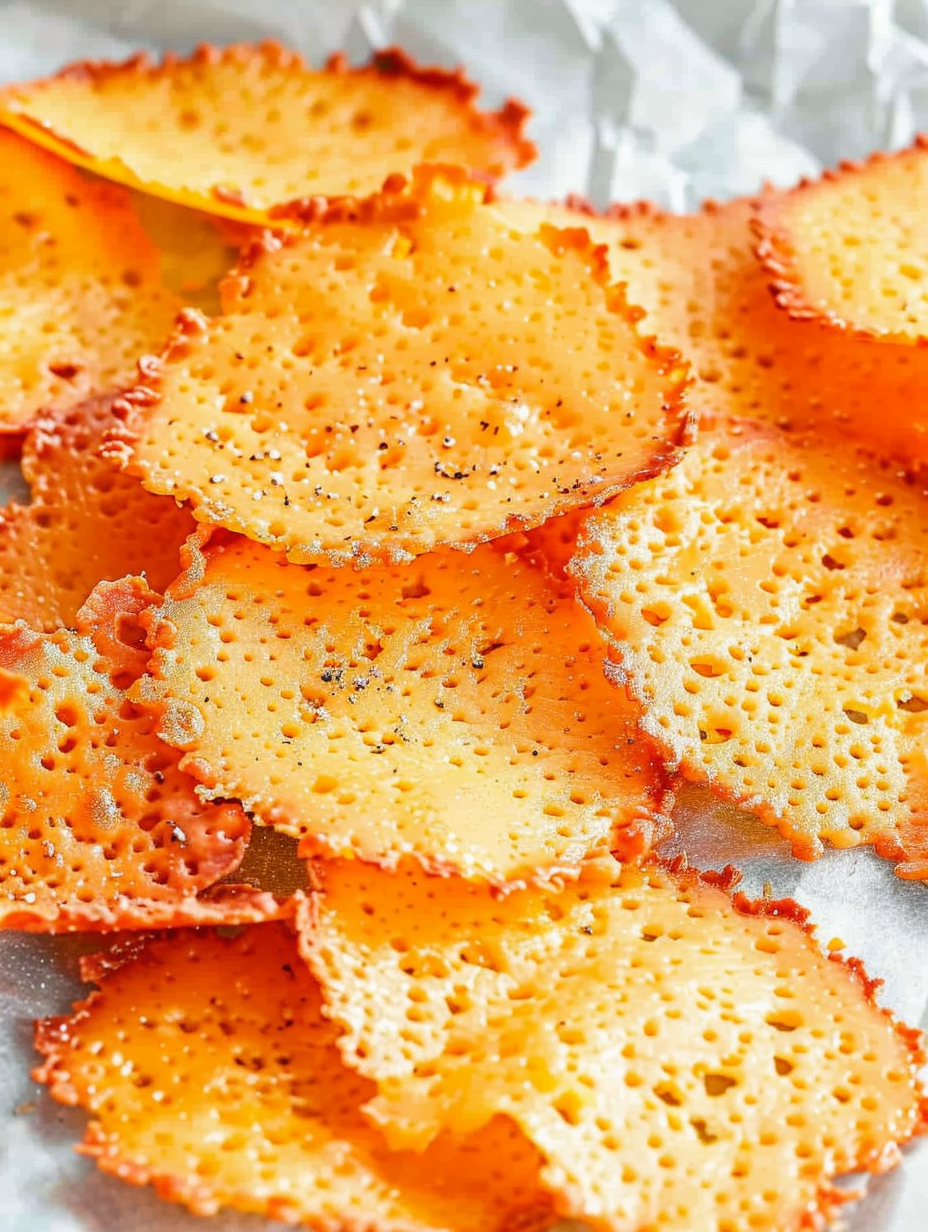
This batch of baked cheese crisps started as an experiment on a busy weeknight when I needed a crunchy, savory snack without turning on a lot of pans. I discovered the simple combination of shredded cheddar and a little garlic powder on a cold evening while raiding the fridge, and the warm, golden results were so addictive that they became my go-to nibble for movie nights and last-minute appetizers. The crisps bake quickly, develop a lacy, crackling edge and a satisfying snap that makes everyone reach for a second piece.
I love these because they are incredibly forgiving and flexible. With only two main ingredients you can scale the batch up or down, tweak the seasoning to match your mood, and get a crunchy result with almost no hands-on time. They are inexpensive to make yet feel special on the plate, and they travel well in an airtight container when you want a snack to bring to a gathering. They also pair beautifully with dips, fresh vegetables, or a sharp spread for a grown-up appetizer.
Why You'll Love This Recipe
- Ready in about 10 minutes from start to finish, making them ideal for last-minute cravings or quick party appetizers. Minimal hands-on time and fast oven cook time save you effort.
- Uses pantry and fridge staples: shredded cheddar and garlic powder. No special equipment is required beyond parchment paper and a baking sheet.
- Customizable and versatile. Add herbs, spices, or grated hard cheeses like Parmesan for different textures and flavors without changing the method.
- Low carbohydrate and gluten free by nature, so they suit many dietary needs and are a great crunchy alternative to crackers for those avoiding carbs.
- Economical and efficient. One cup of cheese yields about ten large crisps, making this a cost-effective snack that still feels indulgent.
- Make-ahead friendly. Bake a batch, cool completely, and store in an airtight container for quick snacks throughout the week.
I first served these at a small family gathering and was delighted by how quickly they disappeared. My sister finished a stack before dinner; my partner loved them paired with a smear of fig jam, and my smallest fan insisted on double garlic. They are one of those unexpected successes that make weeknights more fun and parties a little less fussy.
Ingredients
- Shredded cheddar cheese: Use a sharp or extra sharp variety for the best flavor. Buying a block and shredding it yourself gives a better melt than pre-shredded cheese, which often contains anti-caking agents. One cup of finely shredded cheddar yields about ten 1 tablespoon mounds when spread thin. Look for brands you enjoy eating plain, such as Cabot or Tillamook, for a brighter flavor.
- Garlic powder: Adds a subtle savory note that enhances the cheese without overpowering it. Use fresh, aromatic garlic powder rather than granulated garlic for a finer sprinkle. Two teaspoons total is enough for one cup of cheese; a light pinch on each mound is perfect. You can swap for onion powder, smoked paprika, or dried herbs to vary the profile.
Instructions
Preheat the oven: Preheat to 350 degrees F. A moderate oven gives the cheese time to melt and spread before the edges turn too dark. If your oven runs hot, lower to 325 degrees F and increase bake time slightly to avoid burning. Prepare the pan: Line one or two baking sheets with parchment paper. Parchment prevents sticking and makes it easy to lift crisps once cooled. Do not use wax paper. If you do not have parchment, a silicone baking mat is a suitable alternative. Portion the cheese: Using a tablespoon measure, drop 1 tablespoon mounds of shredded cheddar onto the prepared sheet about 2 inches apart. The cheese will spread while melting, so give each mound ample space to form a lace. Try to keep the mounds uniform for even baking; using a small cookie scoop helps maintain consistent sizes. Season the mounds: Lightly sprinkle a pinch of garlic powder over each pile. A little goes a long way; you want a delicate aromatics layer on top rather than a dusting that overpowers. For even coverage, hold the teaspoon high and shake gently as you go. Bake until golden: Place the baking sheet in the oven and bake for 5 to 8 minutes. Watch for the edges to turn golden brown and the centers to appear set. Baking time varies by oven and cheese moisture; as soon as they are golden, remove them. If they are still pale, give them another minute and check again. Cool and finish: Remove the sheet from the oven and lift the parchment with the crisps to a cooling rack. Let them cool for 2 to 3 minutes until they set and become crisp. Dab the tops with a paper towel to absorb excess grease if desired. If the crisps feel limp, they likely need another minute or two in the oven or additional cooling time to set completely.
You Must Know
- These crisps are naturally low in carbohydrates and gluten free, making them suitable for many dietary plans. Each serving is approximately 48 calories when the batch yields ten crisps.
- Store cooled crisps in an airtight container in the refrigerator for up to one week. They will stay crisp if completely dry; remove excess grease to prevent sogginess.
- They freeze well in a single layer inside freezer-safe containers for up to three months. Re-crisp in a 350 degrees F oven for a few minutes before serving.
- Do not skip parchment paper. Cheese can stick to metal and become difficult to remove without parchment or a silicone mat.
My favorite aspect is how quickly they elevate a snack spread. On potluck day I made three batches with different seasonings and the Parmesan-smoked paprika version vanished first. The simplicity keeps them practical for everyday use and impressive enough for guests.
Storage Tips
After cooling completely, store crisps in a single layer inside an airtight container lined with a paper towel to absorb residual oil. Keep in the refrigerator for up to one week. For longer storage, freeze in a single layer on a tray until solid, then transfer to a freezer bag for up to three months. Reheat frozen pieces on a baking sheet at 350 degrees F for 2 to 4 minutes to restore crispness. Avoid storing warm crisps together; trap moisture will make them soft.
Ingredient Substitutions
Swap cheddar for grated Parmesan for a nuttier, drier crisp that browns quickly. A 50/50 mix of sharp cheddar and Asiago produces a more complex flavor and a lacy edge. For spice variations, replace garlic powder with smoked paprika, chili powder, Italian seasoning, or finely chopped fresh herbs folded into the cheese before baking. If you need dairy-free options, use a firm vegan shred designed for melting, but expect a slightly different texture and longer cook times.
Serving Suggestions
Serve stacked or fanned on a platter with small bowls of dips such as guacamole, herbed cream cheese, or a tangy tomato salsa. They also pair beautifully with charcuterie items, pickled vegetables, or fruit preserves like fig jam for a salty-sweet contrast. Garnish finished crisps with a tiny sprinkle of flaky sea salt or a sliver of fresh herb for presentation. For a light lunch, top a crisp with a smear of ricotta and a slice of cucumber.
Cultural Background
Cheese crisps are a modern interpretation of the simple principle of melting and crisping cheese into a wafer. They echo traditional European practices of frying or baking small quantities of cheese to intensify flavor and create a crunchy snack. In recent years, they have become popular in North America as a low-carbohydrate cracker alternative and a garnish for soups and salads, blurring the line between snack and condiment.
Seasonal Adaptations
In late summer, fold in finely chopped fresh basil or thyme and top with a few dots of sun-dried tomato paste for bright, seasonal flavors. For winter gatherings, add a pinch of ground mustard or a dusting of smoked paprika for warmth. Holiday versions can include nutmeg and finely grated aged Gouda for a festive twist. Adjust bake time slightly if you incorporate wet ingredients like pesto; they will need a touch longer to set.
Meal Prep Tips
Make a double batch on prep day and store in airtight containers for quick snacks or to pack with lunches. To keep them uniformly crisp, layer the crisps between pieces of parchment or paper towel. If planning multiple flavor variations, label each container and bake on separate sheets to prevent cross-flavoring. Re-crisp in the oven for 2 to 4 minutes if they soften after refrigeration.
These baked crisps are a small joy that make entertaining easier and snack time more interesting. I encourage you to experiment with cheeses and seasonings, share a plate with friends, and make them a new staple in your snack rotation.
Pro Tips
Use a block of cheese and shred it yourself for better melting and texture compared with pre-shredded cheese.
Space mounds at least 2 inches apart to allow the cheese to spread and form lacy edges.
Dab excess grease with a paper towel during cooling to keep the crisps from becoming soggy.
This nourishing baked cheese crisps recipe is sure to be a staple in your kitchen. Enjoy every moist, high protein slice — it is perfect for breakfast or as a wholesome snack any time.
FAQs about Recipes
How long do baked cheese crisps last?
Yes. After cooling, store in an airtight container in the refrigerator for up to one week. Re-crisp briefly in the oven before serving if needed.
How do I know when the crisps are done?
They should be baked until the edges turn golden brown and the center looks set. This typically takes 5 to 8 minutes at 350 degrees F.
Tags
Baked Cheese Crisps
This Baked Cheese Crisps recipe makes perfectly juicy, tender, and flavorful steak every time! Serve with potatoes and a side salad for an unforgettable dinner in under 30 minutes.
Ingredients
Cheese
Seasoning
Instructions
Preheat oven
Preheat the oven to 350 degrees F to allow the cheese to melt and spread evenly without burning the edges.
Prepare baking sheet
Line a baking sheet with parchment paper or a silicone mat to prevent sticking and to make removal easy after baking.
Portion cheese
Drop 1 tablespoon mounds of shredded cheddar onto the sheet about 2 inches apart so they can spread into lacey crisps.
Season
Lightly sprinkle a pinch of garlic powder over each mound for a balanced savory note that enhances the cheese.
Bake
Bake for 5 to 8 minutes at 350 degrees F, watching closely for the edges to turn golden brown and the centers to set.
Cool and finish
Lift the parchment to a cooling rack and let crisps set for 2 to 3 minutes. Dab tops with a paper towel to remove excess grease if desired.
Last Step: Please leave a rating and comment letting us know how you liked this recipe! This helps our business to thrive and continue providing free, high-quality recipes for you.
Nutrition
Did You Make This?
Leave a comment & rating below or tag
@feastinarecipe on social media!
Categories:
You might also like...

Lemon Chicken Orzo Soup
Cozy, bright, and ready fast, this Instant Pot lemon chicken orzo soup brings tender chicken, fresh veggies, and a sunny citrus finish.

50 Calorie Strawberry Cheesecakes
Feather-light mini cheesecakes with bright strawberry sauce, a tender biscuit-style base, and creamy filling. Just 47 calories each and irresistibly fresh.

Kahlua Chocolate Cheesecake Bites
Silky mini cheesecakes swirled with melted chocolate and a splash of Kahlua, nestled on Oreo crusts and crowned with fresh whipped cream.
Did You Make This?
Leave a comment & rating below or tag @feastinarecipe on social media!
Rate This Recipe
Share This Recipe
Enjoyed this recipe? Share it with friends and family, and don't forget to leave a review!
Comments (1)
This recipe looks amazing! Can't wait to try it.
Comments are stored locally in your browser. Server comments are displayed alongside your local comments.

Hi, I'm Sarah!
What's Popular

30-Minute Meals!
Join to receive our email series which contains a round-up of some of our quick and easy family favorite recipes.